Tag Archives: installation

Inspection Platform With Custom Support Columns

Recently, a customer contacted us with a problem. They needed a safe way to inspect and clear their conveyor chute. The plan was to fabricate an inspection platform, enclosed with railing, with a caged ladder for access. The top of the ladder would require a self-closing gate in order to meet OSHA requirements for guarding at ladder way openings, as the ladder was not offset from the platform. 

Designing the Inspection Platform

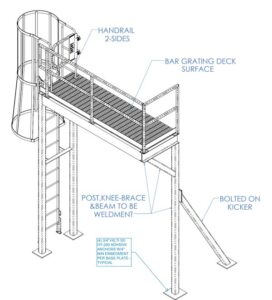
As we started with concept drawings, we realized that the traditional fabrication of a post in each corner would not work with their application. The leading edge of the inspection platform extended into the aisle-way and a post in that corner would encroach on forklift traffic. 

Inspection Platform ISO Drawing

Drawing of inspection platform, ladder and MLG ladder safety gate

Upon consulting our PE, it was decided that we could use a short knee brace at the corner in question, and utilize a bolt-on kicker off the rear post for reinforcement. The kicker was designed to nest underneath their existing equipment. 

As the installation location is open to the elements, and there is a high likelihood of debris, the inspection platform utilizes an open bar grating deck. This allows dirt and water to fall through the treads instead of collecting on top of a solid surface deck. 

Platform Shipping and Installation

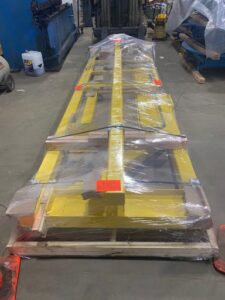
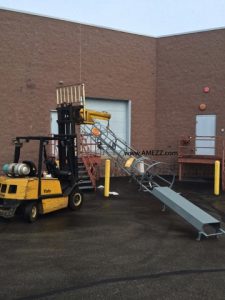
Photo of flat packed inspection platform

Inspection platform packed knocked down for shipping cost savings

The inspection platform shipped knocked down for freight savings. A smaller load takes up less space on a truck and costs less to ship. It also allows for smaller, lighter pieces that are more easily maneuvered at tough to access locations. Installation required basic tools and no hot permit was required.

All components are designed for bolt together installation with basic hand tools. This eliminates the need for field welding, hot permits, and additional finish touchup around weld areas. Installation for the platform and ladder requires two men and one day. As the height is under 12 ft high, a forklift and A frame ladders or a scissor lift are all that are required for install. 

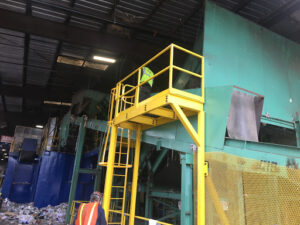
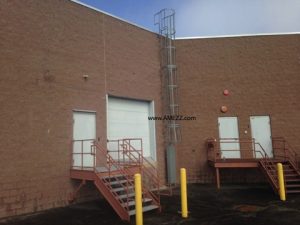
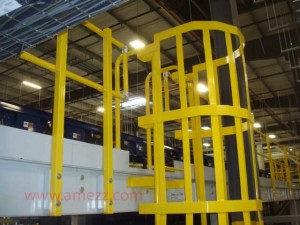
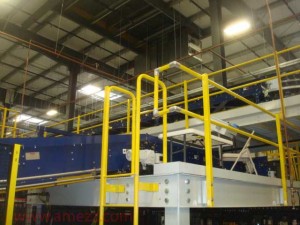
Photo of inspection platform installed with ladder

Inspection platform installed with ladder and MLG ladder safety gate

With the new platform in place, this customer can now safely inspect and perform maintenance on their chute at any time without impeding regular business activity in the area. Fabrication lead time for the platform, ladder, and gate was quoted at 5-7 weeks after approved drawings were returned.  The material was shipped at right on time at 5 weeks. Pricing was also what the original estimate was. On time. On budget. Contact A-Mezz for help with your next project. 

OSHA 1910.28 Ladder Change is Live

OSHA’s November 19, 2018 fixed ladder changeover has officially come on their standard 1910.28. What do you need to know to ensure you are meeting OSHA fall protection standards for your fixed laddersOSHA 1910.28 Ladder ChangeIf you have an existing fixed ladder more that 24’h that was installed before November 19, 2018, it should already have a cage on it.  The previous OSHA standard 1910.27 required cages on all ladders over 20’h. You have until November 18th, 2036 to retrofit the caged ladder with a personal fall arrest system. Until then, you are grandfathered in under the OSHA standard that was in place at the time of install. If your climb is 24’ or less, you do not need to retrofit the ladder at any time with a personal fall arrest system.

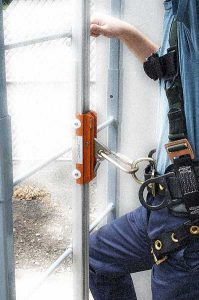
A-Mezz Personal Fall Arrest System Meets OSHA 1910.28

A-Mezz Personal Fall Arrest System Meets OSHA 1910.28

Note that if you modify or replace an existing ladder (over 24 feet high) that was installed before November 18, 2018, you will need to retrofit the ladder with the personal fall arrest system at that time. Replaced ladder sections are not grandfathered in under the prior OSHA standards – 1910.27.

Any new ladders over 24’h will need to be installed with a personal fall arrest system. You can still have a cage installed on the ladder “provided it does not interfere with the operation of the system” (1910.28(b)(9)(iv)).

These changes pertain to “fixed ladders that extend more than 24 feet (7.3 m) above a lower level.” The big change for lower ladders is that a fall arrest system is now not required until you are over 24 feet, whereas the code used to require cages or personal fall arrest systems for climbs over 20’ (1910.27(d)(1)(ii)).

You can also now run your ladders a maximum 150’ in a single climb if using a personal fall arrest system or ladder safety system (1910.28(b)(9)(ii)(B)).

The previous OSHA fixed ladder standard had stipulated a 30’ maximum climb before landing platforms were used to break your climb up into shorter climbs. I.e. before November 18th, 2018, a 150 foot climb would require five separate caged ladders and four separate landing platforms. OSHA 1910.28 will let you now have just one ladder with a personal fall arrest system, cutting fabrication costs, delivery costs, and installation costs.

Please contact us at A-Mezz Industrial Structures to get more information on our fixed ladders, our ladder cages, and our ladder personal fall arrest systems.


A-Mezz Ladder Install in Muddy Conditions

Springtime Muddy Ladder Installation

Ahh… Spring time in Ohio. The flowers, birds, oh and MUD.

A-Mezz Ladder Install in Muddy Conditions

A-Mezz Ladder Install in Muddy Conditions

We got a call from a builder with with a newly constructed structure – so new that there was no paved access yet – and they needed a ladder to gain access to their HVAC rooftop units. The building height was over 30’ and we had some options on how to access the roof based on OSHA’s new regulations.

The first option was a straight, uncaged ladder 35’ high with a personal fall protection cable. That is the new OSHA requirement on all climbs over 24’. The pros of the cable/track systems are that the climber wears a harness and clips onto the fall arrest system so that if he falls, the system stops his fall. The downside is those systems require the climber to have a harness and proper equipment to utilize the cable/track.

For this site the customer chose to go with the second option. We used a lower, uncaged ladder to get them up to a mid landing under 20’h. Then we used a second ladder with cage to climb from the intermediate landing to the upper roof. This setup was slightly more expensive up front but did not require the purchase of additional harnesses, trolleys and maintenance that the personal fall arrest systems required. Additionally, the cage is always there. This provides a safety benefit always, whereas the personal fall arrest systems only provide a safety benefit if the climber is wearing a harness and has the proper equipment. By utilizing the intermediate platform, no climb between platforms is over 24’ so the customer will not have to retrofit their ladders with personal fall arrest systems in 18 years when OSHA’s grandfather rules expire for existing ladder systems.

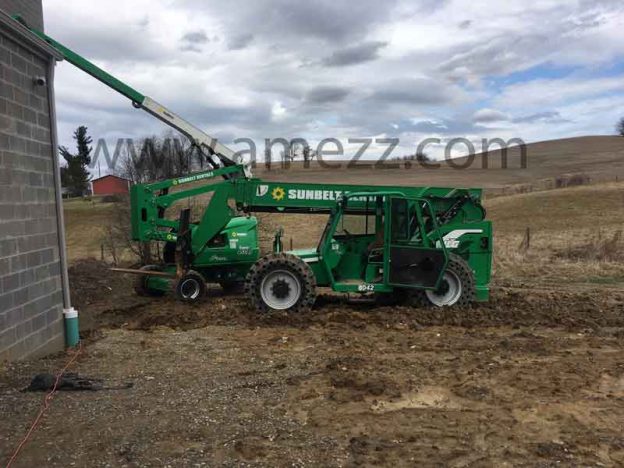
We had to hold off on install for a couple weeks as the ground thawed early in Ohio and there was way too much mud for our equipment to get to the install location. Luckily we caught a break and a few dry sunny days slightly helped dry out the site – being Ohio, if we didn’t get out to the site when we did, the spring rains could have pushed things off for months until things dried up.

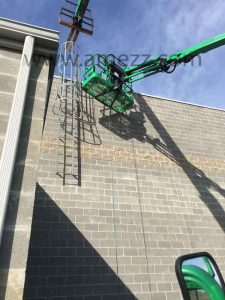
Trying not to bury our axels in the mud, we got the upper ladder into place and worked down from there.

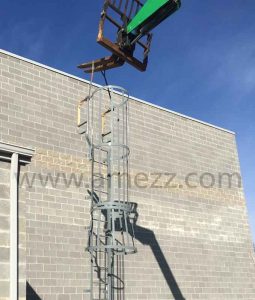
Upper Caged Ladder Being Lifted into Position

Upper Caged Ladder Being Lifted into Position

We fabricated the upper ladder with our self support walk-through handrail because the wall included a short parapet and we didn’t want to have the ladder setting on the metal capping.

Self supported walk-through handrail detail

Self supported walk-through handrail detail

On the lower ladder we included our lockable rung door so that unauthorized people could not climb the ladder.

Completed Installation of Ladder System

Completed Installation of Ladder System

With a crew of two men and one morning, the ladder system was installed (despite the mud) and the customer has safe, OSHA and ANSI compliant access to their roof. A-Mezz took care of everything from design, detail, fabrication and installation and we were able to educate the customer on all of their options and costs. The project was done on time for the amount budgeted.

Custom Crossover Bridge

This past year we were called out to a company who had some sprawling equipment. Because of the space required, their employees would be working on the second floor of the left hand mezzanine, and would have to climb down two flights of stairs, cross the forklift aisle, and climb up two more flights of stairs to access the left mezzanine to continue their work. As you can imagine, that was a huge inefficiency.

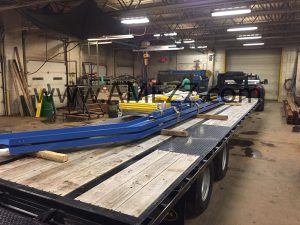
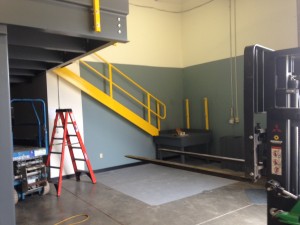
A-Mezz Crossover Platform loaded for delivery to install location

A-Mezz Crossover Bridge loaded for delivery to install location

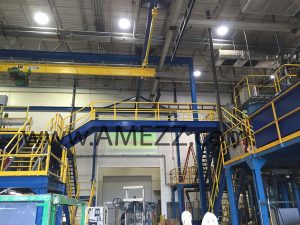
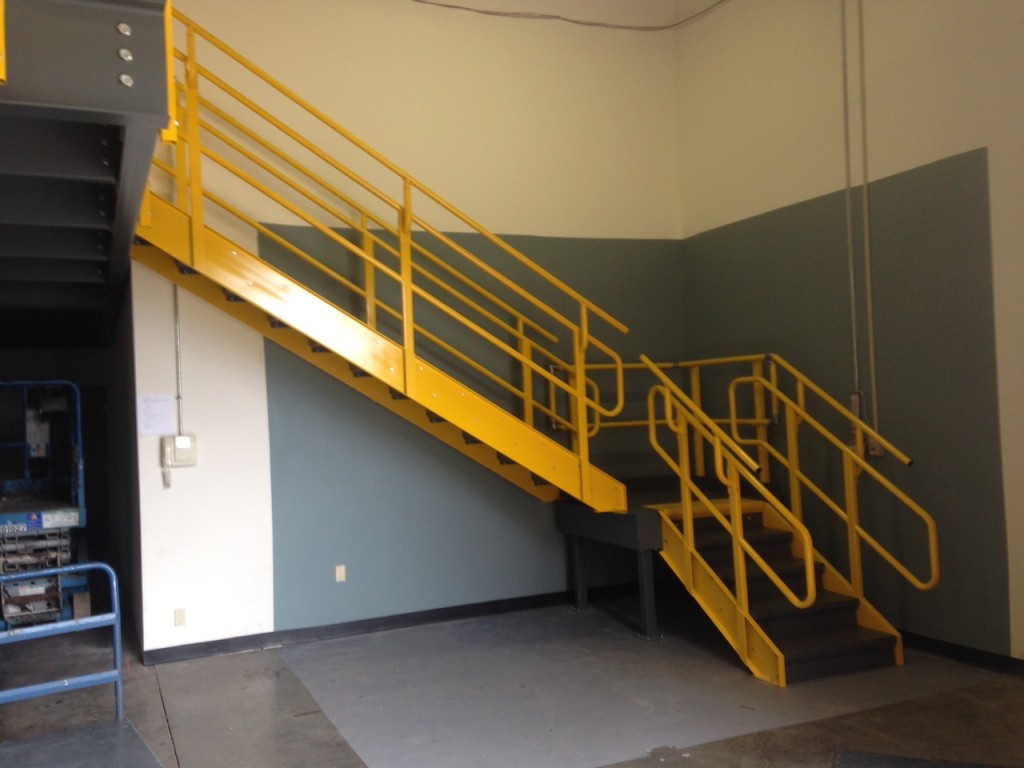
We designed, fabricated, and installed a crossover bridge to allow them to quickly go from one machine to the next without requiring four flights of stairs to be climbed each time, and it also kept them out of the aisleway between the structures. Due to the elevation change between the two structures, we incorporated a stair at the left hand side of the bridge and fabricated the bridge stringers as one piece to allow it to safely reach each side without requiring any additional supports.


The left side was designed to mount on top of that mezzanine’s edge framing members and at the right we had to add additional steel to allow the crossover bridge to safely and securely attach to the side of the right hand mezzanine.

Installed A-Mezz Custom Crossover Platform

Installed A-Mezz Custom Crossover Bridge


Everything was painted to match their existing equipment. Ultimately, the customer liked the setup so much that they called us back a few months later to do another crossover just like the one we had completed for another location in their factory.  For more information on our custom fabrications please visit our website, email or call. 

Fixed Ladder Installation – the process from start to finish

A customer called asking for a safe and secure means of accessing their roof and us to do a fixed ladder installation. They have a building that has multiple tenants and didn’t want to have to go through the tenants’ space every time roof access was needed, so an interior ladder and roof hatch combination was off the table. This happens more often than not either because they don’t have a good location inside to mount the ladder or they don’t want to make a hole in their roof.

We went out for a preliminary site visit to verify what the job would entail. The location that was chosen to mount that ladder at was flat from floor to roof. There were no gutters so we would not have to worry about having to either start and stop the gutter and add another down spout, or add a step across platform at the top of the ladder to keep within OSHA’s requirement of a maximum step across a distance of 12”.

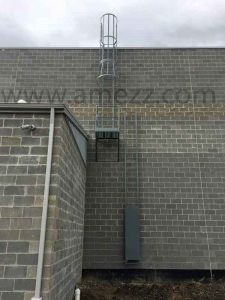
Installation site for caged ladder

Installation site for caged ladder

There was a slight parapet at the top of the wall so we set up the extension ladders to verify that the parapet was under 14”high so we would not need to have a crossover ladder with return on the back. We did elect to modify the walk through handrail to remove the return down to the roof to allow more flexibility with installation. Using the self supported walk through handrail allowed a proper fit regardless of the parapet thickness.

Materials were fabricated and shipped to the jobsite where the installation crew attached the lower and upper ladder sections together with the supplied brackets. Next, the ladder was hooked up and elevated into place by a forklift boom. By securing the ladder a little lower than the top, but well past the weight ½ way point, we were able to safely use a shorter, readily available lift and avoid the added cost of additional machine rental.

Lifting the fixed ladder into position

Lifting the fixed ladder into position

The ladder was also outfitted with the LG6 6’ security ladder rung guard to prevent unauthorized access to the ladder. Once hoisted into place, ½” sleeve anchors were inserted into holes drilled into the block and turned until expanded properly, securing the ladder to the wall. For this ladder 18 anchors were used, distributing the 650# ladder and 300# capacity load to well below the tension and shear values for sleeve anchors with the recommended 1-7/8” minimum embedment and a 4:1 (25%) safety factor. Installation was completed in just one morning by a crew of two.

Completed installation of fixed ladder

Completed fixed ladder installation

Installation of the Mezzanine’s IBC Stairs


Finished L-shaped external IBC stair

Installed external IBC staircase

Previously, I had written a blog post briefly discussing how to put one of our mezzanines together. It had a lot of good photos taken during the installation, so I was able to go through section by section what was done.  There was one particular area I didn’t get to to over in much detail though; the stairs.  While with the previous system that I wrote about, the customer designed and fabricated their own staircase, I recently received a fantastic series of photos from the installation of another system; this time with partially installed stairs included.

installing the IBC stair

Setting up the stairs

The IBC stairs for or mezzanine systems ship in knock down form and need to be installed in the field.  When installing them, you’ll want to lay the stringers on the floor about 3’ apart with the closed face of the stringers inward.  The diamond tread stair treads consist of a closed back riser and stair tread weldment.  Starting with the top tread and riser, you’ll need to bolt the the tread to the stringer fastening it on the inside of the tread.  Only hand tighten the bolts at this time, then work your way down positioning the riser of the next tread behind the flat weldment of the nose on the tread above.  After all the treads have been attached to the stringers (hand snug) you’ll need to install the bottom riser using self tapping screws.  You’ll then need to hoist the stairs up to the mezzanine deck.  Making sure that the dimension from the top of the deck to the top tread is equal to the dimension between the other treads, you’ll need to field drill the the attachment holes using a 9/16” drill and attach it to the mezzanine system.  You’ll also need to install the top tread plate on top of the mezzanine deck closing off the riser from your first tread.  From the underside, you’ll need to tighten up all the bolts and attach the risers to the back of the above tread’s nose via a couple self tapping screws.  Afterwards you’ll need to anchor the stairs to the ground.


Now all that’s left is to finish off the handrail.  The hoops that form the 21” and 36” handrails and handrail extensions come already welded to the stringers.  On each of the uprights, you’ll need to attach an elbow assembly via self tapping screws.  This will provide you with the saddles to support the outer 42” handrail.  You’ll need to take a piece of guardrail pipe for each side, and lay them flush against the saddles, fixing them in place with self tapping screws once again.  As the top line of rail will be longer than the stair run, you’ll want to drop a plumb line from the bottom edge of the rail to the edge of the mezzanine deck and again to the front edge of the bottom stair tread, cutting the pipe square.  Finally, you’ll need to install a plastic plug cap in the openings of the top rail to finish it off.  

Stair tread adhesives

By Jared @ Floormatstore.com

Winter is coming… and it’s time to shift from tackling outdoor projects to indoor ones. At the floormat-store.com division, that tends to mean a spike in stair tread inquiries. Installing indoor rubber and vinyl stair treads is a great cold weather project. What most customers forget to consider when attempting a stair tread project when it gets cold though, is the adhesive.


Rubber and vinyl flooring adhesives have minimum temperatures usually around 65°F. If the temperature of the room you’re installing in isn’t at or above the minimum, you’ll be waiting a long time for the adhesive to set. Every year, we get a few customers calling with the complaint that the adhesive they received was a bad batch. So far, every time, it wasn’t the adhesive’s fault. The installer failed to read the instructions thoroughly enough to catch that temperature warning. Usually, it’s an unfinished basement or the few steps that lead from the garage to the house, but with the kids out of school over Thanksgiving and winter break, cold stair wells in schools are a common application, too. Most adhesives also need around 24 hours to set in ideal situations, so leave that heat on for a day (or two) after you finish.


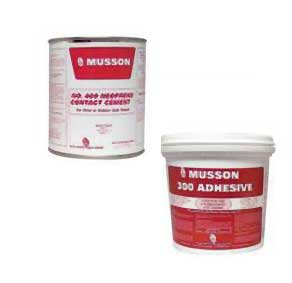
Musson #300 water based contact adhesive

Musson #300 water based contact adhesive with 0 VOCs. Great for indoor stair tread installations

While keeping the temperature in mind, you’ll also want to consider that a lot of adhesive options require a well ventilated area. In summer that’s easy – just open some windows and doors and wear a mask. As it gets cold outside though, leaving those open isn’t an option. So make sure to get a low VOC adhesive that will work for the application. The last thing you want is to pass out from the fumes while installing stair treads – ouch! A water-based contact adhesive, like Musson’s #300, works for both rubber and vinyl treads, risers and tiles, going over concrete, wood, terrazzo, metal and marble – and typically have 0 VOCs. That safely covers just about any application.


Best of luck and stay safe with your projects.

-Jared @ www.floormatstore.com

Do I Need a Swing Gate on My Fixed Ladder?


Walk-thru fixed ladder with cage

Walk-thru fixed ladder with safety cage

Do you need a ladder gate at your ladder opening in your railing? According to OSHA 1910.28(b)(3)(iv)“Each employee is protected from falling into a ladderway floor hole or ladderway platform hole by a guardrail system and toeboards erected on all exposed sides, except at the entrance to the hole, where a self-closing gate or an offset must be used.”

This means that every ladder opening needs to be either (a) Offset so that a person cannot walk (or fall) directly into the opening or (b) Protected by a ladder safety gate. It is an easy either/or. The most common ladder installation locations are not offset and as such require safety gates. Below you will see some photos of ladders and top view sketches clarifying why each of their orientations either do or do not require a gate. Note: ladder chains do not meet OSHA standards.

Another seemingly redundant standard from OSHA further increases the areas requiring gates is 1910.29(b)(13) and 1910.29(b)(13)(i): When guardrail systems are used around holes that serve as points of access (such as ladderways), the guardrail system opening: (1910.29(b)(13)(i) has a self closing gate that slides or swings away from the hole, and is equipped with a top rail and midrail or equivalent intermediate member(…). 

This standard opens up gate requirements to manhole covers, roof hatches and other similar systems that would remain open while accessed.

Now that we know what the code requirement is, it is time to review a few common ladder mounting orientations to discuss where they fall under the code.

Fixed ladder mounted to side of platform

Fixed ladder mounted to side of platform

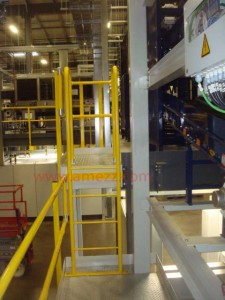
The above fixed ladder is mounted onto the side of the platform. Work is performed further down the platform but it is possible to fall directly down the ladder opening. This location is not offset and as such would require a swing gate. See the below top view sketch for clarification.

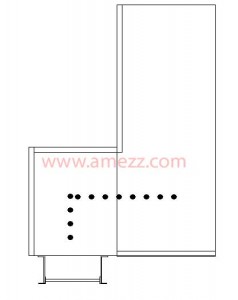
Top view sketch of side mounted fixed ladderway opening

Top view sketch of side mounted fixed ladderway opening

You can walk directly to the ladder opening from where work is/can be expected to be performed and as such, a safety gate is required at the ladder opening.

Fixed ladder with offset landing platform

Fixed ladder with offset landing platform

The above ladder accesses a platform and then turns to access the main walkway. This ladder is offset and would not require a swing gate at the opening.

Top view sketch of offset mounted fixed ladderway opening

Top view sketch of offset mounted fixed ladderway opening

As you can see above, if someone fell while at the main walkway they would fall onto the ladder landing surface, they would not fall down the ladder opening. If the ladder was rotated to the left side of the landing it would require a safety gate because then the ladder opening would no longer be offset.

Ladderway opening on side of catwalk

Ladderway opening on side of catwalk

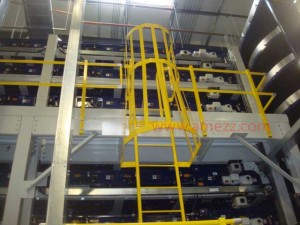
Above is a very common ladder mount position. This one can be tricky until you lay it out from the top view. From first glance it looks like because the ladder is off to the side that it would be offset from the normal flow of traffic, but if you fell at that point of the catwalk there would be no guarding to protect you. A swing gate is a requirement at this location.

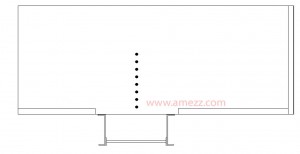
Top view sketch of catwalk side mounted fixed ladderway opening

Top view sketch of catwalk side mounted fixed ladderway opening

As you can see from the above sketch, there is a single direction of travel to the ladder from the catwalk. This is not offset. It would be a single direction fall into the ladder opening and as such, a ladder safety gate is required to protect your employees when a ladder is installed in the above orientation.

Most areas are not offset. A good rule of thumb is that if you can fall into the ladder opening with a single direction fall, then you are not offset. The only example above that didn’t need a gate was the second ladder location. With that orientation, you would fall onto the ladder landing and then hit the rear railing, not fall through the ladder opening.

Commercial and residential roof hatches for pitched roofs

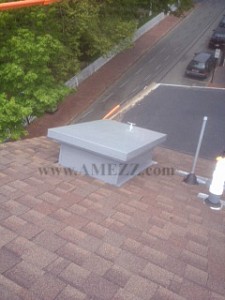
economy series roof hatch mounted on a pitched roof

Standard roof hatch on a pitched roof

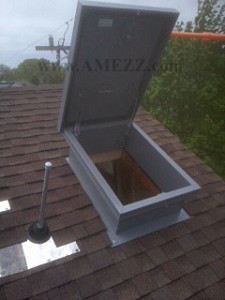
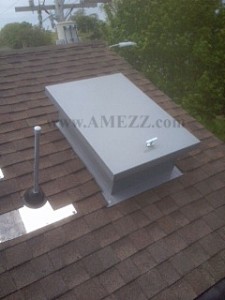
We received this set of photos from a customer who used our “off the shelf” Economy Series Galvanized Roof hatch on a pitched shingle roof like you would find in many commercial and residential locations. The standard roof hatch comes with cap flashing and 1” thick rigid fiber board insulation along the curb of the hatch. For this installation, the customer removed the curb insulation from the hatch and bolted the hatch down to the roof. They wanted the most economical roof hatch solution that had a low profile to match the roof slope. Ordinarily we would suggest using a pitch corrected roof hatch on slopes greater than 3/12, but the infrequent use and need for a low profile roof hatch was more important to the customer than the advantages of the pitch corrected roof hatch. Below are some pros and cons of each setup to help you decide which solution is best for your situation.

Open roof hatch showing clearances on a sloped roof

Open roof hatch showing clearances on a sloped roof

Economy series hatch installed on a shingled, sloped roof

Economy series hatch installed on a shingled, sloped roof


Standard roof hatch on a pitched roof pros:

  • Low cost
  • Standard sizes most likely in stock for immediate shipment
  • Low profile on roof

Standard roof hatch on a pitched roof cons:

  • Cannot use roof hatch railing (roof hatch railing may be required by OSHA depending on your site conditions)
  • Increased strain on hardware – installation on pitches 4/12 and greater are not covered by warranty
  • Decreased opening area due to roof hatch angle (see above photos)
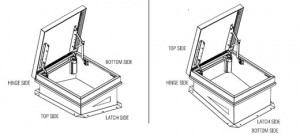
Sample pitch correction options for roof hatch curbs mounting on sloped roofs

Sample pitch correction options for roof hatch curbs mounting on sloped roofs

Pitch corrected hatch on a pitched roof pros:

  • Larger opening for exiting on a pitched roof
  • Less strain on the hardware
  • Roof hatch railing can be installed on pitch corrected curbs
  • Needed for warranty coverage on pitches of 4/12 and greater
  • Required for larger roof hatches on pitched roofs

Pitch corrected roof hatch on a pitched roof cons:

  • Slightly increased cost (made to order)
  • Increased lead time (made to order)
  • Taller curb on low end of roof may be more visible from ground level

Using the pitch corrected hatch for your pitched roofs over 3/12 gives you the standard manufacturer’s  warranty and can give you a larger opening to go through, but ultimately it comes down to your specific needs and what is most important for you. If you have any questions, please contact us.