A-Mezz Ladder Install in Muddy Conditions

Springtime Muddy Ladder Installation

Ahh… Spring time in Ohio. The flowers, birds, oh and MUD.

A-Mezz Ladder Install in Muddy Conditions

A-Mezz Ladder Install in Muddy Conditions

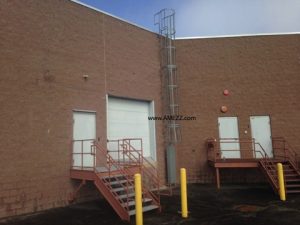
We got a call from a builder with with a newly constructed structure – so new that there was no paved access yet – and they needed a ladder to gain access to their HVAC rooftop units. The building height was over 30’ and we had some options on how to access the roof based on OSHA’s new regulations.

The first option was a straight, uncaged ladder 35’ high with a personal fall protection cable. That is the new OSHA requirement on all climbs over 24’. The pros of the cable/track systems are that the climber wears a harness and clips onto the fall arrest system so that if he falls, the system stops his fall. The downside is those systems require the climber to have a harness and proper equipment to utilize the cable/track.

For this site the customer chose to go with the second option. We used a lower, uncaged ladder to get them up to a mid landing under 20’h. Then we used a second ladder with cage to climb from the intermediate landing to the upper roof. This setup was slightly more expensive up front but did not require the purchase of additional harnesses, trolleys and maintenance that the personal fall arrest systems required. Additionally, the cage is always there. This provides a safety benefit always, whereas the personal fall arrest systems only provide a safety benefit if the climber is wearing a harness and has the proper equipment. By utilizing the intermediate platform, no climb between platforms is over 24’ so the customer will not have to retrofit their ladders with personal fall arrest systems in 18 years when OSHA’s grandfather rules expire for existing ladder systems.

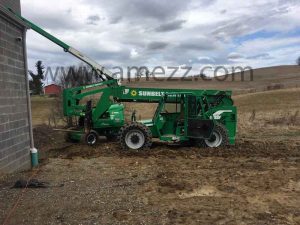
We had to hold off on install for a couple weeks as the ground thawed early in Ohio and there was way too much mud for our equipment to get to the install location. Luckily we caught a break and a few dry sunny days slightly helped dry out the site – being Ohio, if we didn’t get out to the site when we did, the spring rains could have pushed things off for months until things dried up.

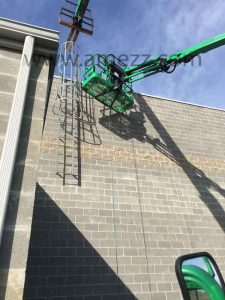
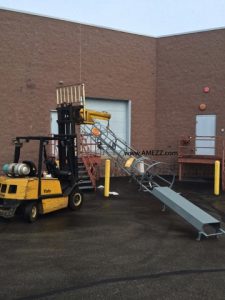
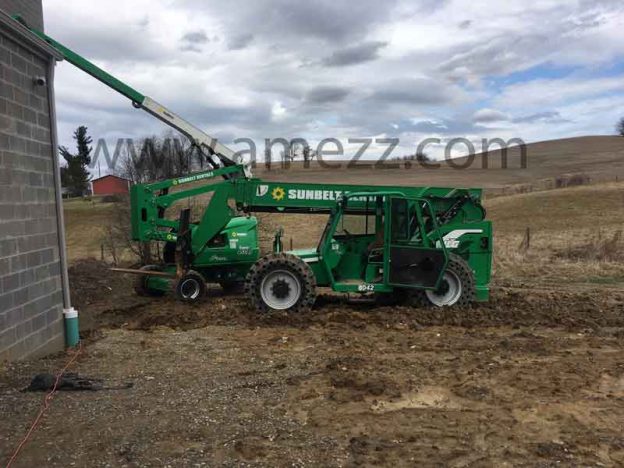
Trying not to bury our axels in the mud, we got the upper ladder into place and worked down from there.

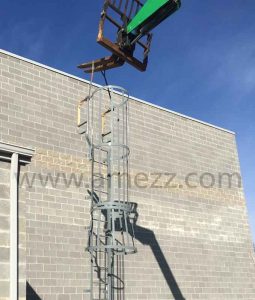
Upper Caged Ladder Being Lifted into Position

Upper Caged Ladder Being Lifted into Position

We fabricated the upper ladder with our self support walk-through handrail because the wall included a short parapet and we didn’t want to have the ladder setting on the metal capping.

Self supported walk-through handrail detail

Self supported walk-through handrail detail

On the lower ladder we included our lockable rung door so that unauthorized people could not climb the ladder.

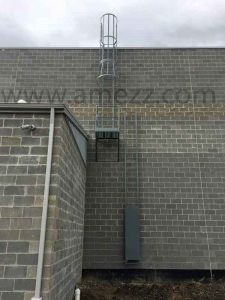
Completed Installation of Ladder System

Completed Installation of Ladder System

With a crew of two men and one morning, the ladder system was installed (despite the mud) and the customer has safe, OSHA and ANSI compliant access to their roof. A-Mezz took care of everything from design, detail, fabrication and installation and we were able to educate the customer on all of their options and costs. The project was done on time for the amount budgeted.

Working around an Obstruction with Modular Wall Panels

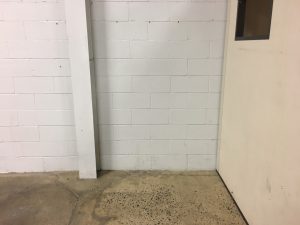
Modular building with existing building column in the way

Looking to expand your modular office, but that I-beam is in the way of the wall panels?

One of the greatest advantages of using modular wall panels for your in-plant offices is their ability to easily change and grow as your needs change.  Back in 2010, we provided a customer with a 20’x12’ modular in-plant office with an internal wall, splitting the space into two separate offices.  A few years later they decided to rearrange the wall panels, taking out the dividing wall and creating one large office space.  Earlier this year, the customer contacted us again looking to further expand upon the room, adding an additional 16’ to the system.  This is an easy modification to make.  Typically you would just disassemble the end 12’ wall, add four new 4’ modular wall panels to each of the 20’ long walls, and then close it back off with the existing 12’ end.   But this extension offered a little twist that I thought we could talk about today.  There was an I-beam right where the wall panels would go through.

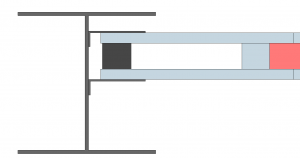
Using angle and an internal steel stud to tie a modular wall panel to  an I-beam

Conceptual sketch showing how the wall panels would be secured to the I-beam

If the wall panels fall between the flanges, the most cost effective method would be to terminate the wall on both sides of the webbing and secure it to the I-beam using some 1”x6” angle and an internal stud.  This is not the cleanest method though, as the I-beam appears to cut through the wall and typically leaves a gap in the grid ceiling inside the I-beam.

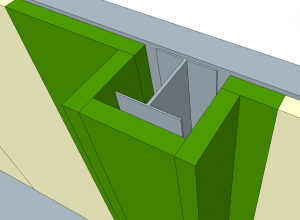
conceptual model of using modular wall panels to box around an obstruction

Conceptual sketch showing how the wall panels can could be used to box out the I-beam

In this particular case the flange of the I-beam lined up with the outer sheet of gyp-board, creating an obstruction.   Because of this we simply boxed around the I-beam with wall panels, closing it off.  While this method requires a bit more in the way of materials, it allows for a very clean and uniform appearance.

modular wall panels boxing out an obstruction

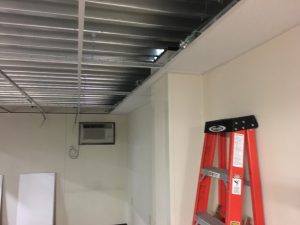
The view from inside the finished modular office extension.

Replacing old dock stairs

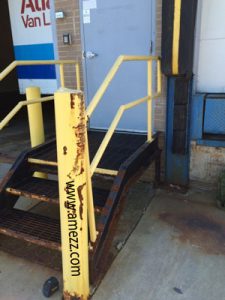
We were recently called out to a site with a dock access stair that had seen better days. It got a lot of use, but by the looks of it, had been neglected from a maintenance standpoint. Enamel paint is a great finish if it is maintained, but when left outside around the salt and high traffic to be found on a dock stair it won’t take long to rust without maintenance.

This stair had the painted stair tread nosings all rusted away to a brittle, porous edge. The stringers and support columns all had given way to rust beyond what was fixable with a repair job.

Dock stairs in need of replacement

Dock stairs in need of replacement

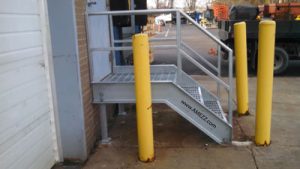
The most economical solution for our customer was to have a replacement set of stairs fabricated and hot dipped galvanized. The cost of repair – cutting the current stairs apart, brush/blasting the existing rust out, cutting steel to weld into deteriorated sections, grinding and painting the product –  all in the field would have taken much more time than having replacement stairs fabricated in the shop and brought out to the site. Furthermore we didn’t want to put a “Band-Aid” on the existing stairs by repairing them, knowing the customer wanted to have something in place to forget about. Fabricating a new stair with a hot dipped galvanized would greatly increase the lifespan of the stairs. There is no touch-up painting required and galvanized products can last 5x as long as painted steel.


A-Mezz did a site visit to verify conditions and get the existing stair’s measurements. During the visit it was determined that the floor wasn’t completely level. We made the support columns slotted to allow for minor adjustment in the field. This will be more user friendly than making the stair flat and requiring shimming. We didn’t want to fabricate each leg a different length should they one day move it to a new location or have the floor surface refinished in the future.


A-Mezz fabricated and pre-assembled as much of the stair and landing as possible in the shop to minimize the time on site with door access out of service as this was a busy dock entrance door. The existing stairs were demo’d and the new stairs were installed in all one morning.

A-Mezz galvanized steel replacement dock stairs

A-Mezz galvanized steel replacement dock stairs

The customer’s new dock stairs will have a long service life due to the hot dipped galvanized finish. The stairs will be able to tackle snow and ice easily with the bar grating treads, and look attractive for years to come – all at a price that was less than repair.

Fixed Ladder Installation – the process from start to finish

A customer called asking for a safe and secure means of accessing their roof and us to do a fixed ladder installation. They have a building that has multiple tenants and didn’t want to have to go through the tenants’ space every time roof access was needed, so an interior ladder and roof hatch combination was off the table. This happens more often than not either because they don’t have a good location inside to mount the ladder or they don’t want to make a hole in their roof.

We went out for a preliminary site visit to verify what the job would entail. The location that was chosen to mount that ladder at was flat from floor to roof. There were no gutters so we would not have to worry about having to either start and stop the gutter and add another down spout, or add a step across platform at the top of the ladder to keep within OSHA’s requirement of a maximum step across a distance of 12”.

Installation site for caged ladder

Installation site for caged ladder

There was a slight parapet at the top of the wall so we set up the extension ladders to verify that the parapet was under 14”high so we would not need to have a crossover ladder with return on the back. We did elect to modify the walk through handrail to remove the return down to the roof to allow more flexibility with installation. Using the self supported walk through handrail allowed a proper fit regardless of the parapet thickness.

Materials were fabricated and shipped to the jobsite where the installation crew attached the lower and upper ladder sections together with the supplied brackets. Next, the ladder was hooked up and elevated into place by a forklift boom. By securing the ladder a little lower than the top, but well past the weight ½ way point, we were able to safely use a shorter, readily available lift and avoid the added cost of additional machine rental.

Lifting the fixed ladder into position

Lifting the fixed ladder into position

The ladder was also outfitted with the LG6 6’ security ladder rung guard to prevent unauthorized access to the ladder. Once hoisted into place, ½” sleeve anchors were inserted into holes drilled into the block and turned until expanded properly, securing the ladder to the wall. For this ladder 18 anchors were used, distributing the 650# ladder and 300# capacity load to well below the tension and shear values for sleeve anchors with the recommended 1-7/8” minimum embedment and a 4:1 (25%) safety factor. Installation was completed in just one morning by a crew of two.

Completed installation of fixed ladder

Completed fixed ladder installation

Installation of the Mezzanine’s IBC Stairs


Finished L-shaped external IBC stair

Installed external IBC staircase

Previously, I had written a blog post briefly discussing how to put one of our mezzanines together. It had a lot of good photos taken during the installation, so I was able to go through section by section what was done.  There was one particular area I didn’t get to to over in much detail though; the stairs.  While with the previous system that I wrote about, the customer designed and fabricated their own staircase, I recently received a fantastic series of photos from the installation of another system; this time with partially installed stairs included.

installing the IBC stair

Setting up the stairs

The IBC stairs for or mezzanine systems ship in knock down form and need to be installed in the field.  When installing them, you’ll want to lay the stringers on the floor about 3’ apart with the closed face of the stringers inward.  The diamond tread stair treads consist of a closed back riser and stair tread weldment.  Starting with the top tread and riser, you’ll need to bolt the the tread to the stringer fastening it on the inside of the tread.  Only hand tighten the bolts at this time, then work your way down positioning the riser of the next tread behind the flat weldment of the nose on the tread above.  After all the treads have been attached to the stringers (hand snug) you’ll need to install the bottom riser using self tapping screws.  You’ll then need to hoist the stairs up to the mezzanine deck.  Making sure that the dimension from the top of the deck to the top tread is equal to the dimension between the other treads, you’ll need to field drill the the attachment holes using a 9/16” drill and attach it to the mezzanine system.  You’ll also need to install the top tread plate on top of the mezzanine deck closing off the riser from your first tread.  From the underside, you’ll need to tighten up all the bolts and attach the risers to the back of the above tread’s nose via a couple self tapping screws.  Afterwards you’ll need to anchor the stairs to the ground.


Now all that’s left is to finish off the handrail.  The hoops that form the 21” and 36” handrails and handrail extensions come already welded to the stringers.  On each of the uprights, you’ll need to attach an elbow assembly via self tapping screws.  This will provide you with the saddles to support the outer 42” handrail.  You’ll need to take a piece of guardrail pipe for each side, and lay them flush against the saddles, fixing them in place with self tapping screws once again.  As the top line of rail will be longer than the stair run, you’ll want to drop a plumb line from the bottom edge of the rail to the edge of the mezzanine deck and again to the front edge of the bottom stair tread, cutting the pipe square.  Finally, you’ll need to install a plastic plug cap in the openings of the top rail to finish it off.