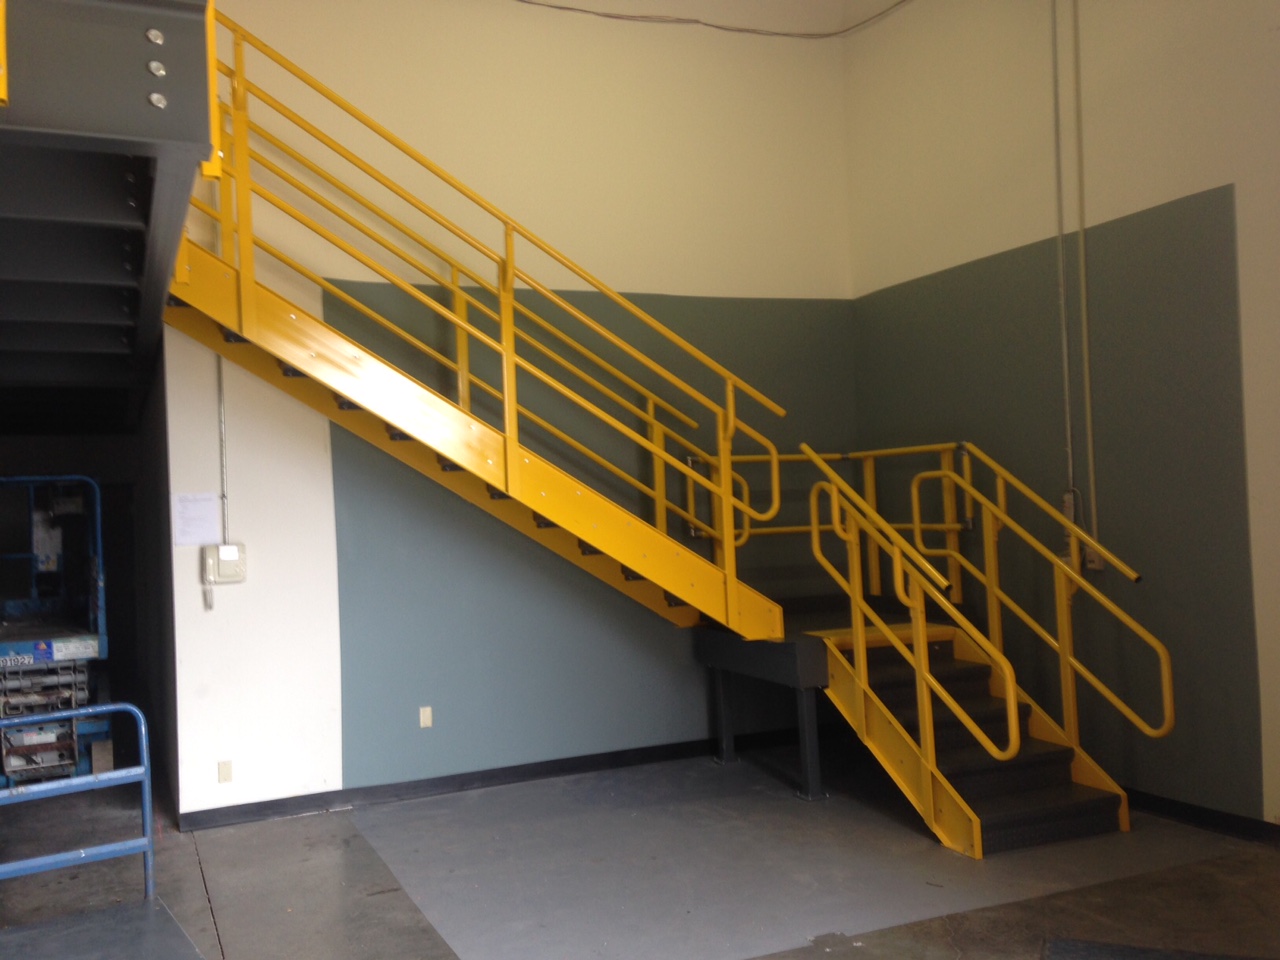
Installed external IBC staircase
Previously, I had written a blog post briefly discussing how to put one of our mezzanines together. It had a lot of good photos taken during the installation, so I was able to go through section by section what was done. There was one particular area I didn’t get to to over in much detail though; the stairs. While with the previous system that I wrote about, the customer designed and fabricated their own staircase, I recently received a fantastic series of photos from the installation of another system; this time with partially installed stairs included.

Setting up the stairs
The IBC stairs for or mezzanine systems ship in knock down form and need to be installed in the field. When installing them, you’ll want to lay the stringers on the floor about 3’ apart with the closed face of the stringers inward. The diamond tread stair treads consist of a closed back riser and stair tread weldment. Starting with the top tread and riser, you’ll need to bolt the the tread to the stringer fastening it on the inside of the tread. Only hand tighten the bolts at this time, then work your way down positioning the riser of the next tread behind the flat weldment of the nose on the tread above. After all the treads have been attached to the stringers (hand snug) you’ll need to install the bottom riser using self tapping screws. You’ll then need to hoist the stairs up to the mezzanine deck. Making sure that the dimension from the top of the deck to the top tread is equal to the dimension between the other treads, you’ll need to field drill the the attachment holes using a 9/16” drill and attach it to the mezzanine system. You’ll also need to install the top tread plate on top of the mezzanine deck closing off the riser from your first tread. From the underside, you’ll need to tighten up all the bolts and attach the risers to the back of the above tread’s nose via a couple self tapping screws. Afterwards you’ll need to anchor the stairs to the ground.
Now all that’s left is to finish off the handrail. The hoops that form the 21” and 36” handrails and handrail extensions come already welded to the stringers. On each of the uprights, you’ll need to attach an elbow assembly via self tapping screws. This will provide you with the saddles to support the outer 42” handrail. You’ll need to take a piece of guardrail pipe for each side, and lay them flush against the saddles, fixing them in place with self tapping screws once again. As the top line of rail will be longer than the stair run, you’ll want to drop a plumb line from the bottom edge of the rail to the edge of the mezzanine deck and again to the front edge of the bottom stair tread, cutting the pipe square. Finally, you’ll need to install a plastic plug cap in the openings of the top rail to finish it off.