Inspection Platform With Custom Support Columns

Recently, a customer contacted us with a problem. They needed a safe way to inspect and clear their conveyor chute. The plan was to fabricate an inspection platform, enclosed with railing, with a caged ladder for access. The top of the ladder would require a self-closing gate in order to meet OSHA requirements for guarding at ladder way openings, as the ladder was not offset from the platform. 

Designing the Inspection Platform

As we started with concept drawings, we realized that the traditional fabrication of a post in each corner would not work with their application. The leading edge of the inspection platform extended into the aisle-way and a post in that corner would encroach on forklift traffic. 

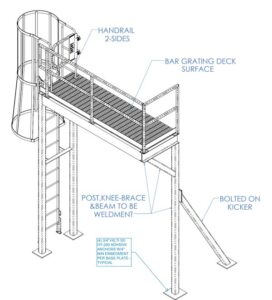
Inspection Platform ISO Drawing

Drawing of inspection platform, ladder and MLG ladder safety gate

Upon consulting our PE, it was decided that we could use a short knee brace at the corner in question, and utilize a bolt-on kicker off the rear post for reinforcement. The kicker was designed to nest underneath their existing equipment. 

As the installation location is open to the elements, and there is a high likelihood of debris, the inspection platform utilizes an open bar grating deck. This allows dirt and water to fall through the treads instead of collecting on top of a solid surface deck. 

Platform Shipping and Installation

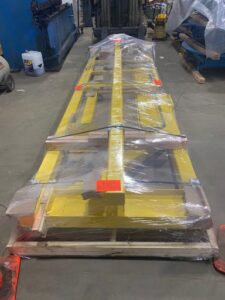
Photo of flat packed inspection platform

Inspection platform packed knocked down for shipping cost savings

The inspection platform shipped knocked down for freight savings. A smaller load takes up less space on a truck and costs less to ship. It also allows for smaller, lighter pieces that are more easily maneuvered at tough to access locations. Installation required basic tools and no hot permit was required.

All components are designed for bolt together installation with basic hand tools. This eliminates the need for field welding, hot permits, and additional finish touchup around weld areas. Installation for the platform and ladder requires two men and one day. As the height is under 12 ft high, a forklift and A frame ladders or a scissor lift are all that are required for install. 

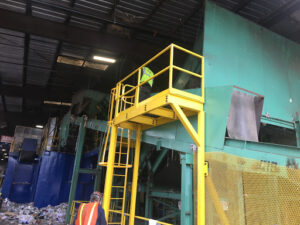
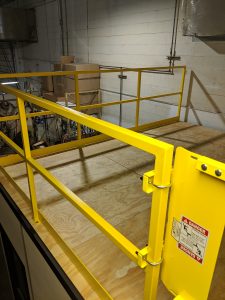
Photo of inspection platform installed with ladder

Inspection platform installed with ladder and MLG ladder safety gate

With the new platform in place, this customer can now safely inspect and perform maintenance on their chute at any time without impeding regular business activity in the area. Fabrication lead time for the platform, ladder, and gate was quoted at 5-7 weeks after approved drawings were returned.  The material was shipped at right on time at 5 weeks. Pricing was also what the original estimate was. On time. On budget. Contact A-Mezz for help with your next project. 

Storage Platform with Shelves and Security Cage

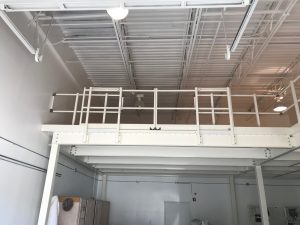
irregular shaped storage platform with internal stair

Storage platforms are a great way to add extra storage space to your facility by enabling you to take advantage of the unused space above to maximize your available space without needing to expand your facility.  The mezzanine probably itself isn’t the only thing you’ll need to think about when putting in a storage platform – you might want to put in some additional shelving or maybe some security cages while you’re at it.  We recently received some photos back from a project where we were able to assist the customer with all of this.

The Storage Platform

custom bi-parting slide gate

The custom bi-parting slide gate allowed us to center the gate for forklift access.

The storage platform itself was an irregular shaped 30’x31’6″ overall, including a 19’x11′ bump in to allow for easy access of the fork trucks at the bottom of the platform.  The customer requested an 11’5″ top of deck, which left us with 9’10” clearance height beneath our beam and c-section framing. They were planning on using the platform for mixed storage, with mostly light storage on shelves, but also the occasional pallet.  We designed the platform to accommodate a 125 psf live load and used a durable and cost effective B-deck skinned with Resindek LD deck surface. This gave them a smooth solid surface to roll their pallets across that could easily handle the point loads of their shelves.  We also included a custom bi-parting slide gate so we could position just where the customer wanted.

Shelves

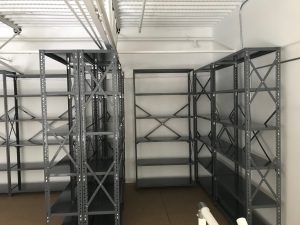
shelving on storage platform

We added multiple bays of shelving above and below the platform to increase the customer’s available storage space.

While planning out their storage area, the customer determined that they were going to need some new shelves to go above and below the platform and provided us with a layout of what they were hoping to do.  We were able to provide them with 36 bays of various sizes of selves. We stuck with individual shelving units to afford them the flexibility to rearrange their layout if their needs change in the future. The clip style shelves helped minimize installation time, and the open shelves (lacking side and back walls) we provided helped keep the cost down while allowing them to place some larger items between two adjacent bays.

Security Cages

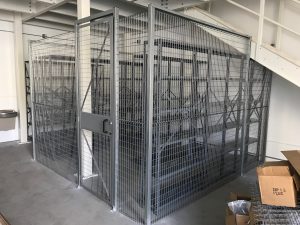
security cage below stair case

The welded wire panels were easily cut in the field to allow the staircase to pass through.

There were some materials the customer was going to store that needed to be secured.  They wanted to create two secure zones: one 6’x15′ two wall cage on top of the storage platform , and a 11’x11′ three wall cage the ground level beneath the stairs. The Quick Fence welded wire mesh partition we provided worked great because it went together quickly and was easy for the installers to cut in the field to fit around the staircase.

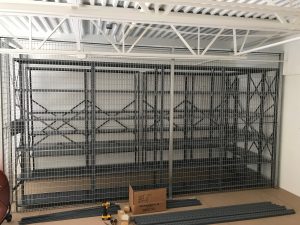
security cage on top of storage platform

We caged off a section on top of the deck as well for additional secure storage space.

The customer was really happy with the quality of the storage platform, and with the ease in which it all went together.  The next time you’re thinking of putting in a storage platform in your facility, let us provide you with an option to provide the shelves and cages as well.

Using the Roof of a Modular Office for Storage

office with storage above

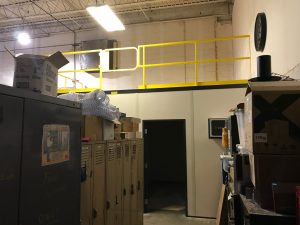
The main purpose of the roof deck in a modular building is to form a membrane that holds the whole system together. Due to cost considerations, we typically design them with enough load capacity to support the lights and acoustical ceiling.  That doesn’t always have to be the case though. We can also design it so that the roof of your building can be used for light storage. I recently got some photos back on a project where the customer wanted to do just that.

top view

It was a pretty cluttered area, so hopefully the load bearing roof will give them some breathing room.

The customer wanted to put in an office for the maintenance manager and his team in order to cut down on the noise.  The corner of the facility where they were situated was already pretty cluttered and they didn’t want to lose any more space back there, so they came to us in hopes of putting in a modular office with enough load capacity on the roof to use it for long-term light storage.

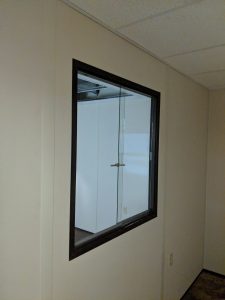
interior wall with reception window

The sliding reception window allows the employees to easily communicate between offices.

The office was 20′ wide by 12′ deep.  They wanted to break it into two separate 10’x12′ offices, but they wanted to make it easy to communicate between offices, so we put in an internal partition wall with a sliding reception window.  

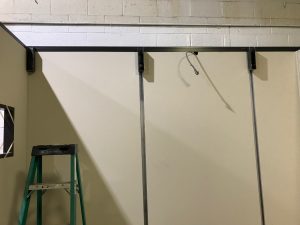
recessed beam hangers

Modular wall panels with structural connectors and hangers to support the recessed beams.

There were a few things we needed to do in order to support a 100 PSF live load on the deck. We needed to put 10″ c-sections spanning from the front to the back of the building attached to hangers in the ceiling plenum.  To support these c-sections, we used structural panel connectors between our wall panels as opposed to our typical tongue and groove or I-spline connections. While we could have gone with a 2-wall system due to the modular office’s location in the corner, we put a third wall along the back to support the c-sections instead of dropping columns to save the customer a little money as well.  Due to the size of the recessed c-sections we went with 9′ tall panels so the customer could maintain a 8′ clearance height in the room.

beam in the ceiling

A structural c-section was recessed into the ceiling plenum at every panel connection.

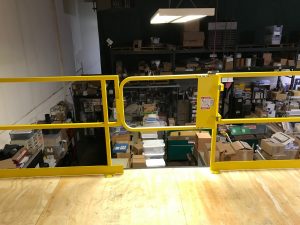
There were a few things we needed to do on top of the deck as well to finish it off.  We covered the corrugated roof deck with OSB so that the customer would have a smooth walking surface above.  We also fabricated and installed some surface mounted handrail and kick plate, as well as a spring loaded access gate to keep their workers from falling off the edge when moving around on the roof.  You would also need to put in a staircase to access the system, but the customer told us they were going to take care of their own egress.

looking onto the load bearing roof

The surface mounted handrail will help keep workers safe when moving around on top of the office

The system went together nice and quick.  Mechanical and electrical installation took a little less than a week, and the customer was really pleased with his new office. Now they just need to start moving things to the roof.

A-Mezz Rigid Track Personal Fall Arrest System

Personal fall arrest systems are causing cages to go out of vogue with OSHA. As of November 2018 they will not count as fall protection on new fixed ladders and they will only count as fall protection on existing ladders until November of 2036. Note that if an existing ladder is modified at anytime, that modified section of ladder must be retrofitted with a personal fall arrest system at that time. 

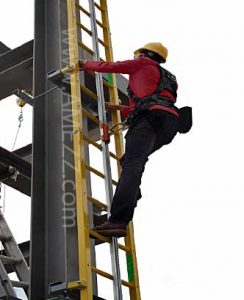
Personal fall arrest system with body harness and trolley

Personal fall arrest system in use with body harness and trolley

We now carry a rigid fall arrest track that, when used in conjunction with a trolley and body harness, will meet OSHA’s new requirements for fall protection. The rigid track and trolley allow the climber to move freely up and down the track without needing to push, pull, or even touch any part of the fall arrest system.

Should an accident happen, your foot slips or you fall, the trolley on the fall arrest system will automatically lock onto the rigid rail, stopping your fall.

Tracks are available in 316 Stainless Steel or Aluminum with an anodized finish. The trolleys are designed for a single user and have a capacity of 310 lbs. Note: Two users are permitted to use a single track when used for rescue purposes, but never the same trolley. With that in mind, we suggest the single track and two harnesses and trolleys.

One track/trolley may get you by for most things, but if you ever need to have more than one person on the roof at the same time you will need to have a harness and trolley for each climber. If you do not, the first climber has to get to the roof, remove the trolley and harness, lower it by rope to the lower person who then has to put on the harness and climb up. Likewise, when work is done, one person has to climb down with the harness and trolley and then remove it, tie it to a rope for the upper climber to pull up, put on the harness and climb down… It doesn’t make much sense to us either.

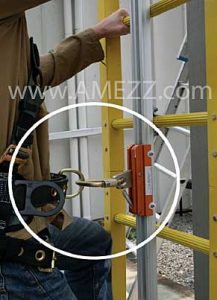
Close up view of A-Mezz personal fall arrest systems utilizing rigid track.

Close up view of A-Mezz personal fall arrest systems utilizing rigid track.

The rigid tracks are installed in the middle of the climbing side of the ladder rungs. The fall arrest system clamps around the ladder rung every 4’ to 6’ to secure and can have multiple pieces of rigid track spliced together to accommodate long climbs without requiring a single long rail to be shipped, which saves on shipping costs. Often the increased cost of the system is offset almost entirely by the fact that the ladder does not need to have a cage anymore. Cages are costly to manufacture and especially to ship. Taking up 4’x4’x34’ of space on a truck isn’t cheap. We have seen some freight costs come back almost 1/7th what they were compared to caged ladders.


The New Pallet Rack Gate System: Improving the Safety on Your Pick Units and Pallet Rack Mezzanines

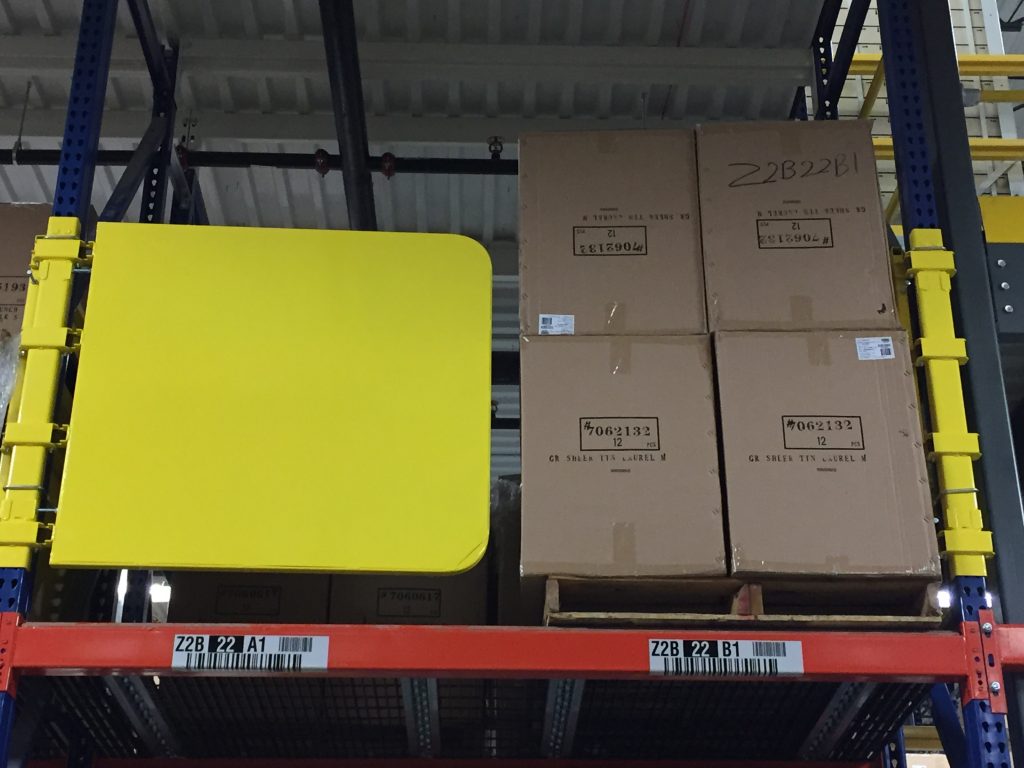
pallet rack gates protecting two bays of pallet rack

The Pallet Rack Gate automatically closes off the edge as the pallet clears the bay, protecting your employees.

We’ve been adding a number of gates to our mezzanine gate collection over the past year. Today I’d like to take a minute to talk about another of our newly added gates:  the Pallet Rack Gate.

The Pallet Rack Gate System is a self-closing gate designed to improve the safety of your pick modules with pallet flow systems or pallet rack based mezzanines, and are designed to meet or exceed OSHA railing standard 1910.23(a)(2) with a 42” high gate and mid-rail.  

As the name implies, it is specifically designed to integrate with your existing pallet rack. The universal hinge post brackets of the gate connect to the uprights of your pallet rack via U-bolts, minimizing the footprint of the gate, while allowing for an easy installation in minutes without the need for drilling.  The gates are designed to fit standard 60” wide or 96” openings in your rack system, but custom sizes are available. If you need something special we’ll be happy to look into it.

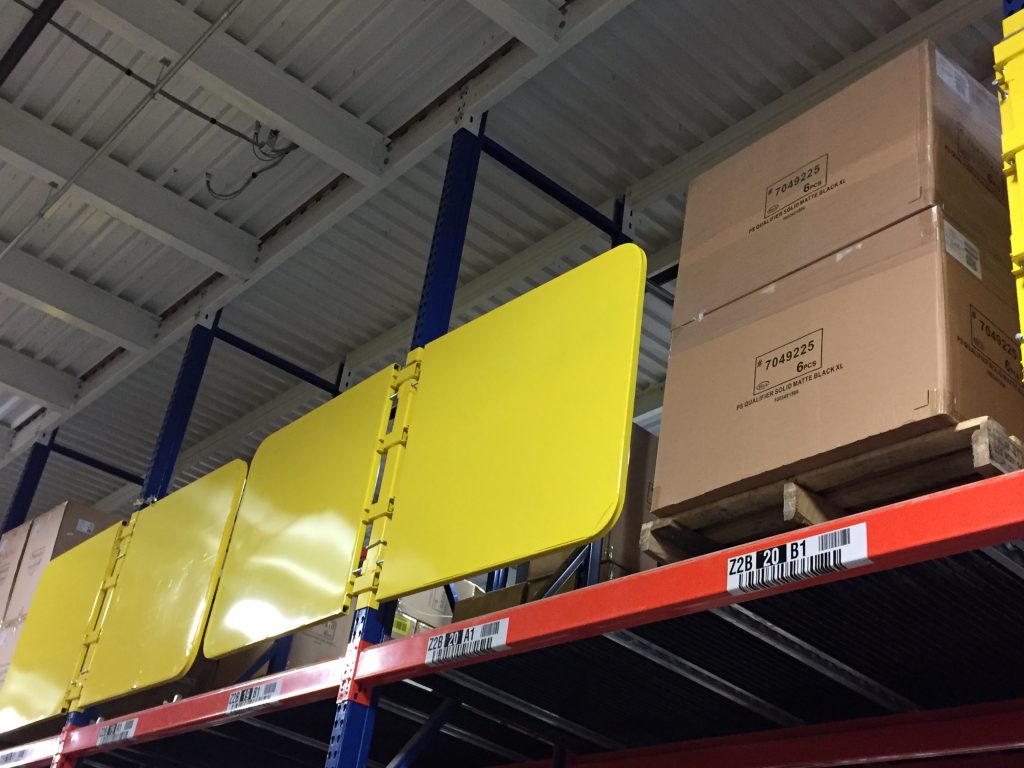
Then protecting multiple bays of rack, the intermediate gates would share a bracket at each upright to minimize the cost

The intermediate sections of the Pallet Rack Gate system combine both a left and right gate on a shared hinge bracket, minimizing the cost.

The gates are available as a single left gate with hinge bracket, a single right gate with hinge bracket, or if covering multiple connected bays of pallet rack, both a left and right gate connected to a shared hinge post bracket.  This helps keep the footprint and your costs down by minimizing the amount of material required.    

These gates are designed to stand up to the rigors of heavy use and require little to no maintenance.  They are constructed out of durable mild steel and have a safety yellow powder coat finish baked on.  The four stainless steel torsion spring hinges connected to each gate assure a safe and reliable operation.

The Pallet Rack Gate System is a simple, durable, and cost effective method of increasing the safety on your existing pallet rack mezzanine systems and pick units.  Give us a call and we’ll be happy to assist in laying out the design of the gates and working up a quote.  And if you’re looking to protect the base of your pallet rack from fork truck damage, or looking for a pallet rack itself, we’ll be happy to help with that as well.

Two Wall and Three Wall In-Plant Offices

two wall modular building system

Two wall in-plant office system utilizing the customer’s existing block walls

Many of the in-plant offices we provide customers are located around the perimeter of their building, and we are often asked about the possibility of utilizing the existing wall.  Depending on the site conditions, a two or three wall system could offer a significant cost savings versus a typical four wall in-plant office.  Today, I’d like to talk a little about how an in-plant office can utilize your existing building walls and some of the factors to consider if a two or three wall modular building system is a good fit for your space.

Panelized building system connecting to existing block wall

By utilizing the customer’s existing block wall, they were able to design a row of offices along the back wall of their facility without needing to reroute their existing lines

One thing to consider when thinking about designing a two or three wall in-plant office is what kind of walls are in place.  If we are going to utilize your existing walls, we are going to need to tie into them in a couple different places.  We will need to attach a piece of channel called a wall start from the floor to the top of the panel, wherever the panel would connect to the building wall.  As we typically use a corrugated roof deck to form the membrane that holds the building together, we will also need to attach an angle along the enclosed length of the wall at the panel height.  Because of this, the walls need to be substantial enough to be tied into.  Block, stud and gypsum, or concrete walls are great.  Steel skinned buildings are not.  The wall should also be even across the locations where the building would tie in.  If there’s a significant gap, such as in some brick walls, you’ll need to add some flashing to seal off the gaps into the building.  In some buildings there has been a wall built in front of the steel skin wall.  Remember to make sure the height of the front wall is taller than the height of the building panels.

Modular wall system above and below a mezzanine

A four wall in-plant office above the mezzanine with a two wall modular building system below the deck

Recently, we have done a number of mezzanine supported in-plant offices along the perimeters of the customers’ buildings, and are often asked if we could utilize the existing building walls.  The issue here, though, is that even though you might not realize it, there is some movement on the platform different from the existing building wall.  These forces would weaken the structural integrity of the building system.  At the ground level below the mezzanine, we can potentially utilize the existing building walls, but we would need to go with a four wall system on top of the platform.

two wall building system below a mezzanine

This two wall modular building system allowed our customer to separate production from the employee entrance.

A two wall modular building system offers a number of advantages, such as the ability to utilize existing windows/wiring, as well as a cost savings from using fewer materials and labor.  If you are looking at putting in some in-plant offices, it might be worth your while to consider going with a two or three wall building system.

Installation of the Mezzanine’s IBC Stairs


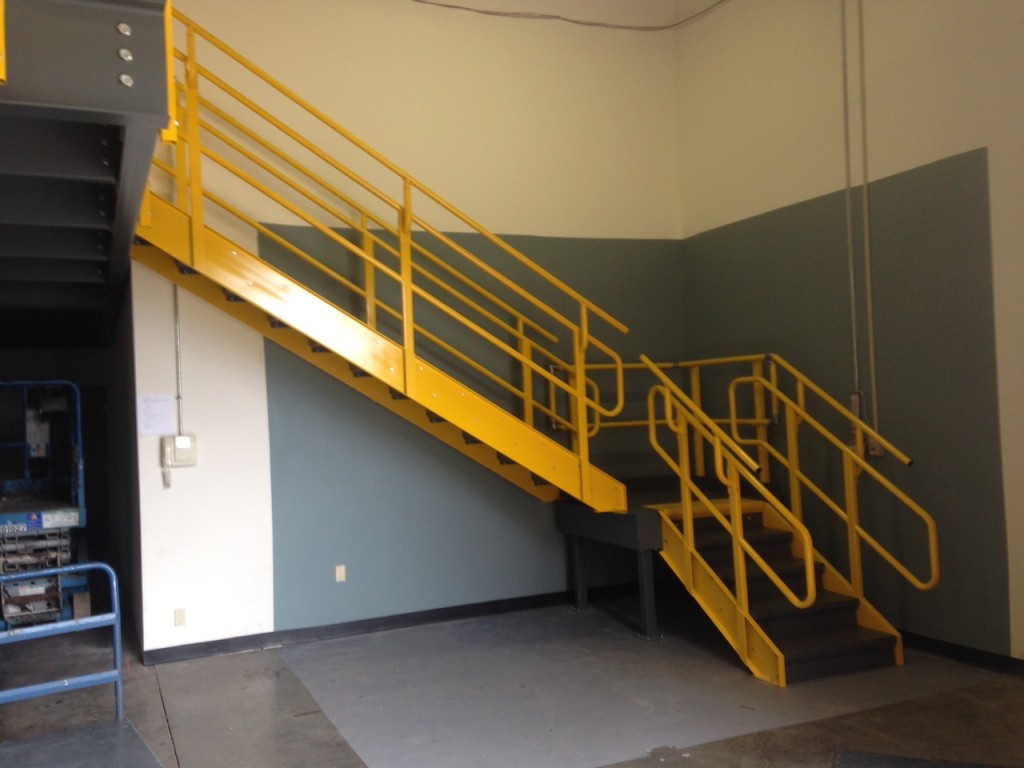
Finished L-shaped external IBC stair

Installed external IBC staircase

Previously, I had written a blog post briefly discussing how to put one of our mezzanines together. It had a lot of good photos taken during the installation, so I was able to go through section by section what was done.  There was one particular area I didn’t get to to over in much detail though; the stairs.  While with the previous system that I wrote about, the customer designed and fabricated their own staircase, I recently received a fantastic series of photos from the installation of another system; this time with partially installed stairs included.

installing the IBC stair

Setting up the stairs

The IBC stairs for or mezzanine systems ship in knock down form and need to be installed in the field.  When installing them, you’ll want to lay the stringers on the floor about 3’ apart with the closed face of the stringers inward.  The diamond tread stair treads consist of a closed back riser and stair tread weldment.  Starting with the top tread and riser, you’ll need to bolt the the tread to the stringer fastening it on the inside of the tread.  Only hand tighten the bolts at this time, then work your way down positioning the riser of the next tread behind the flat weldment of the nose on the tread above.  After all the treads have been attached to the stringers (hand snug) you’ll need to install the bottom riser using self tapping screws.  You’ll then need to hoist the stairs up to the mezzanine deck.  Making sure that the dimension from the top of the deck to the top tread is equal to the dimension between the other treads, you’ll need to field drill the the attachment holes using a 9/16” drill and attach it to the mezzanine system.  You’ll also need to install the top tread plate on top of the mezzanine deck closing off the riser from your first tread.  From the underside, you’ll need to tighten up all the bolts and attach the risers to the back of the above tread’s nose via a couple self tapping screws.  Afterwards you’ll need to anchor the stairs to the ground.


Now all that’s left is to finish off the handrail.  The hoops that form the 21” and 36” handrails and handrail extensions come already welded to the stringers.  On each of the uprights, you’ll need to attach an elbow assembly via self tapping screws.  This will provide you with the saddles to support the outer 42” handrail.  You’ll need to take a piece of guardrail pipe for each side, and lay them flush against the saddles, fixing them in place with self tapping screws once again.  As the top line of rail will be longer than the stair run, you’ll want to drop a plumb line from the bottom edge of the rail to the edge of the mezzanine deck and again to the front edge of the bottom stair tread, cutting the pipe square.  Finally, you’ll need to install a plastic plug cap in the openings of the top rail to finish it off.  

Mezzanine Supported Modular Office

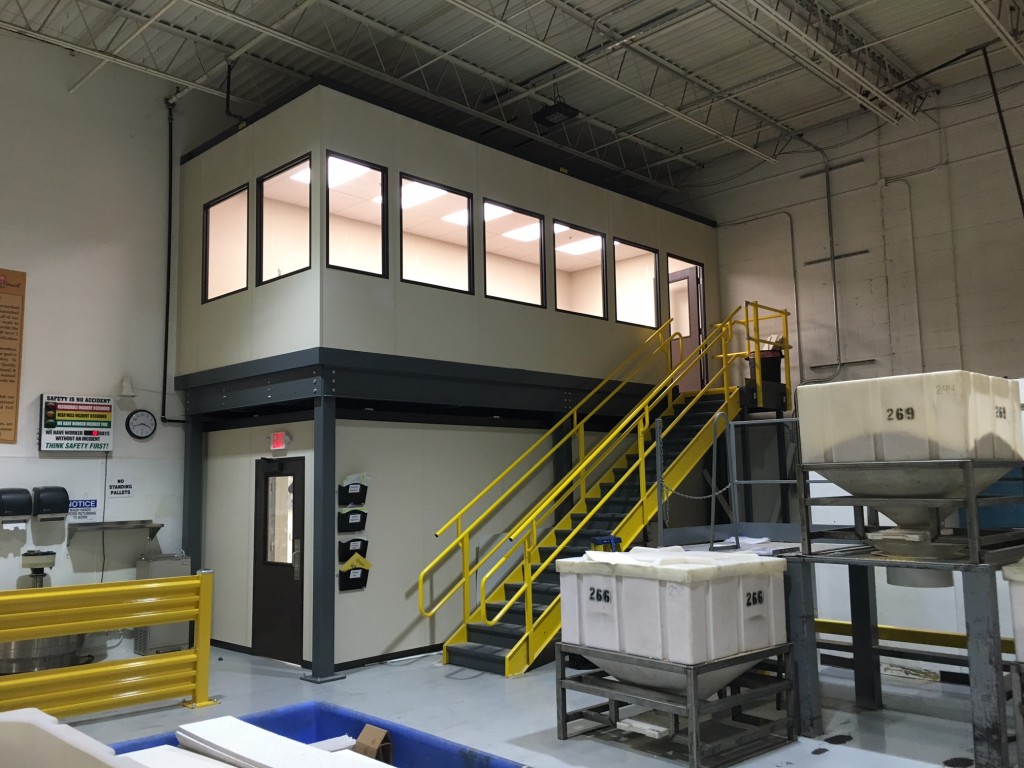
Mezzanine with modular office above

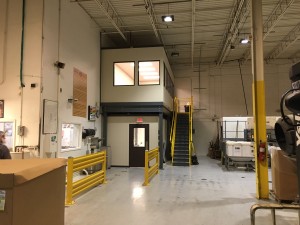
Mezzanine supported modular office with a two-wall modular building below

Whether you’re running out of room on the plant floor or need to oversee production, mezzanines are commonly employed to support and elevate modular buildings.  Recently we received some great photos back on a project we completed last month for a mezzanine supported modular office that I thought you might like to see.  The customer was located right here in Northeast Ohio.  They were putting in a new line on the plant floor and needed to tear down some offices they had in order to make room.   There wasn’t enough space to relocate the offices elsewhere on the plant floor, so they decided to utilize some of their unused overhead space.

Side view of mezzanine and modular office.

A 9’ high mezzanine supported modular office with an 8’ high modular wall system below.

When thinking on putting in a mezzanine supported modular building, it’s important to consider just how much space is available.  Remember that with typical column spans in low seismic areas, you’ll probably lose 1’3” to 1’5” for the mezzanine itself.  If you plan on having people move through the area you will need to maintain a minimum of 7’ for clearance.  The modular building panels are typically 8’ or 9’ tall, and unless you are planning on supporting them by the structure above, you will probably want about a foot more in order to install the roof deck to the panels which helps form the membrane that holds the system together.   In this particular case the customer’s mezzanine had a clearance height of 8’7” with a 9’10” top of deck.  This provided us enough room to install a modular office above (9’ tall panels, 9’3-1/8” overall height, 8’6” clearance height) and an 8’ high (8’3-1/8” overall with a 7’6” clear ceiling height) modular wall system below.

inside modular building

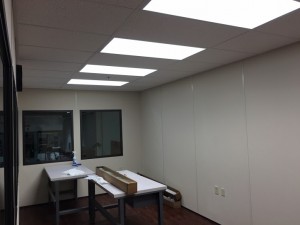
Four wall modular office above the mezzanine with customer provided/ installed floor covering

While designing these mezzanine supported modular offices, we’re often asked if we can utilize the adjacent existing walls.  While this is commonly done on the main floor of a facility, unfortunately we cannot do this up on top of the mezzanine deck.   There will always be some movement and vibrations on top of an elevated structure and because of this the structure would need to be a four wall system and not tie into the adjacent walls.  In this particular care, we put in a four wall system above the mezzanine deck as well as a two wall system below the deck to create an enclosed pass way between the production floor, the front offices beyond the cinder block wall, and the production floor entrance way to the outside.

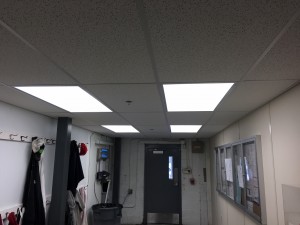
inside view of two wall modular wall system

Two wall modular wall system below the mezzanine

It took our installers 6 work days to unload and install (both mechanical and electrical) the 24’x10’ mezzanine, the 24’x10’ 4-wall modular office above, and the 9’x22’9” two wall modular wall system below, and we had yet another very happy customer.