Why You Need to Protect your Equipment with Guardrail

accidents do happen

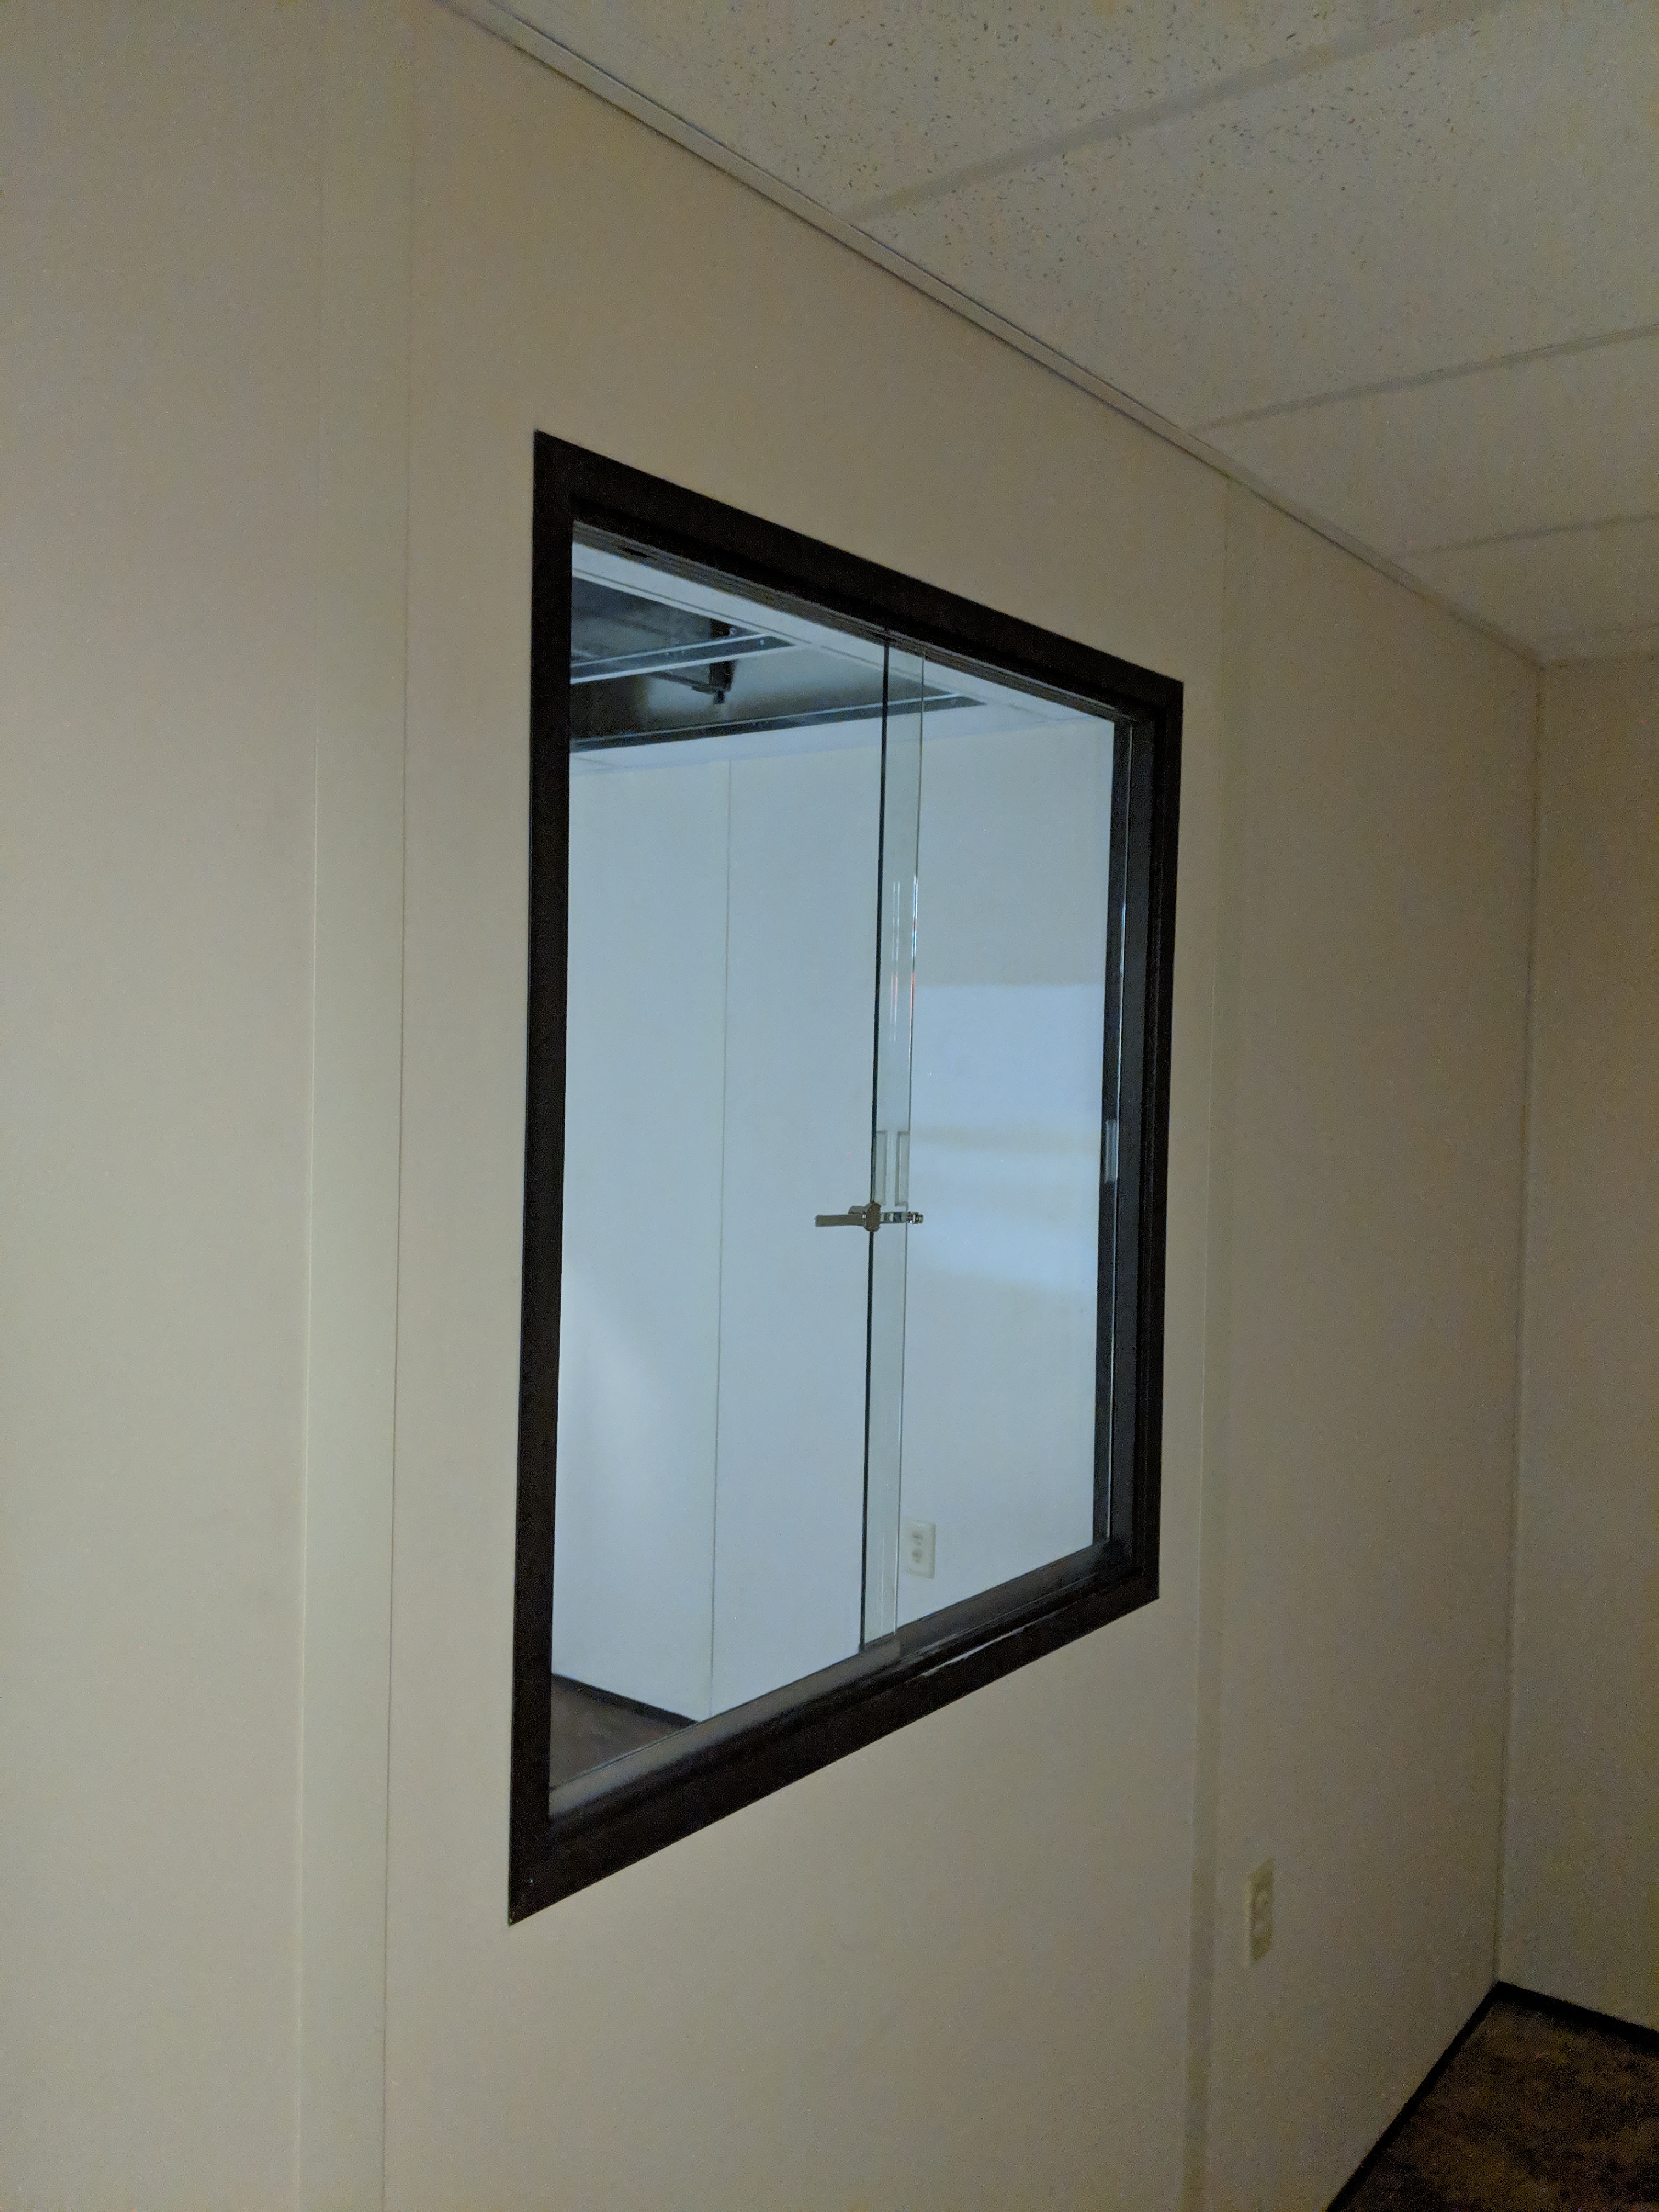
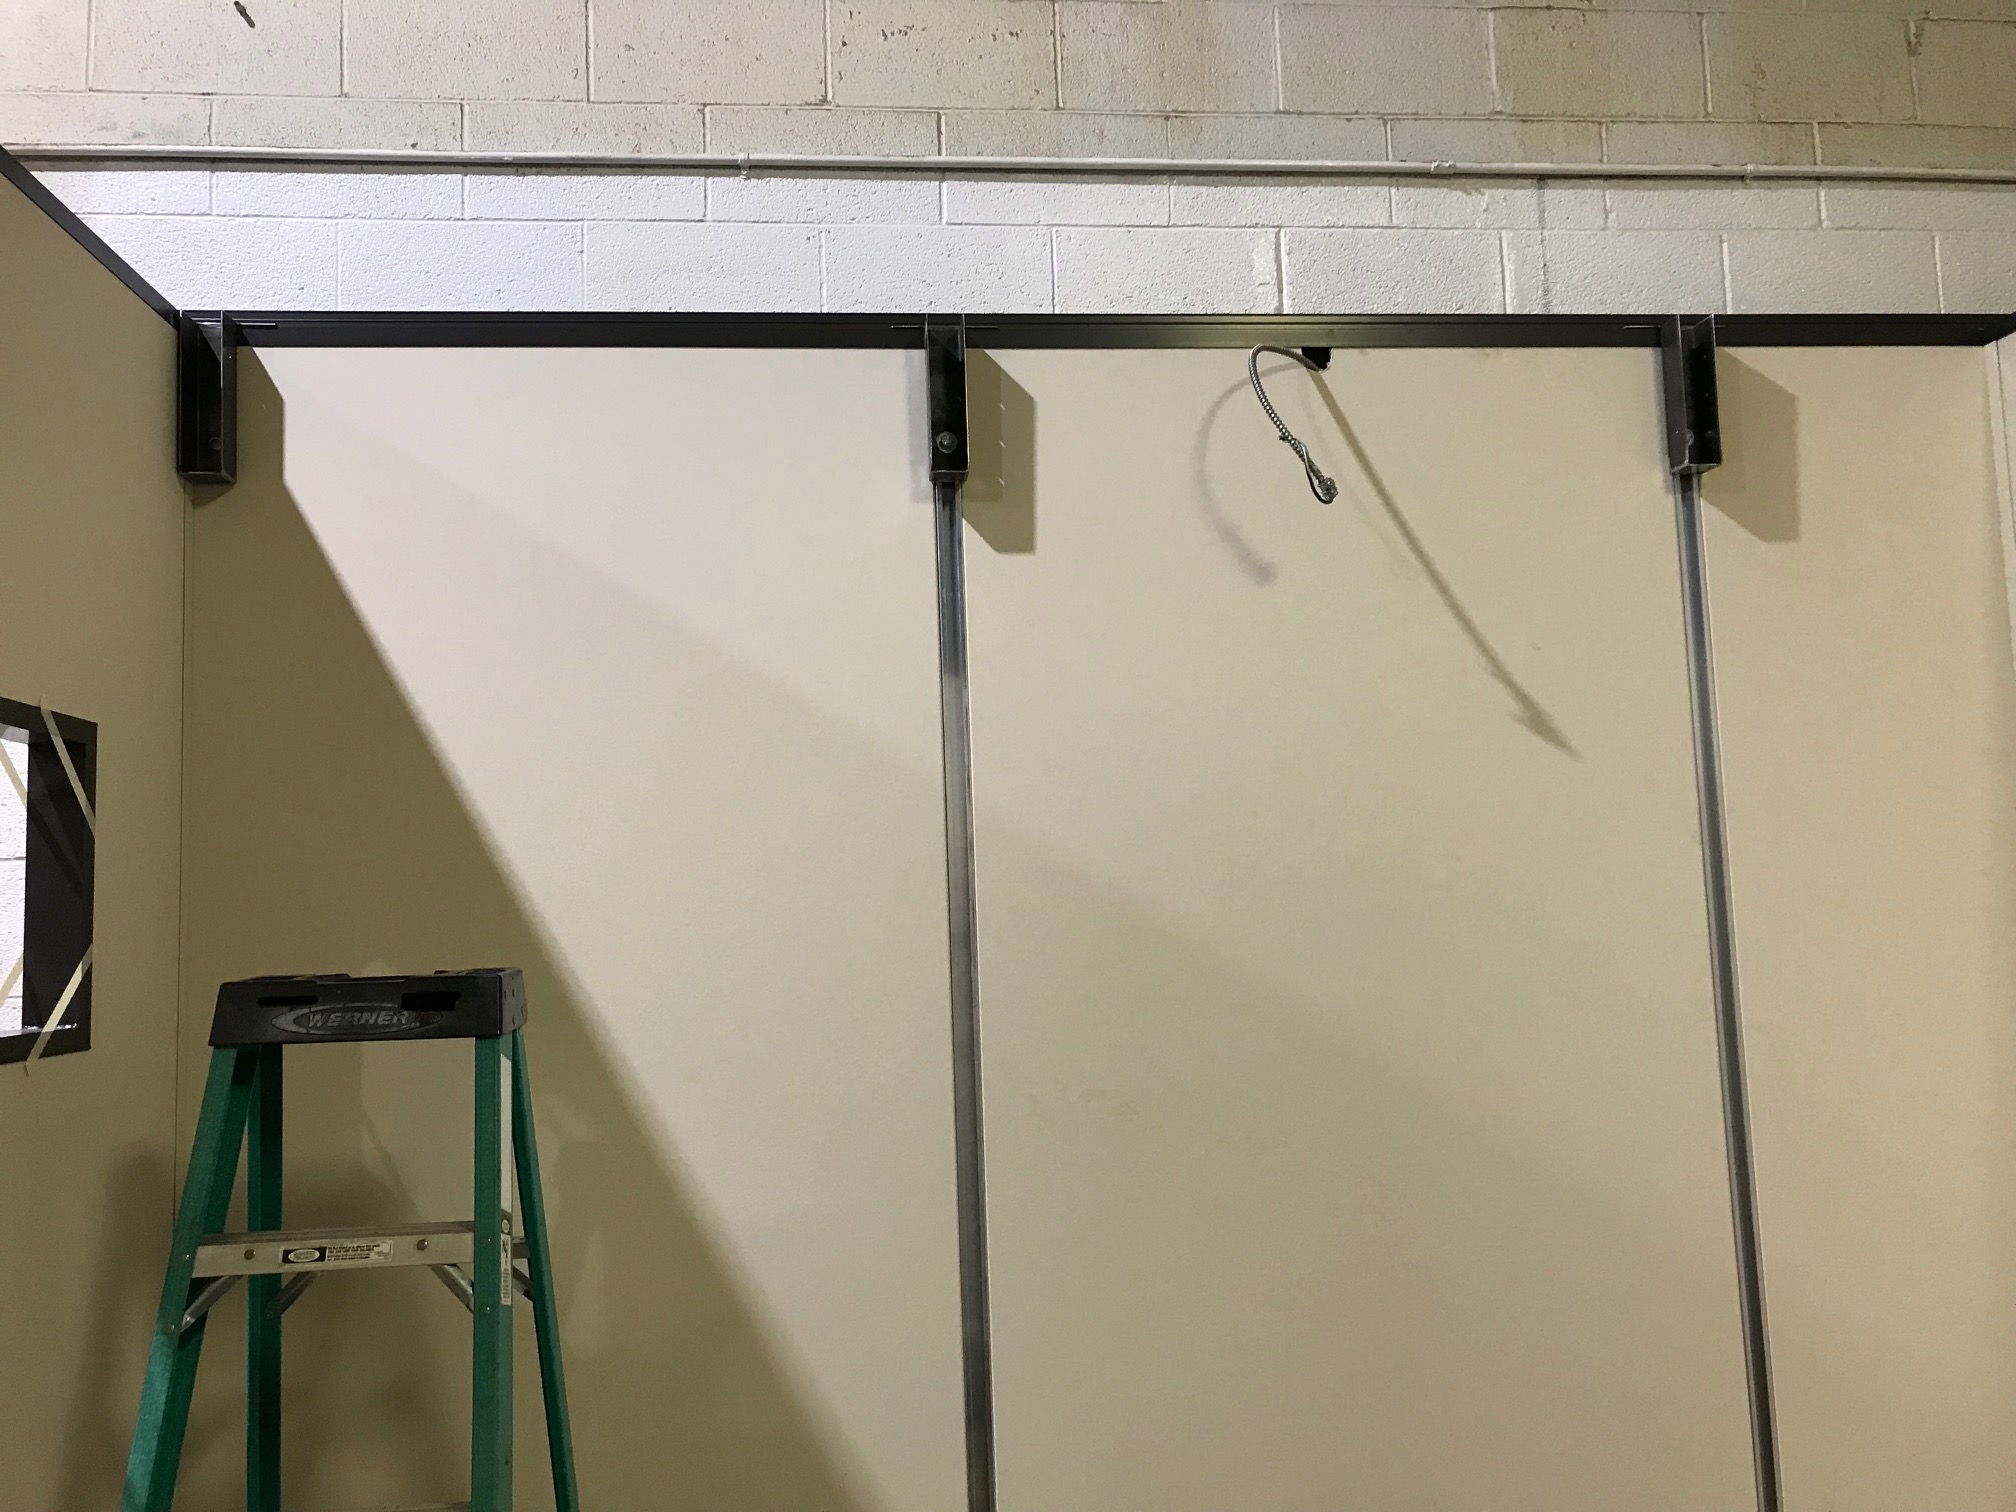
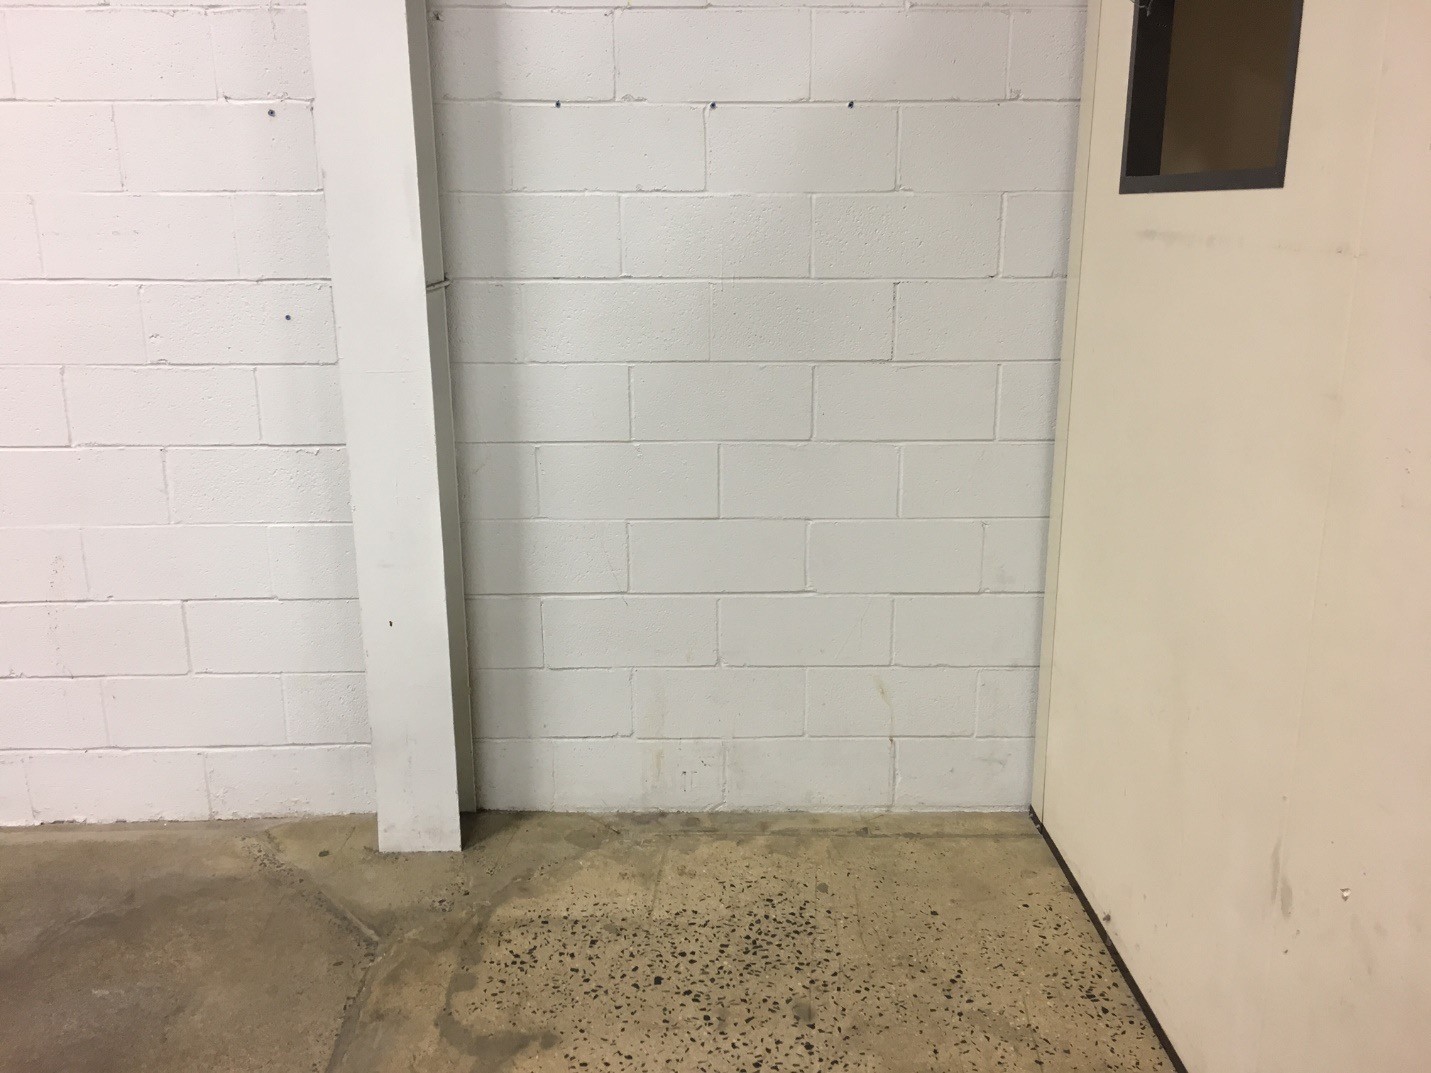
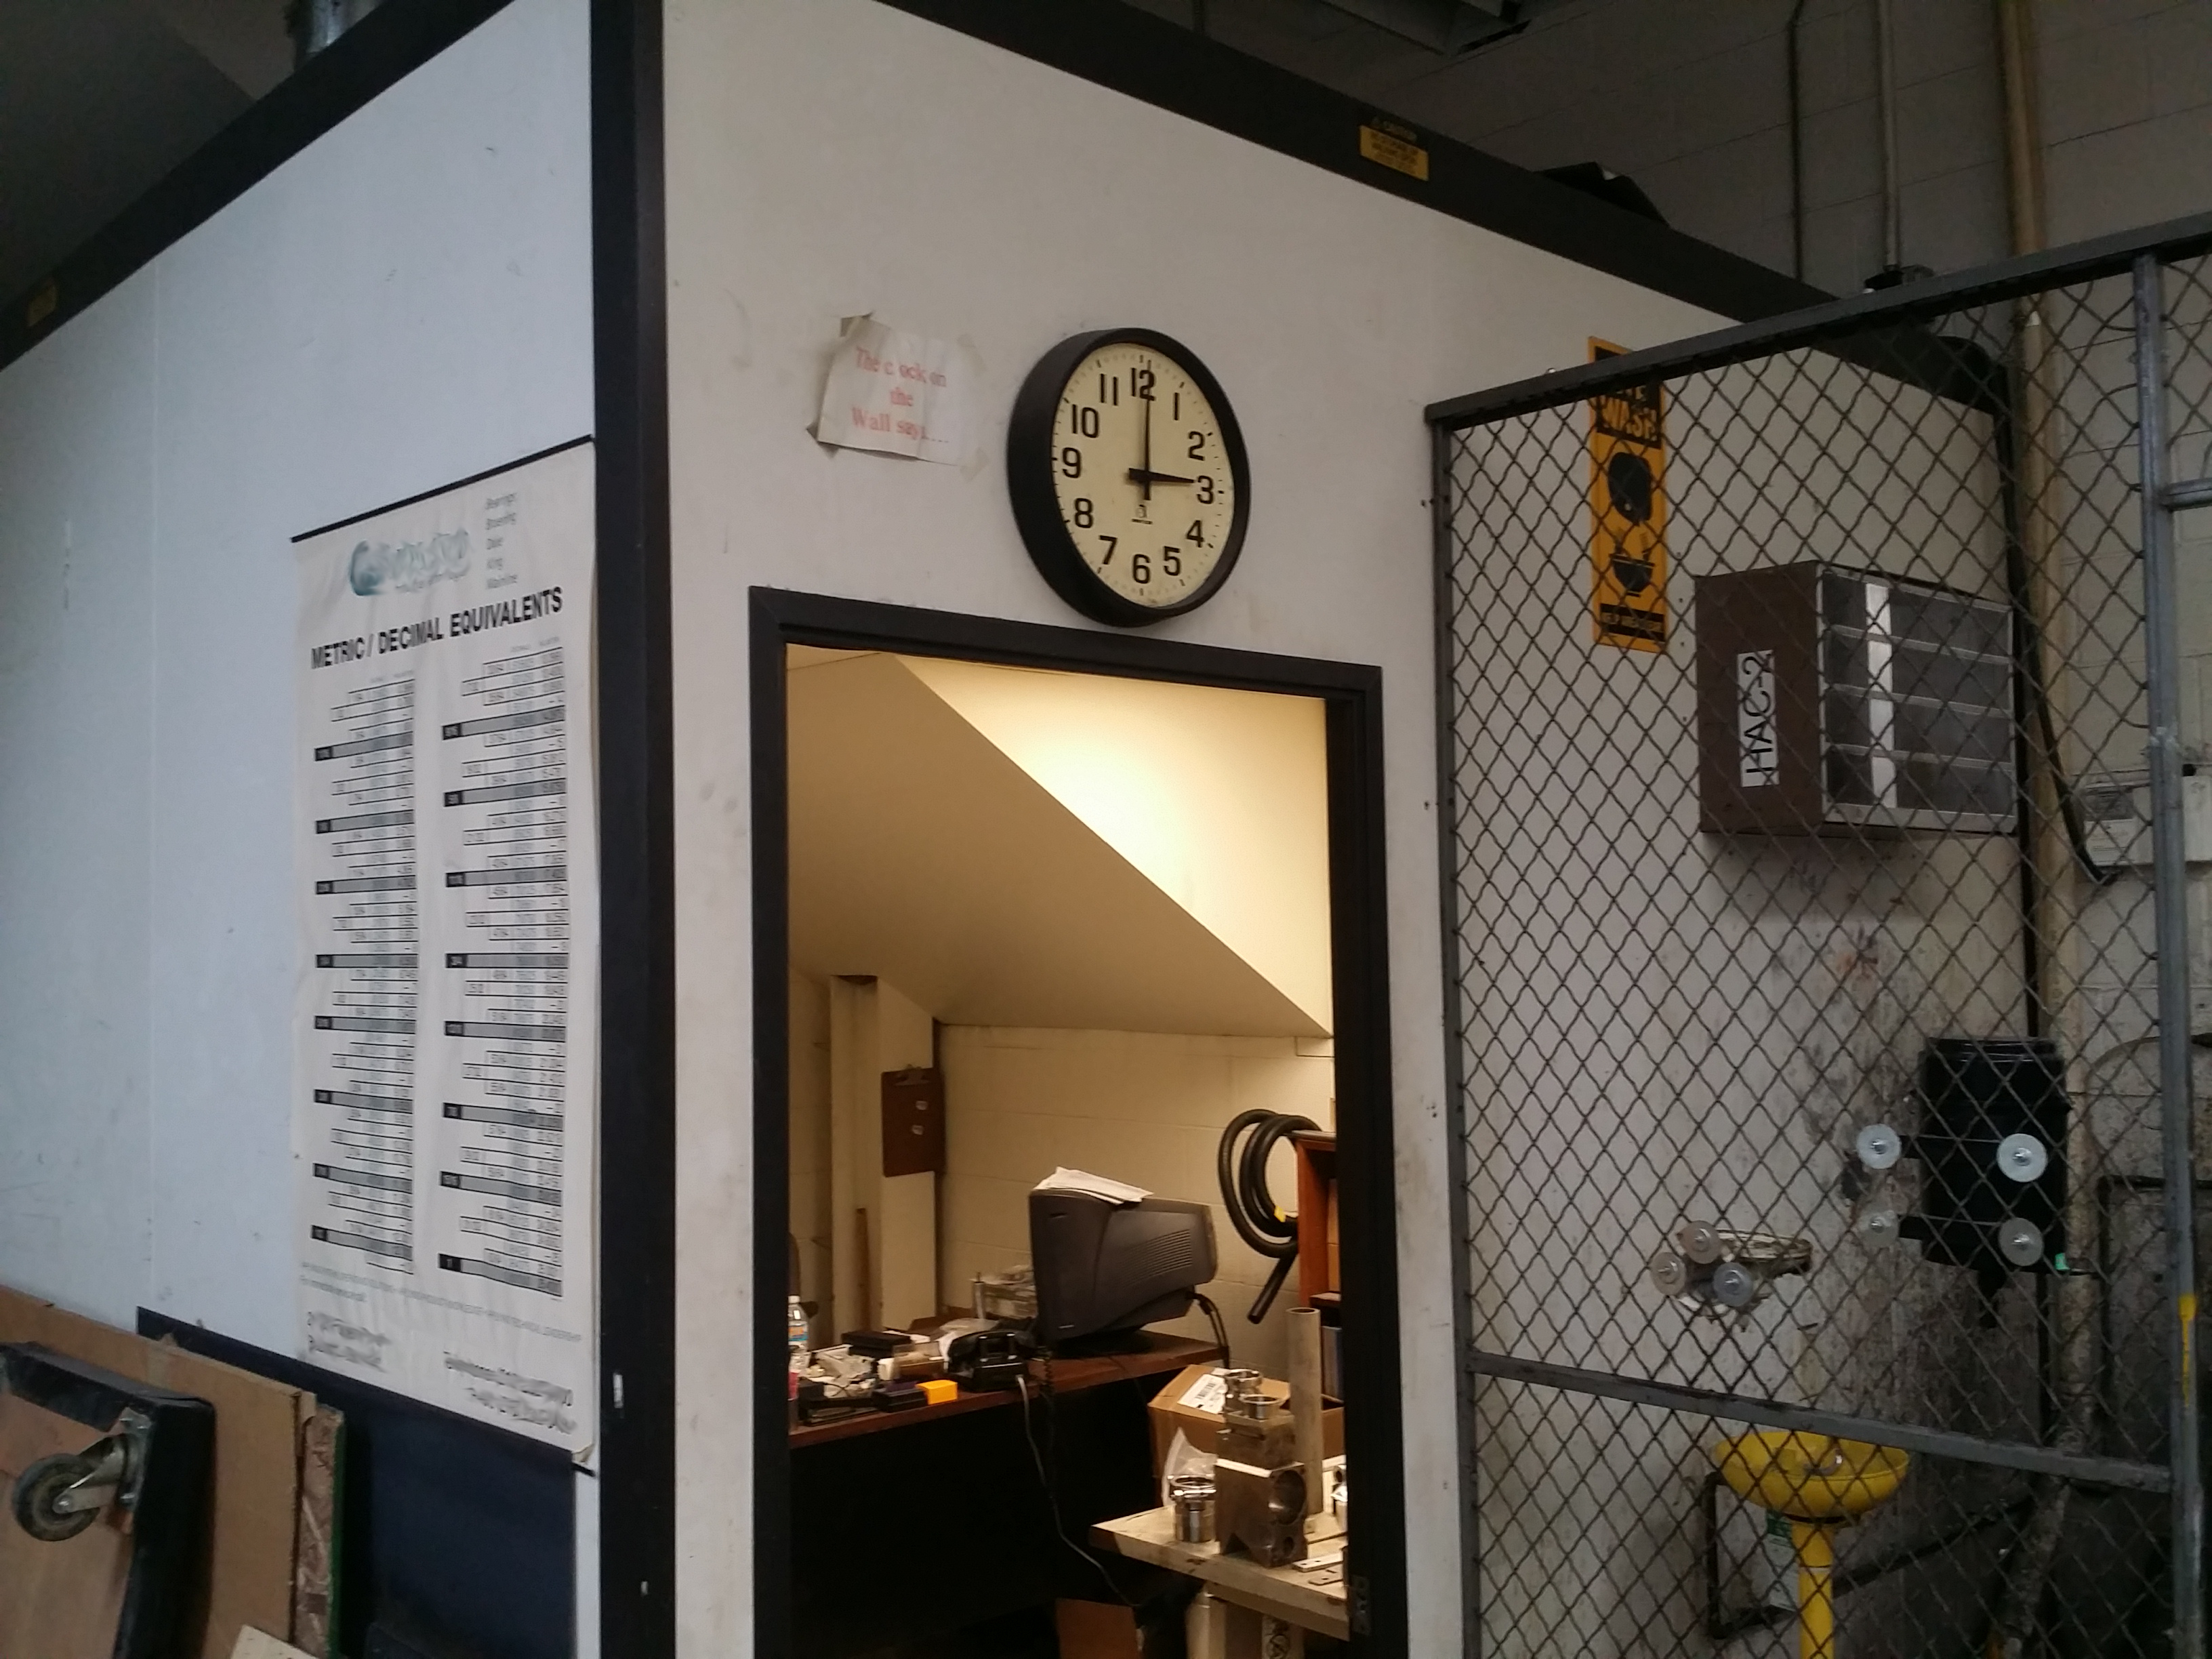
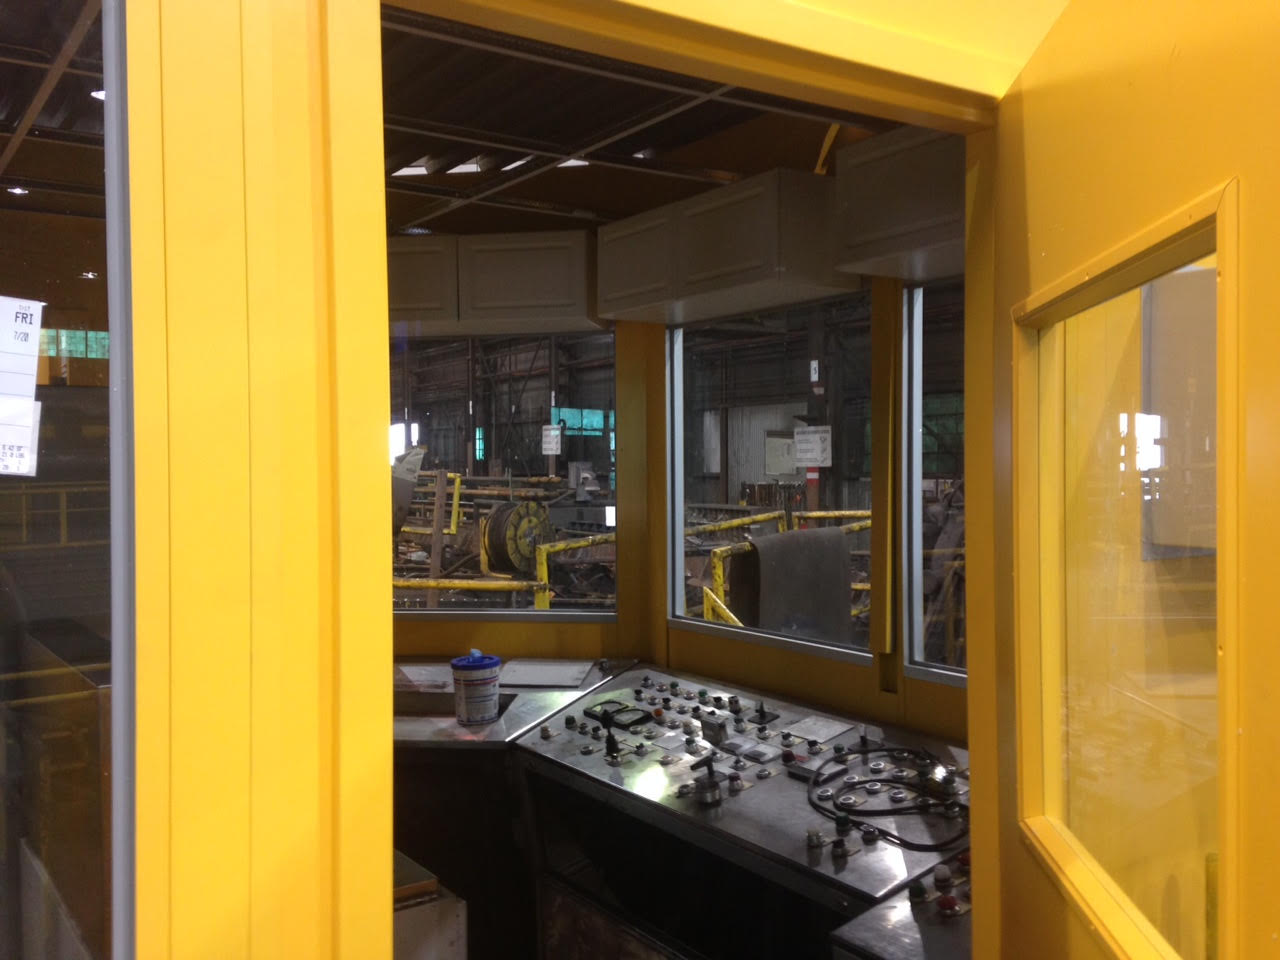
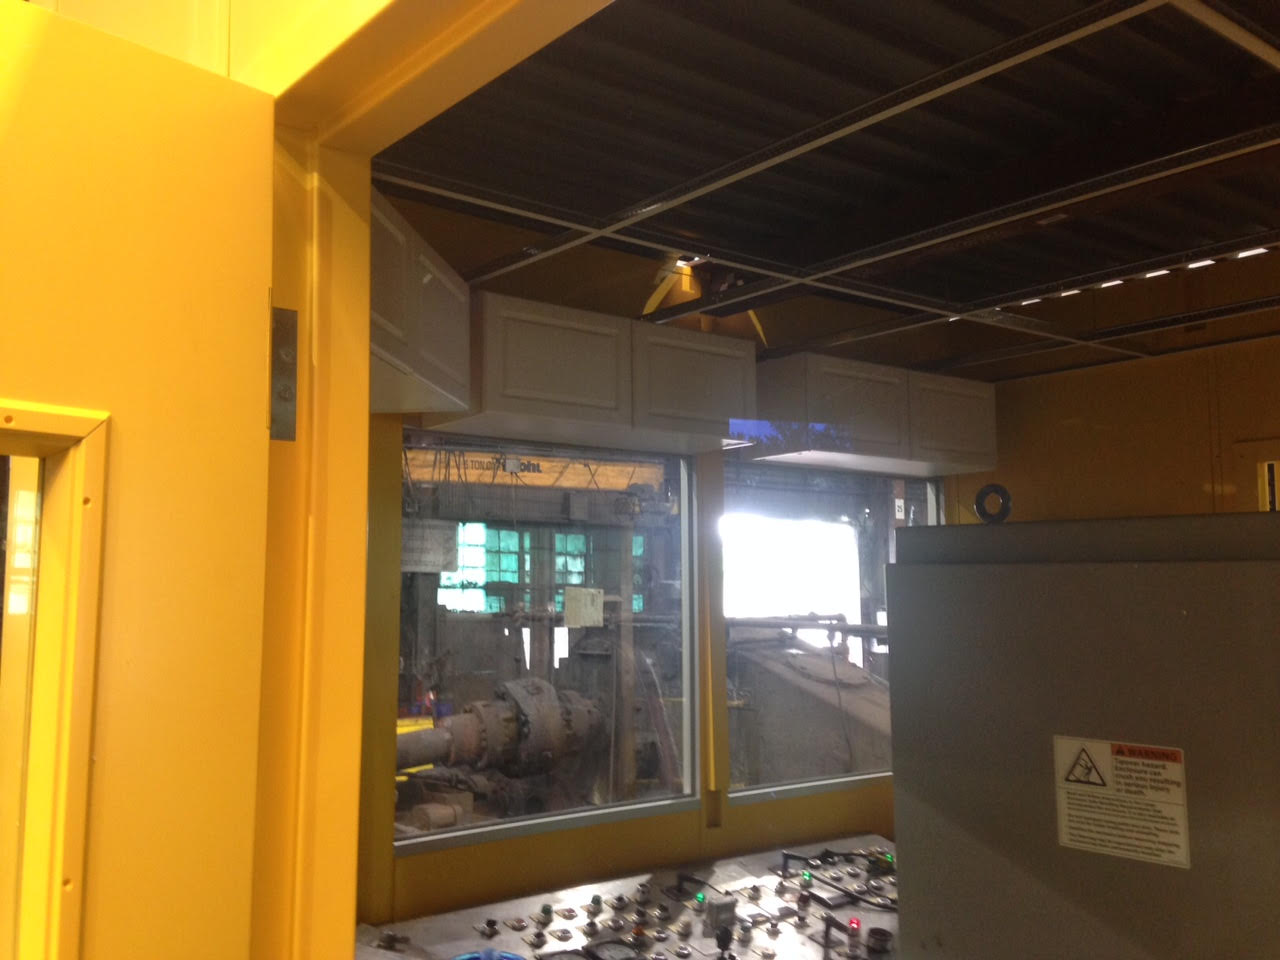
Damage to modular building panel from run in with fork truck tine

Regardless of how much training you’ve had, or how careful you are, accidents can happen.  Even your best fork truck driver can make a mistake. I recently had a customer contact me with just such a situation.

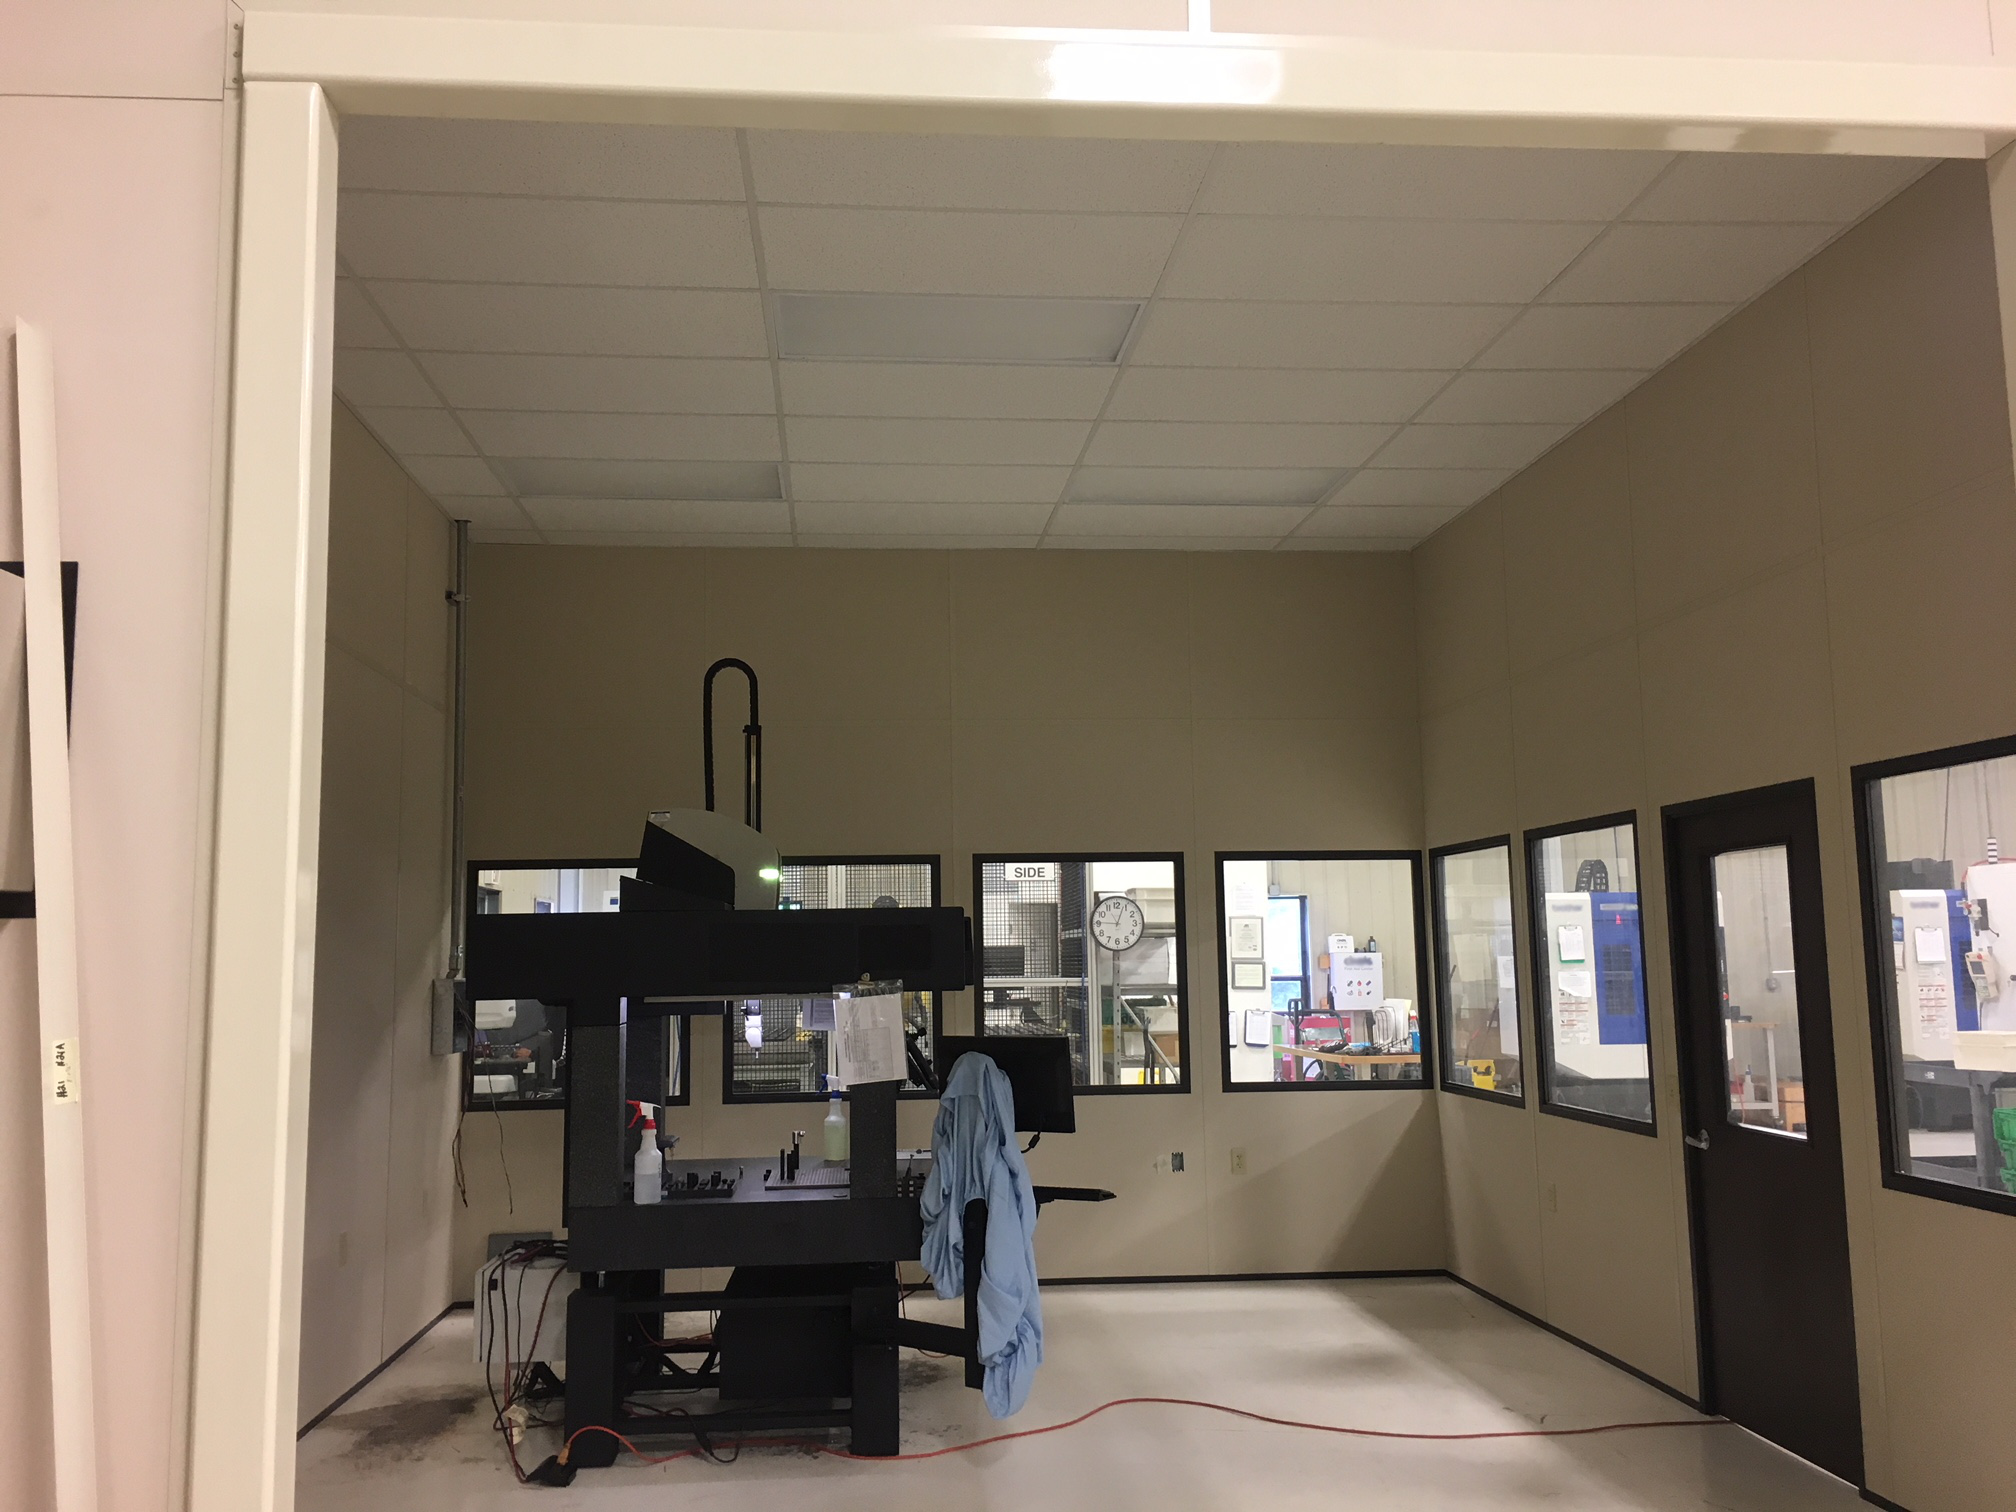
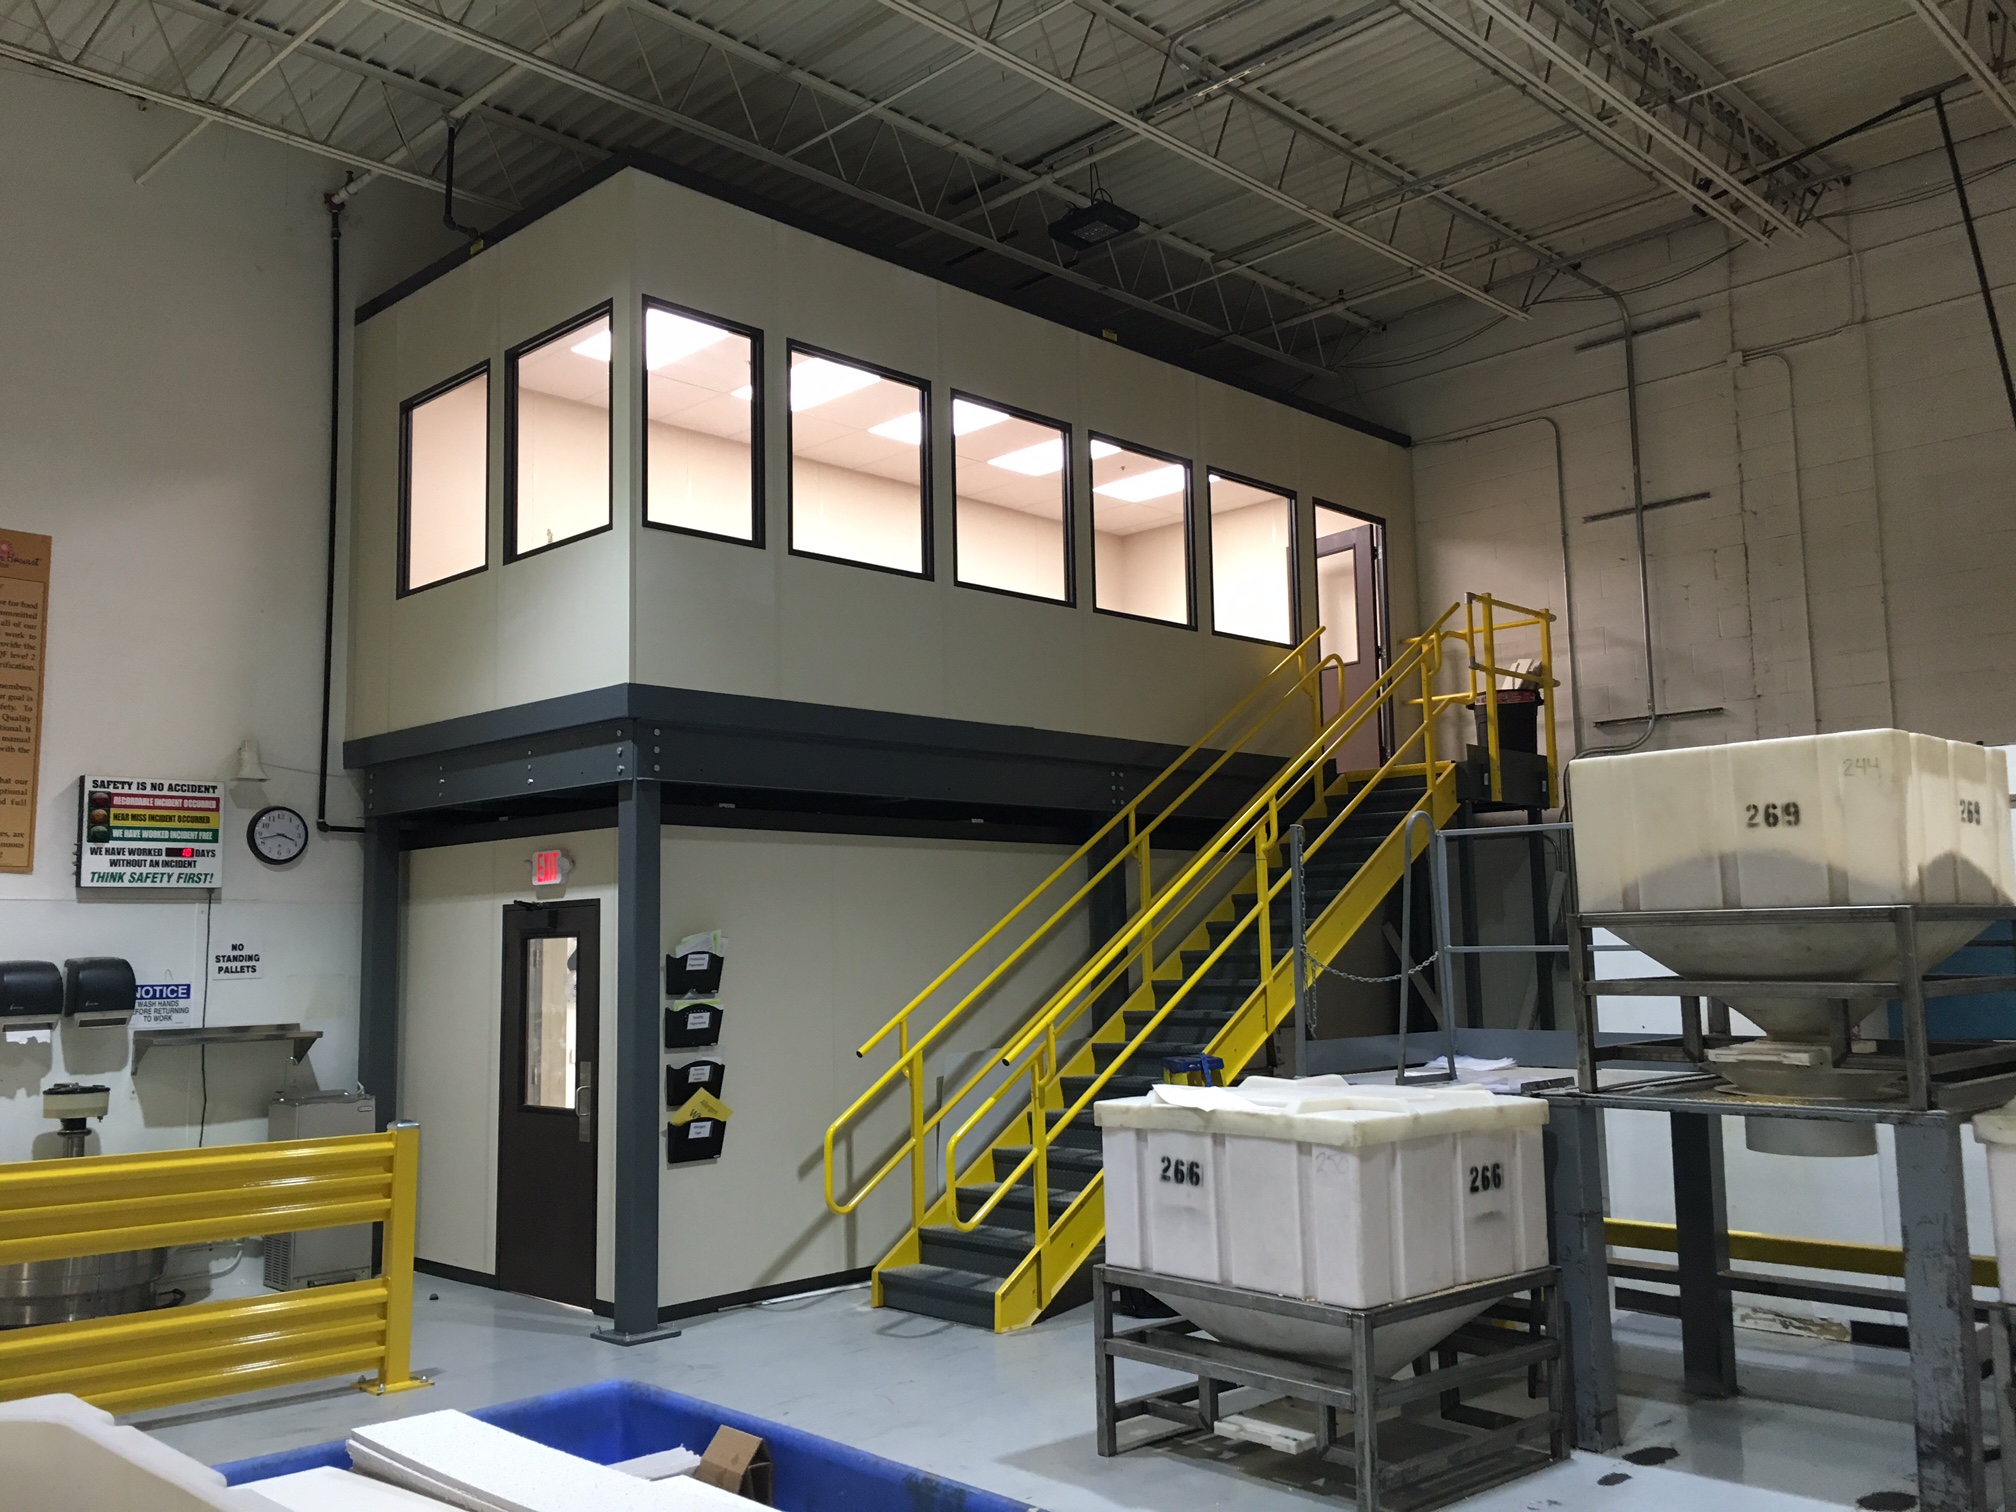
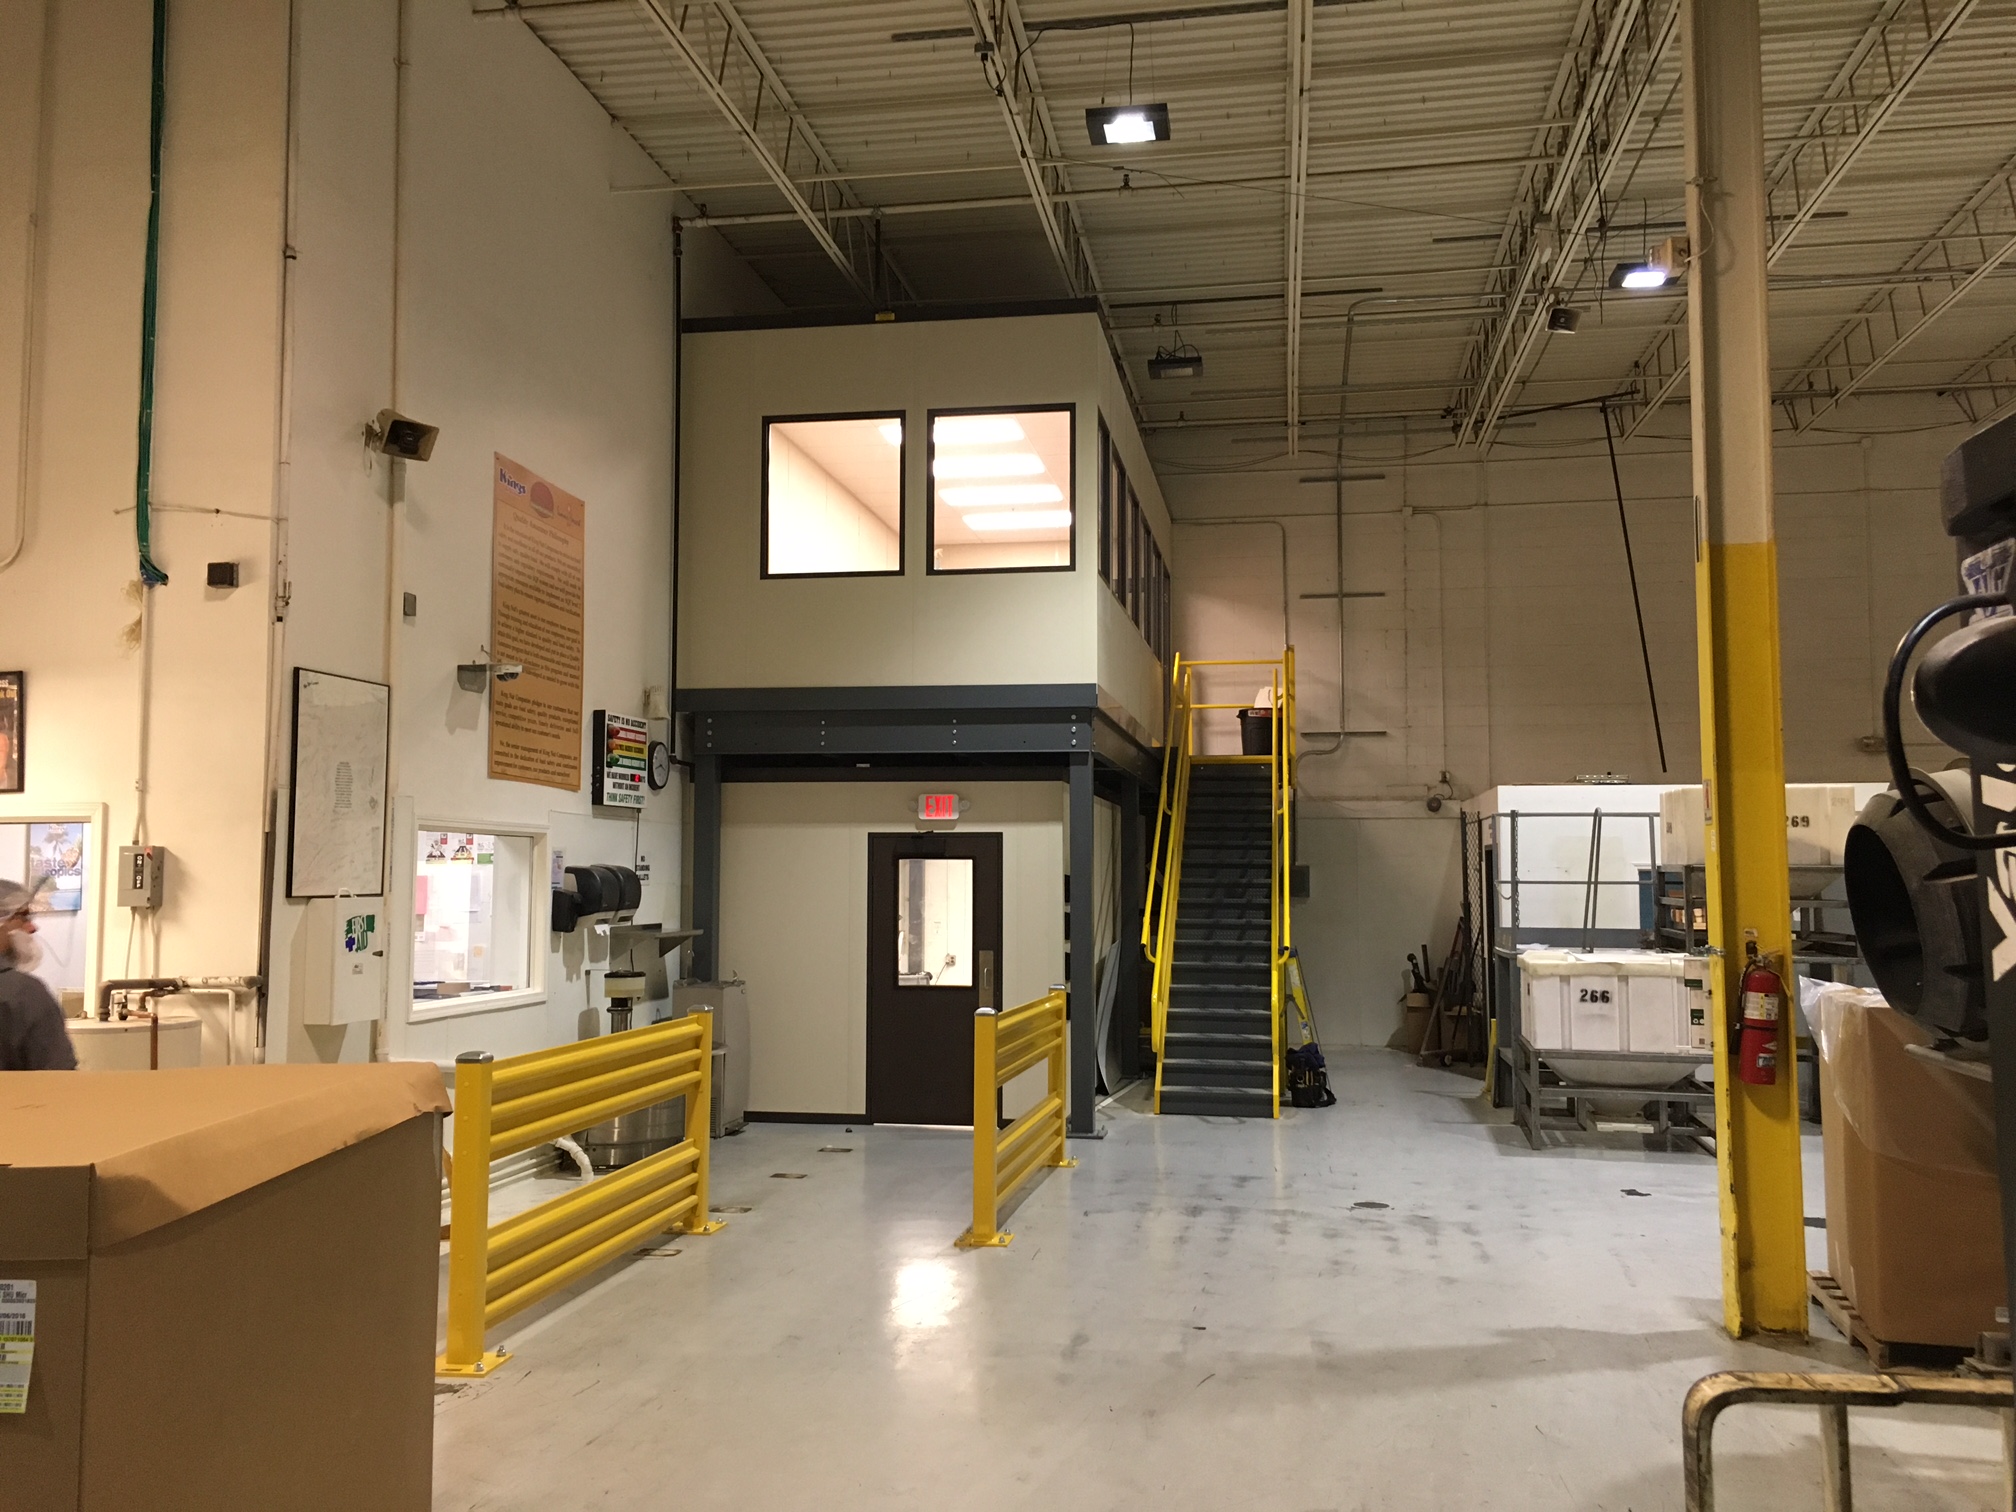
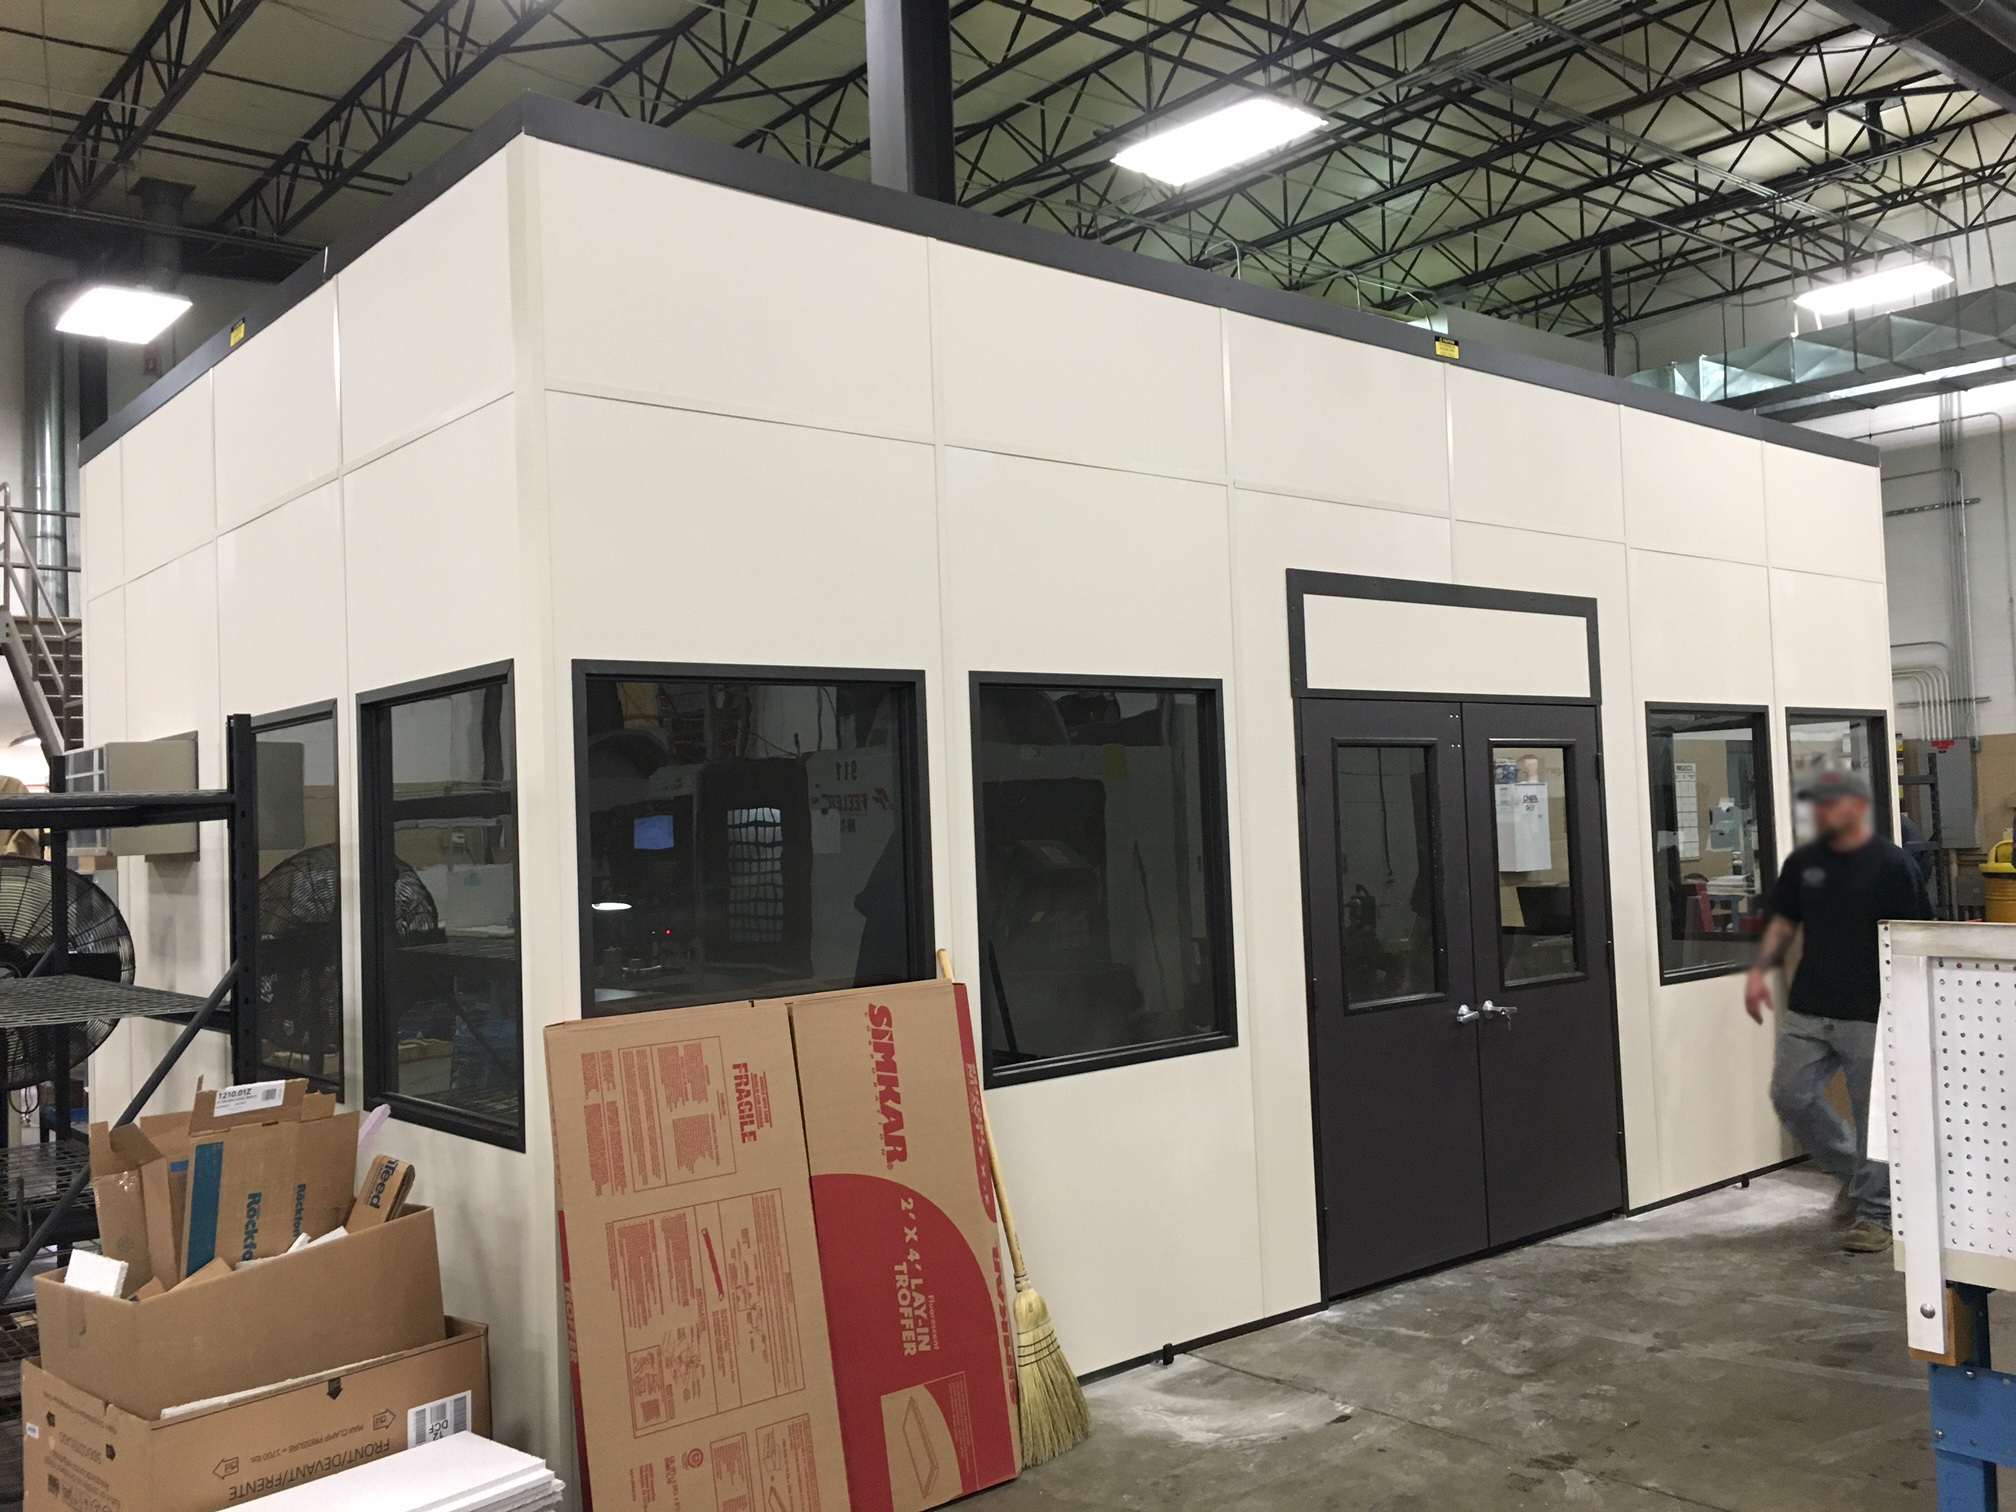
Last year the customer had put in a quality assurance lab and office using our A-wall modular building system.  Unfortunately, their best fork truck driver slipped up and ran into the wall. They were lucky: no one was injured, and he was able to stop before he caused any significant structural damage.  It did however knock a knock a 2”x4” hole on the one side of the wall panel and a larger hole on the inside where it pushed through. Since the damage was localized to a couple small holes in a single panel and there was no structural damage to any of the other components, the customer contacted a local drywall contractor to repair the damage to the panel, and we were able to provide him with a sheet of vinyl to cover the patches with.

use industrial guardrail to protect your equipment  and personnel in areas with fork traffic

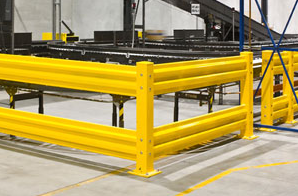
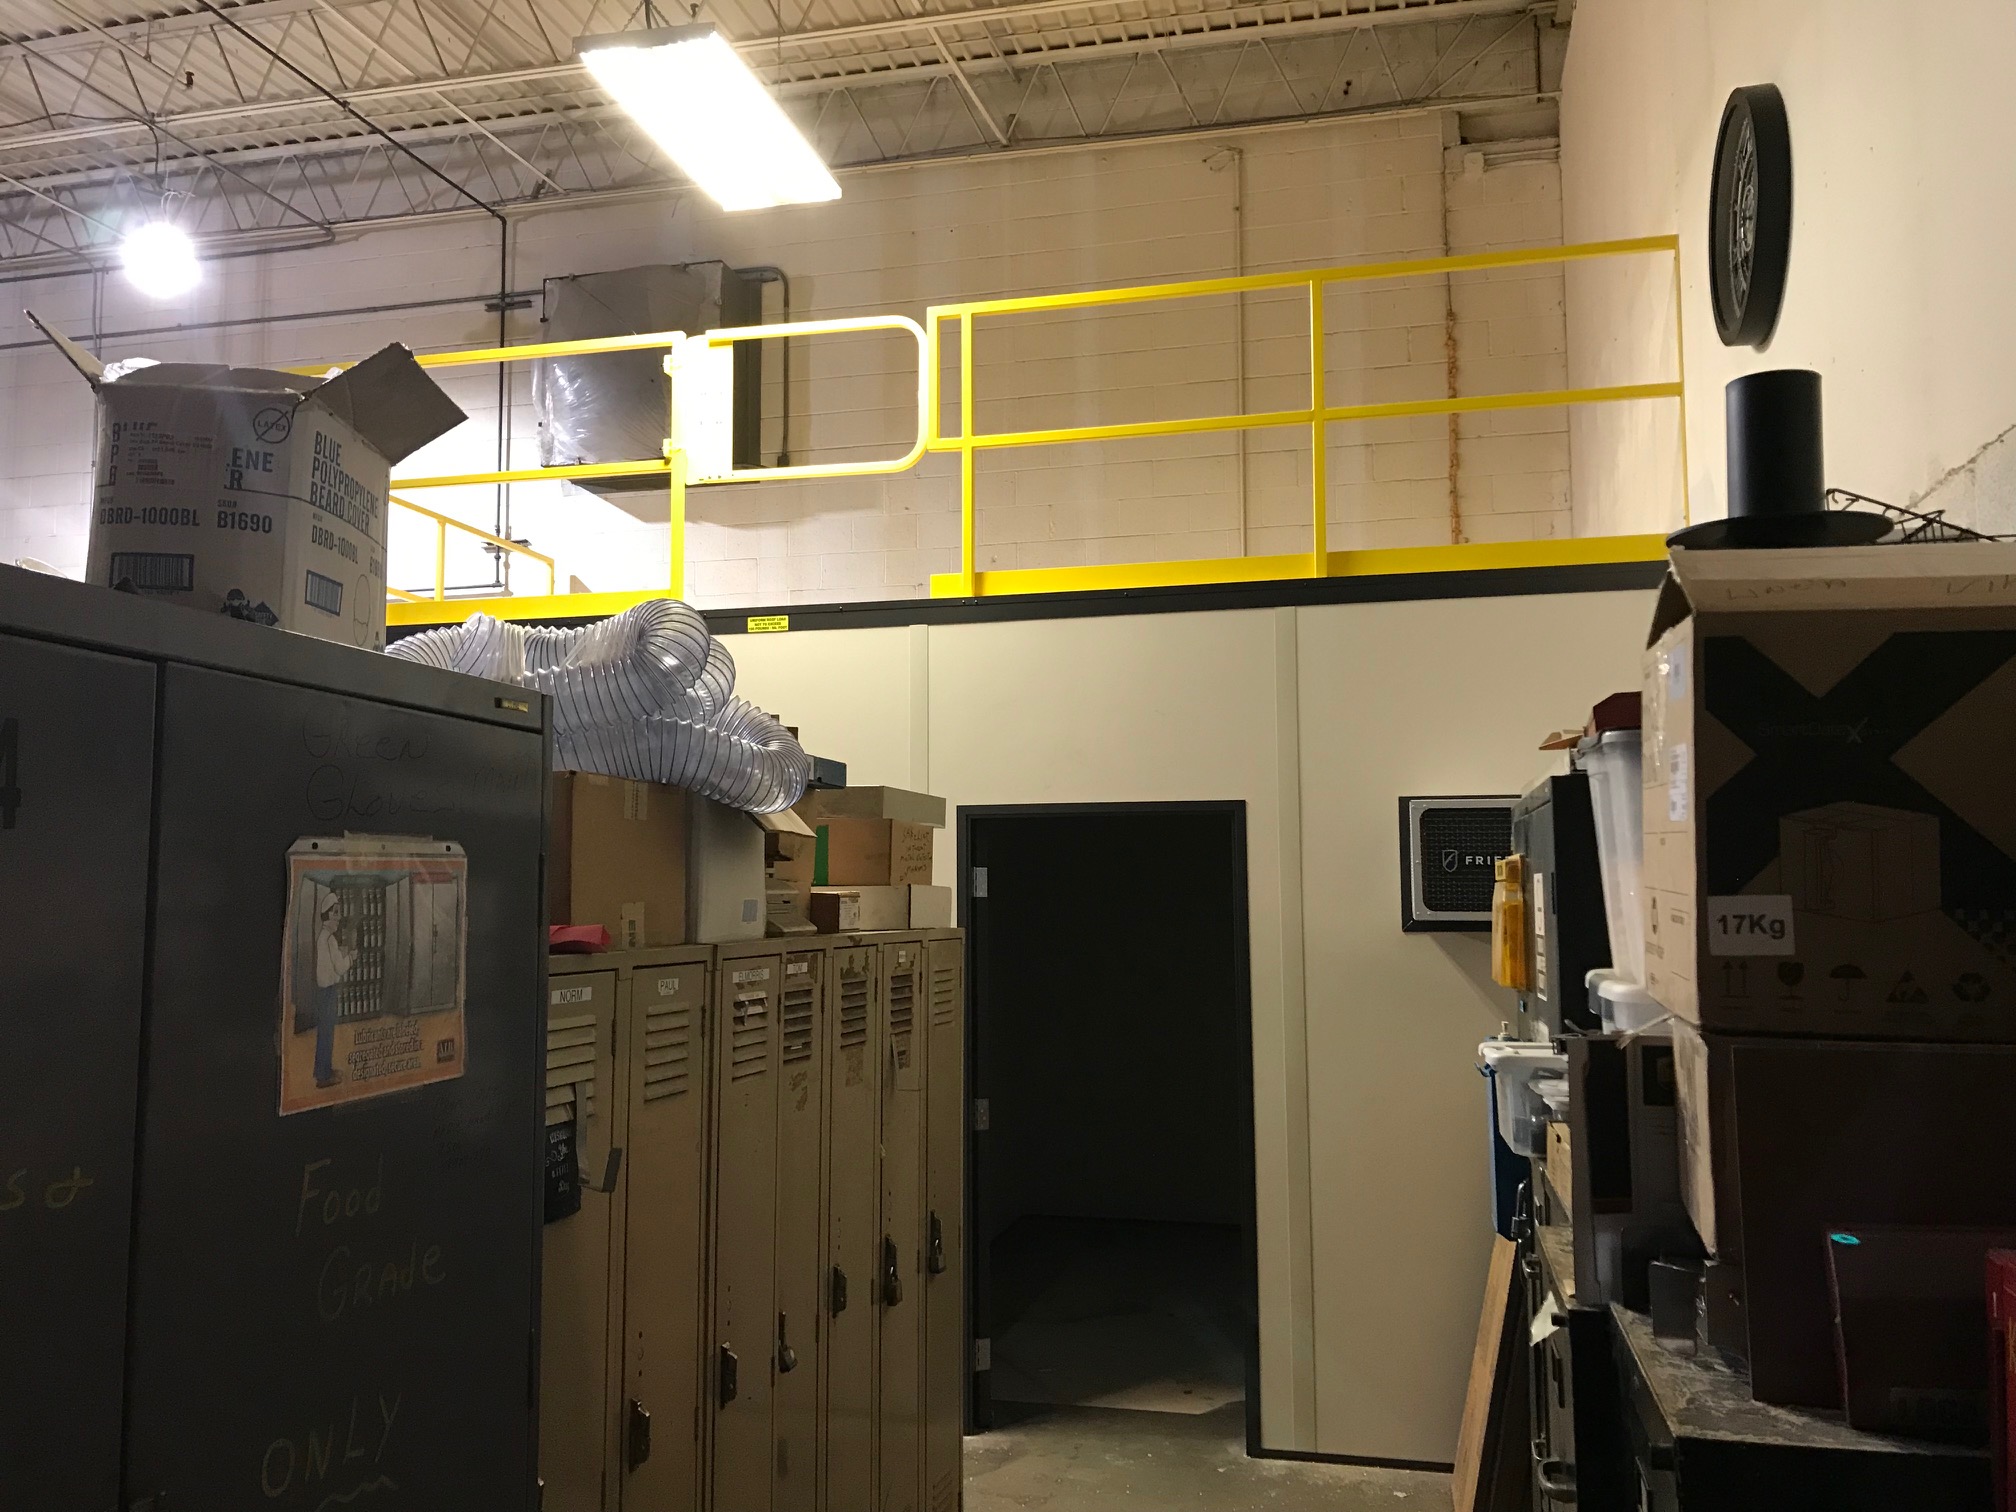
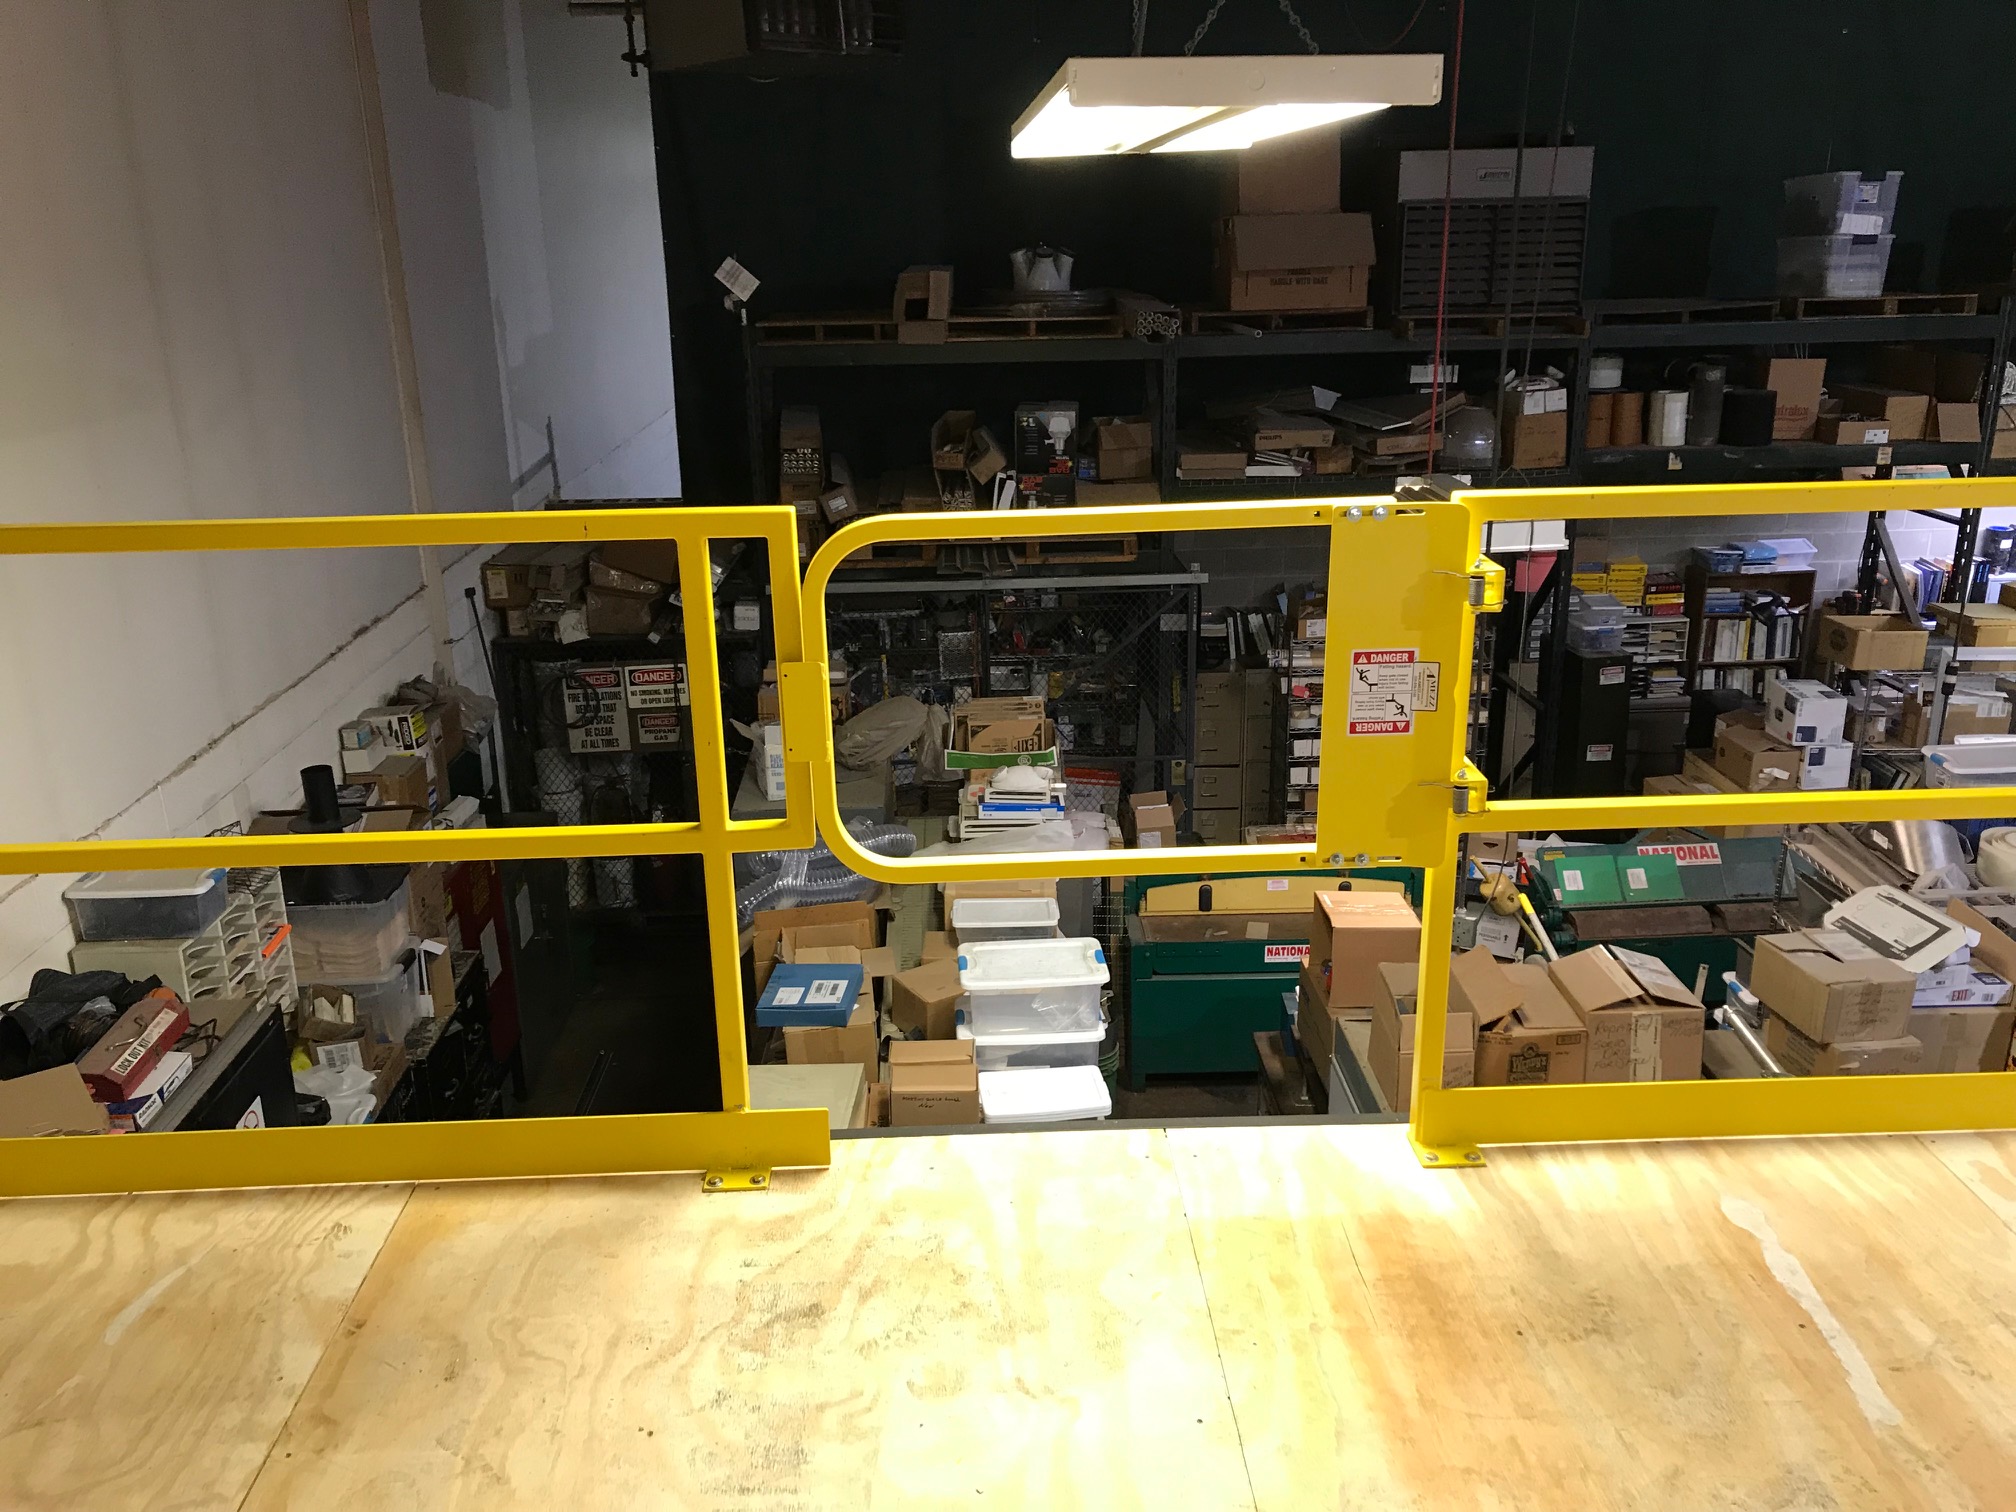
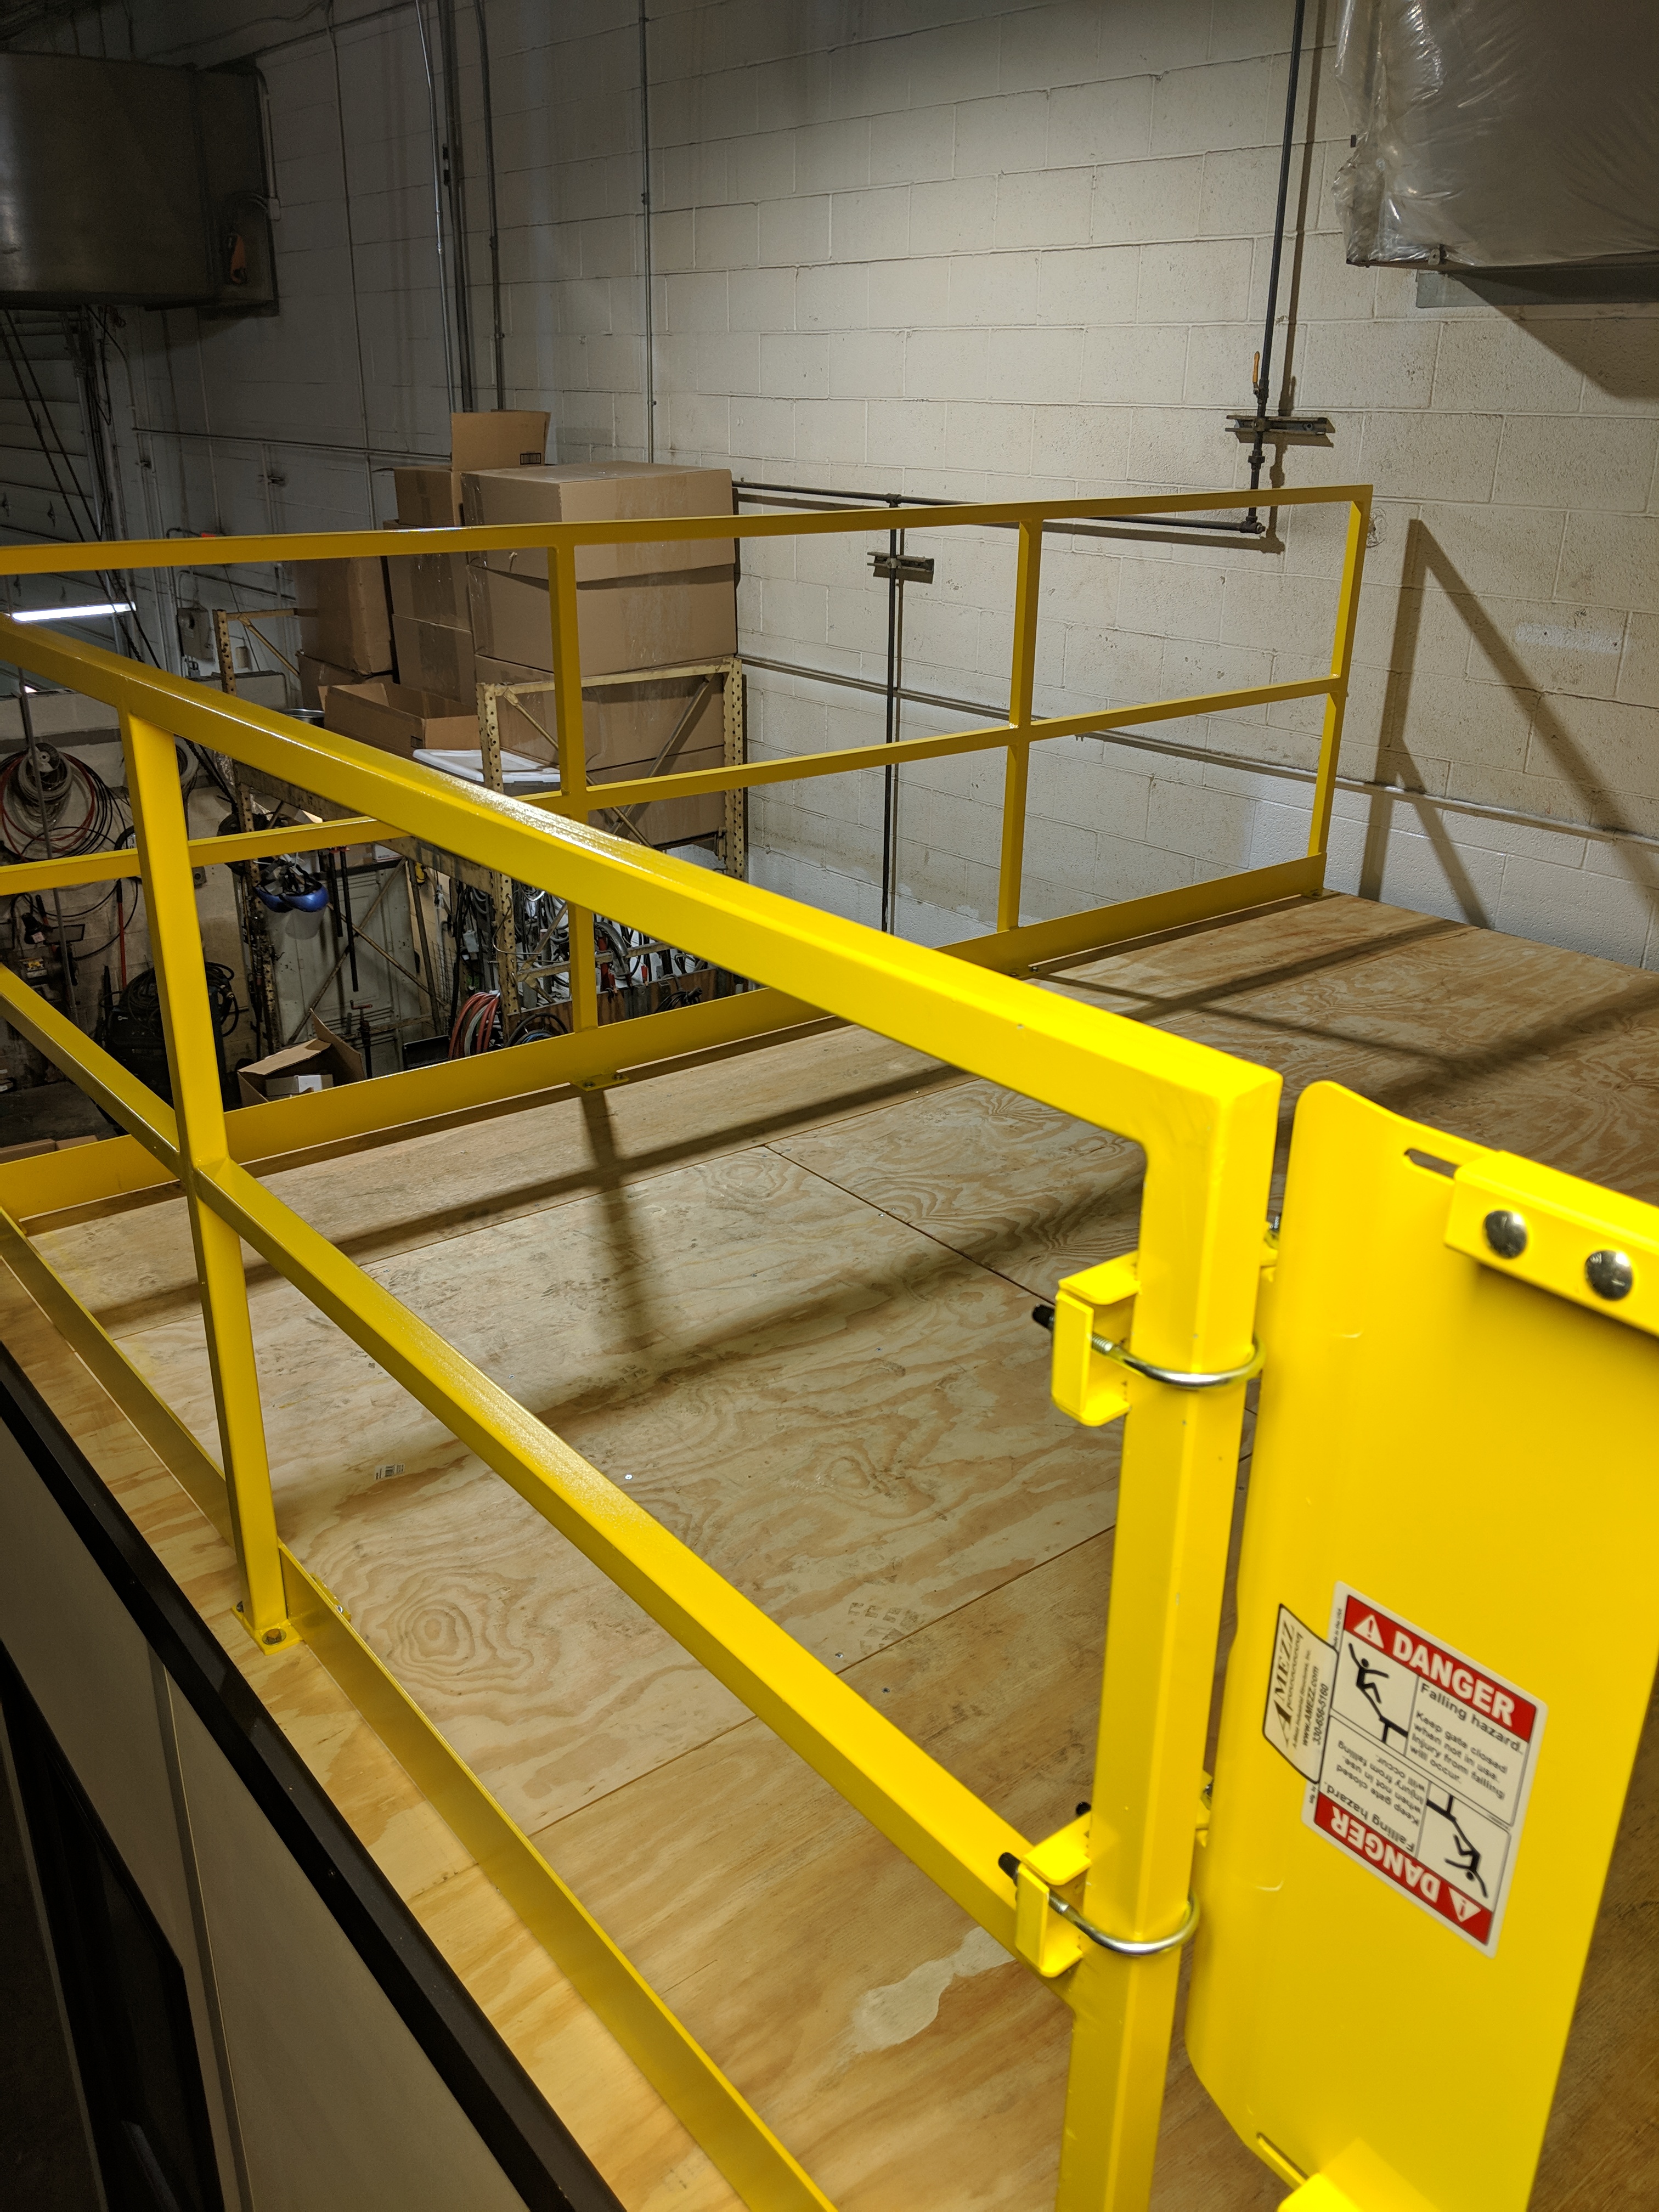
Industrial guardrail protects your equipment from fork traffic

This all could have been avoided if the customer put up a line of industrial guardrail around the perimeter.  Our industrial guardrail is available in single and double rail configurations, and our standard non-liftout system is designed for a 10,000 lb at 4 mph breakthrough.  It’s bolt together design is easy to install and comes with all required hardware, including the concrete anchors. We offer a wide variety of lengths and off-center welded baseplates to configure a layout that will best fit your facility’s layout.  We can even provide you with a heavy duty gate system that can stop a 13,500 lb fork truck moving at 6.5 mph, yet fold out of the wall to allow passage. Next time you’re thinking about putting in a structure in an area with fork traffic, don’t forget about adding guardrail to protect your workers and your equipment.  You might not be as lucky as this customer was.

Using the Roof of a Modular Office for Storage

office with storage above

The main purpose of the roof deck in a modular building is to form a membrane that holds the whole system together. Due to cost considerations, we typically design them with enough load capacity to support the lights and acoustical ceiling.  That doesn’t always have to be the case though. We can also design it so that the roof of your building can be used for light storage. I recently got some photos back on a project where the customer wanted to do just that.

top view

It was a pretty cluttered area, so hopefully the load bearing roof will give them some breathing room.

The customer wanted to put in an office for the maintenance manager and his team in order to cut down on the noise.  The corner of the facility where they were situated was already pretty cluttered and they didn’t want to lose any more space back there, so they came to us in hopes of putting in a modular office with enough load capacity on the roof to use it for long-term light storage.

interior wall with reception window

The sliding reception window allows the employees to easily communicate between offices.

The office was 20′ wide by 12′ deep.  They wanted to break it into two separate 10’x12′ offices, but they wanted to make it easy to communicate between offices, so we put in an internal partition wall with a sliding reception window.  

recessed beam hangers

Modular wall panels with structural connectors and hangers to support the recessed beams.

There were a few things we needed to do in order to support a 100 PSF live load on the deck. We needed to put 10″ c-sections spanning from the front to the back of the building attached to hangers in the ceiling plenum.  To support these c-sections, we used structural panel connectors between our wall panels as opposed to our typical tongue and groove or I-spline connections. While we could have gone with a 2-wall system due to the modular office’s location in the corner, we put a third wall along the back to support the c-sections instead of dropping columns to save the customer a little money as well.  Due to the size of the recessed c-sections we went with 9′ tall panels so the customer could maintain a 8′ clearance height in the room.

beam in the ceiling

A structural c-section was recessed into the ceiling plenum at every panel connection.

There were a few things we needed to do on top of the deck as well to finish it off.  We covered the corrugated roof deck with OSB so that the customer would have a smooth walking surface above.  We also fabricated and installed some surface mounted handrail and kick plate, as well as a spring loaded access gate to keep their workers from falling off the edge when moving around on the roof.  You would also need to put in a staircase to access the system, but the customer told us they were going to take care of their own egress.

looking onto the load bearing roof

The surface mounted handrail will help keep workers safe when moving around on top of the office

The system went together nice and quick.  Mechanical and electrical installation took a little less than a week, and the customer was really pleased with his new office. Now they just need to start moving things to the roof.

Using modular building panels to create a CMM enclosure

Finished CMM enclosure

Modular building panels can be used to provide a cleaner environment for your shop equipment.

CMM, or coordinate measuring machines, are a piece of equipment that uses a physical or laser probe to map out the geography of an object.  They are very precise machines and need to be kept in a clean and often temperature controlled environment. I recently had a customer who found this out the hard way when the dust in the air due to production was messing with his machine, so he contacted us looking for an equipment enclosure.

Using modular building panels, we designed a 16′ deep by 20′ wide four wall enclosure.  Due to the maximum height of the mast on the CMM, the customer needed a lot of available head room in the area, so we stacked panels up to 13′ using the A-wall 300 system, leaving us 12’6″ of available head room under the drop ceiling and recessed lights. The customer wanted a way to easily remove the CMM if he needed to in the future, but didn’t want to put in a large door. In order to facilitate this, we put in a 8′ wide by 9′ high removable panel assembly using a tubular steel “goal post” and some additional trim pieces, so if he did need to move the equipment he would just need to remove the extra trim pieces on the outside and pop put the panels. The customer wanted a lot of windows in the enclosure, and since the A-Wall modular building system’s windows are factory installed right into the panel as a single piece, we were able to put one in every 4′ panel (aside from the one with the HVAC system) that wasn’t facing their wall, including the two removable panels. We also outfitted the room with Flex-4 modular wiring inside the wall panels in order to save the customer money on the electrical installation.

CMM enclosure removable panel opening

The removable panels provide the customer with easy access to the equipment should they need it.

Upon contacting us, the customer was looking for a quick solution.  After receiving the order we were able to send him approval drawings the next day.   He was able to quickly turn around the approved drawings so we were able to ship it out to him in two weeks.  The installation took a two man crew two days to complete. Twenty two days after we received the PO, the customer had this great looking equipment enclosure assisting with the smooth operation of the CMM.

Working around an Obstruction with Modular Wall Panels

Modular building with existing building column in the way

Looking to expand your modular office, but that I-beam is in the way of the wall panels?

One of the greatest advantages of using modular wall panels for your in-plant offices is their ability to easily change and grow as your needs change.  Back in 2010, we provided a customer with a 20’x12’ modular in-plant office with an internal wall, splitting the space into two separate offices.  A few years later they decided to rearrange the wall panels, taking out the dividing wall and creating one large office space.  Earlier this year, the customer contacted us again looking to further expand upon the room, adding an additional 16’ to the system.  This is an easy modification to make.  Typically you would just disassemble the end 12’ wall, add four new 4’ modular wall panels to each of the 20’ long walls, and then close it back off with the existing 12’ end.   But this extension offered a little twist that I thought we could talk about today.  There was an I-beam right where the wall panels would go through.

Using angle and an internal steel stud to tie a modular wall panel to  an I-beam

Conceptual sketch showing how the wall panels would be secured to the I-beam

If the wall panels fall between the flanges, the most cost effective method would be to terminate the wall on both sides of the webbing and secure it to the I-beam using some 1”x6” angle and an internal stud.  This is not the cleanest method though, as the I-beam appears to cut through the wall and typically leaves a gap in the grid ceiling inside the I-beam.

conceptual model of using modular wall panels to box around an obstruction

Conceptual sketch showing how the wall panels can could be used to box out the I-beam

In this particular case the flange of the I-beam lined up with the outer sheet of gyp-board, creating an obstruction.   Because of this we simply boxed around the I-beam with wall panels, closing it off.  While this method requires a bit more in the way of materials, it allows for a very clean and uniform appearance.

modular wall panels boxing out an obstruction

The view from inside the finished modular office extension.

Two Wall and Three Wall In-Plant Offices

two wall modular building system

Two wall in-plant office system utilizing the customer’s existing block walls

Many of the in-plant offices we provide customers are located around the perimeter of their building, and we are often asked about the possibility of utilizing the existing wall.  Depending on the site conditions, a two or three wall system could offer a significant cost savings versus a typical four wall in-plant office.  Today, I’d like to talk a little about how an in-plant office can utilize your existing building walls and some of the factors to consider if a two or three wall modular building system is a good fit for your space.

Panelized building system connecting to existing block wall

By utilizing the customer’s existing block wall, they were able to design a row of offices along the back wall of their facility without needing to reroute their existing lines

One thing to consider when thinking about designing a two or three wall in-plant office is what kind of walls are in place.  If we are going to utilize your existing walls, we are going to need to tie into them in a couple different places.  We will need to attach a piece of channel called a wall start from the floor to the top of the panel, wherever the panel would connect to the building wall.  As we typically use a corrugated roof deck to form the membrane that holds the building together, we will also need to attach an angle along the enclosed length of the wall at the panel height.  Because of this, the walls need to be substantial enough to be tied into.  Block, stud and gypsum, or concrete walls are great.  Steel skinned buildings are not.  The wall should also be even across the locations where the building would tie in.  If there’s a significant gap, such as in some brick walls, you’ll need to add some flashing to seal off the gaps into the building.  In some buildings there has been a wall built in front of the steel skin wall.  Remember to make sure the height of the front wall is taller than the height of the building panels.

Modular wall system above and below a mezzanine

A four wall in-plant office above the mezzanine with a two wall modular building system below the deck

Recently, we have done a number of mezzanine supported in-plant offices along the perimeters of the customers’ buildings, and are often asked if we could utilize the existing building walls.  The issue here, though, is that even though you might not realize it, there is some movement on the platform different from the existing building wall.  These forces would weaken the structural integrity of the building system.  At the ground level below the mezzanine, we can potentially utilize the existing building walls, but we would need to go with a four wall system on top of the platform.

two wall building system below a mezzanine

This two wall modular building system allowed our customer to separate production from the employee entrance.

A two wall modular building system offers a number of advantages, such as the ability to utilize existing windows/wiring, as well as a cost savings from using fewer materials and labor.  If you are looking at putting in some in-plant offices, it might be worth your while to consider going with a two or three wall building system.

Mezzanine Supported Modular Office

Mezzanine with modular office above

Mezzanine supported modular office with a two-wall modular building below

Whether you’re running out of room on the plant floor or need to oversee production, mezzanines are commonly employed to support and elevate modular buildings.  Recently we received some great photos back on a project we completed last month for a mezzanine supported modular office that I thought you might like to see.  The customer was located right here in Northeast Ohio.  They were putting in a new line on the plant floor and needed to tear down some offices they had in order to make room.   There wasn’t enough space to relocate the offices elsewhere on the plant floor, so they decided to utilize some of their unused overhead space.

Side view of mezzanine and modular office.

A 9’ high mezzanine supported modular office with an 8’ high modular wall system below.

When thinking on putting in a mezzanine supported modular building, it’s important to consider just how much space is available.  Remember that with typical column spans in low seismic areas, you’ll probably lose 1’3” to 1’5” for the mezzanine itself.  If you plan on having people move through the area you will need to maintain a minimum of 7’ for clearance.  The modular building panels are typically 8’ or 9’ tall, and unless you are planning on supporting them by the structure above, you will probably want about a foot more in order to install the roof deck to the panels which helps form the membrane that holds the system together.   In this particular case the customer’s mezzanine had a clearance height of 8’7” with a 9’10” top of deck.  This provided us enough room to install a modular office above (9’ tall panels, 9’3-1/8” overall height, 8’6” clearance height) and an 8’ high (8’3-1/8” overall with a 7’6” clear ceiling height) modular wall system below.

inside modular building

Four wall modular office above the mezzanine with customer provided/ installed floor covering

While designing these mezzanine supported modular offices, we’re often asked if we can utilize the adjacent existing walls.  While this is commonly done on the main floor of a facility, unfortunately we cannot do this up on top of the mezzanine deck.   There will always be some movement and vibrations on top of an elevated structure and because of this the structure would need to be a four wall system and not tie into the adjacent walls.  In this particular care, we put in a four wall system above the mezzanine deck as well as a two wall system below the deck to create an enclosed pass way between the production floor, the front offices beyond the cinder block wall, and the production floor entrance way to the outside.

inside view of two wall modular wall system

Two wall modular wall system below the mezzanine

It took our installers 6 work days to unload and install (both mechanical and electrical) the 24’x10’ mezzanine, the 24’x10’ 4-wall modular office above, and the 9’x22’9” two wall modular wall system below, and we had yet another very happy customer.

Removable Access Panel in a Modular Building Equipment Enclosure

cmm room equipment enclosure

New CMM room with removable panel above the door

A very common application for modular buildings is as an equipment enclosure.  The customer is trying to cordon off an area on their production floor to encapsulate a certain process.   Sometimes they are trying to isolate the sound it produces.  Sometimes they are trying to isolate it from a dusty environment.  A lot of these machines, such as CMM machines, won’t fit through a 6’8” or 7’ high doorway.  Once the equipment is in place it usually stays there for many years, but customers often want the ability to get it in and out of the room on rare occasions should the need arise without having to disassemble a good chunk of the building.  For a doorway that will only be used once in a blue moon, it’s rarely cost effective to order a custom swing door, or put in an additional canister style door for equipment access.  A much more cost effective method that we’ve found is to put in a removable access panel.

Removable panel on a modular building

Removable panel above a 6′ x 8′ doorway

Recently, we provided a customer with a modular building to use as an equipment enclosure for their new CMM equipment.  On a day to day basis, a 6’ wide x 6’8” high double door would be more than sufficient for them, but they wanted to be able to occasionally pass something larger through the doorway.   If they were going to pass taller materials through the door way more regularly we could have ordered in a special 8’ high double door, but because they only needed once in a blue moon access we were able save them several hundred dollars in material by putting in a removable panel section above their doorway.  

removable panel drawing

Adding a removable panel is a fairly simple thing to do.  The panels were cut in the factory to accommodate a 6’ wide x 8’ high opening.  We took an additional panel section to cover the gap above the 6’ x 6’8” door and framed it in using the channel for the door frame and some additional “h” cap trim pieces we normally use along the top of the panels.  We also installed “h” cap to the building panels at the opening above the door and fastened the removable panel to the opening.  This sealed off the seams between the panels.  Now when the customer needs that little bit of extra space, all they need to do is remove the screws connecting the panel to the building, allowing them to fit their larger equipment through.


Visiting an Old Mezzanine Supported Modular Office

mezzainine supported modular office from 1997

After almost 20 years of service this modular office is holding up great

Occasionally, I’m asked about how well our modular offices hold up over the years if they are designed so that they can be reconfigured in the future as your needs change.  Surely, after general wear and tear they will want to just order a new building anyway, no?   Well, I recently had the opportunity to visit an old customer of ours.  Over the years, we’ve provided them with a number of mezzanines, catwalks, and modular offices.  Several of the modular offices have been disassembled, modified, and reinstalled in different locations.  While there, I got an opportunity to look at this old tank platform mezzanine and A-wall 300 modular office we provided them with back in 1997.  The steel decking has started to bend up a little at the seam in a couple areas, but after almost twenty years of service the mezzanine and modular office were in excellent condition.  If the customer wanted to, it would still be a simple task to disassemble the modular office and put it up again in a new location, possibly with a few modifications.  The components are all still compatible with what we provide today.  The only design change is that the I-splines used to connect the panels in the A-wall 300 modular building system are now typically painted to match the panels as opposed to the same color as the framing on the windows and doors.  So yes, these modular buildings are built to last.


Putting a Window and a Through the Wall Air Conditioner in the Same Panel of a Modular Building

Non progressive modular building system with a through the wall HVAC

The existing modular building with a through the wall HVAC, before modifications.


Modular building systems are designed to be relatively easy to modify should the need arise.  This past summer we put in this 10′ by 11′ odd shaped modular building to serve as a control booth at a steel plant here in Ohio.  All the panels had a window in them, aside from a small panel on the end which held a through the wall heat/cool air conditioner. After everything was installed, the workers who operate the control booth determined that they wanted to add a window to that panel as well, and move the air conditioner above the window.  Unfortunately, modular wall panels are not generally designed to support a through the wall air conditioner when placed above a window.   We could, however, modify it to put the air conditioner below the window.

non progressive modular wall system dissassembly

Removing the modular building wall panel to make the modifications

Depending on the modular building system used, there are a couple of different ways to go about making the modifications.  In this particular case, with it being a non-progressive modular building system with steel skinned panels, we reused the existing materials, and made the modification directly to the panel.  We shipped the customer a new custom width window to fit inside the narrow panel, and some new trim for the framed HVAC opening as the customer decided to put in a heavier duty air conditioner while we were doing the modifications.  All the other components were reused from the existing.

Modular wall system with window and HVAC in the same panel

After the modifications the wall panel now has a new window and HVAC below


The modifications were fairly quick and easy.  When the installers arrived, they disassembled that section of the building to remove the panel in question.  They then cut the modular building panel to fit the new window and air conditioner.  Afterwards, it was simply a case of putting it back together.  All said and done, it took two guys about half a day to complete the modifications.


Using Modular Building Materials to Build a Control Room in a Steel Plant

Steel plant control room constructed of non-progressive modular building system

The shiny new control room made using modular building materials.

We recently received some photos back of a modular building we provided a customer that I thought would be nice to share with you.  The customer has a steel plant here in Ohio, and was looking to replace and expand upon an existing steel constructed control room pulpit on their mill floor.

Looking inside the odd shaped modular building control booth

The irregular shaped control panel dictated the pentagonal shape of the building.

The new control room was roughly 10’ long x 11’ wide x 9’ high, but due to the shape of one of their existing control panels, the room needed to be pentagonal with a diagonal wall.  The wall panels were made of 24 ga painted steel with a 3” thick polystyrene core.  The customer wanted the building to stand out and requested we paint everything safety yellow.

For this project we used a more traditional progressive building system where the wall panels were separated by wiring chases as opposed to our non-progressive A-wall system. While this system does not offer the uniform sound barrier that the A-wall system offers and has more pieces required to install, it did offer them some advantages.  Due to the overall design of this project, it was less expensive for the customer. If something were to happen to one of the panels that would require it to be replaced, they would not need to disassemble as much to replace it as the progressive system allows them to remove an individual panel without needing to start at the corner.  The customer also has several other control rooms in their facility of this same design.  They’re very pleased with them and wanted to maintain compatibility through their plant.

Exposed recessed beam in ceiling plenum of modular building control room

With the control room ready for electrical installation, you can clearly see the beam used in the ceiling plenum to provide the customer with a 25 PSF “walking load” for the roof deck.

Using a steel beam in the ceiling plenum, and some heavier gage reinforced wiring chases underneath, we were able to also provide the customer with a 25 PSF “walking load” capacity for their roof deck.  For one more special little touch, we were able to provide the customer with some cabinets that would fit above their windows to store their notebooks and such.

bright yellow steel mill control booth

The bright safety yellow control room really stands out.

Their existing control room was torn down on Saturday, and the new modular building was put up on Sunday, ready for their electricians to wire in the control panels.  The customer was really pleased with how quickly the transition went.