Relocating a Modular Office

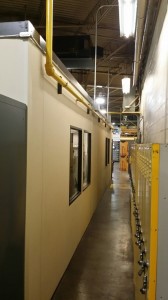
A-Wall 200 modular in-plant office.  Still in great shape after one reconfiguration and 6+ years of use.

A-Wall 200 modular in-plant office. Still in great shape after one reconfiguration and 6+ years of use.

One of the major advantages of modular building systems over traditional construction is their ability to adapt to your changing needs.  Let’s take this project for example.
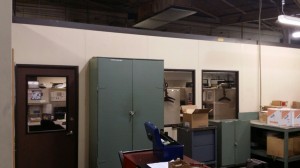
6+ year old A-Wall 200 modular office.  Here, the first reconfiguration moved the door from the other side of the building.

6+ year old modular office after the first reconfiguration moving the door from the other side of the building.

Back in early 2008, we provided the customer with a 24’ wide x 42’ long x 9’ high modular in-plant office.  The original layout had three doors. There were two on one 24’ end, and one on the other.  A few years later as their layout around the building was changing, the 24’ long wall with two doors was going to get blocked off.   By disassembling a portion of the building and swapping 4’ panels with one another, the customer was able to relocate the doors to the 42’ long walls.

Over the years the customer’s needs continued to change.   They recently decided to remove the in-plant office.   If this was built out of traditional construction, the office space would be torn down and that would be the
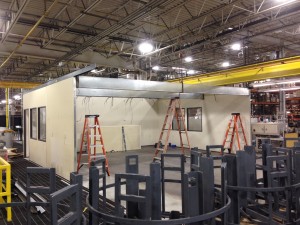
Installing the reconfigured in-plant office in its new location. Recessed beams used to support the roof deck due to the long spans.

Installing the reconfigured in-plant office in its new location. Recessed beams used to support the roof deck due to the long spans.

end of it.  However, as this was modular construction, the customer found another spot in their plant where the building could be relocated in a slightly smaller (24’ wide x 34’ long) form.

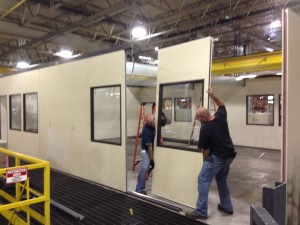
We were able to reuse almost all of the materials when we relocated it.  We replaced the base track, as well as the ceiling grid and tiles.  The base track is very difficult to remove without creating kinks in the channel.   As the panels fit very snuggly into new base track, any kink in the track can make it almost impossible to fit.  Likewise, the material cost to replace the ceiling grid and tiles is usually significantly less than the additional labor to carefully disassemble the ceiling for reuse.

Relocating the modular office panels

Relocating the modular office panels

There were some additional considerations that went into the reconfiguration to maximize the materials we could reuse.  On the A-Wall building systems with a non-load bearing roof, we can span the roof deck a maximum 20’.  In the original 24’x42’ layout, we used a couple of 24’ long recessed beams to break the spans approximately into thirds.  By maintaining the 24’ width and by making sure that none of the spans between beams grew, we were able to reuse the beams and roof deck without needing to order any additional material.

The modular wall system’s ability to be rearranged and reconfigured for a new application, or disassembled and re-installed in a new location, is one of this customer’s favorite features.  They’ve purchased a number of modular buildings from us over the years and most of them have been rearranged or relocated at least once.

Installation of a Parapet Crossover Fixed Ladder

By Brett

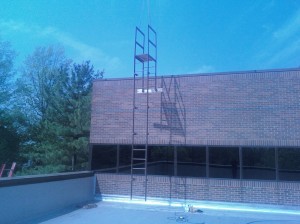
parapet crossover ladder suspended by crane

Installation of parapet crossover fixed ladder by crane

We recently completed fabrication and installation of some hard to reach roof ladders for a customer in northeast Ohio. They were looking to access their upper roof level from their lower roof. Before contacting A-Mezz, if they were on the lower roof and wanted to access the upper roof, they needed to climb back down the roof hatch ladder, walk over to the taller building section and take an elevator to the top floor of that building. They then had to climb back up another ladder through a roof hatch. This was entirely too time consuming and a big efficiency drain.

We arrived on site and after reviewing the site conditions it was decided that an uncaged ladder was the best solution to their roof access problems.

There were a couple of things that we had to work around at the site. The first item we had to work around was that the upper most roof had a parapet wall on top.

According to the ANSI Standard A14.3-2002, the first rung of a climb has to be 14” or less from ground level (floor or roof). As the parapet was over 14” high, a crossover platform was required to allow for rungs on the rear of the parapet.

The second item we had to work around was the row of windows that went around the building. We needed to make sure that the ladder brackets cleared the window span for installation so we made sure to attach directly above and below the windows. The ladder was also painted a brown color to help it blend in with the building, making it less noticeable from the parking lot and street.

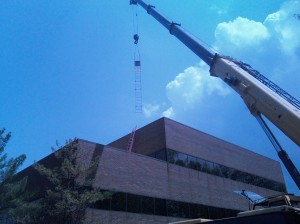
Crane lifting fixed ladder for installation

Lifting the fixed ladder into place

The last item we had to work around was the install location. As we were going from one roof to another roof, it was impossible to use lift equipment like scissor lifts and fork lifts to safely get the parapet ladder into place for installation. As the overhead was clear and there was a concrete pad nearby, we brought in a crane for the heavy lifting.

Actual installation time for the parapet crossover ladder was just a couple of hours, but the planning and attention to all the little details on site are what made the process go so smoothly.