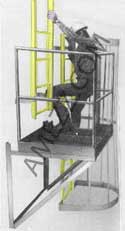
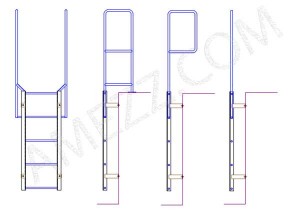
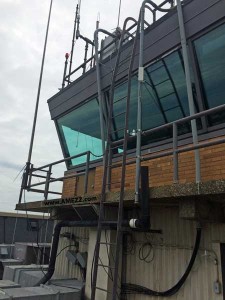
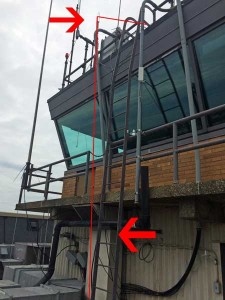
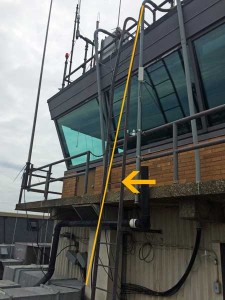
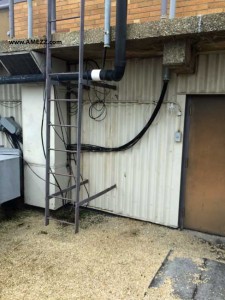
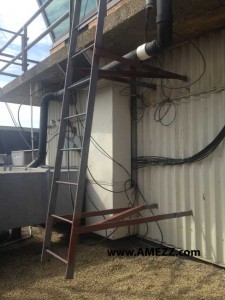
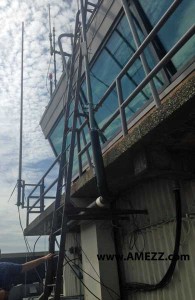
Extension ladder bracket in use

Extension Ladder Brackets Help Students Train

We want to highlight a project we completed for a local trade school. We installed our permanently mounted extension ladder brackets in their HVAC classroom. The brackets provide a safe and controlled environment for students to practice setting up and climbing ladders.
HVAC trade classroom with A-Mezz extension ladder brackets

HVAC trade classroom with A-Mezz extension ladder brackets

Many students in apprenticeship positions are knowledgeable about HVAC installation and maintenance, but students can often lack some overlooked skills like using an extension ladder safely. Our brackets allow students to practice these skills in a controlled environment before they encounter them in the field.
A-Mezz Extension ladder support bracket

Installed A-Mezz Extension Ladder Support Brackets below removable handrails

Each bracket features an adjustable tray for the extension ladder to sit in. Tie-off points on the brackets ensure the ladder is secure while in use. This eliminates sliding, falling, or unauthorized removal of the ladder while someone is on the roof. Additionally, the tray can be leveled when used on sloped surfaces.
The aluminum construction ensures that the brackets will remain in excellent condition even when exposed to weather.
These brackets are designed with options for mounting to a roof with or without gutters, or for wall mounting, eliminating the need for roof penetrations.
In addition to providing a safe training environment, our extension ladder mounting brackets can also be used to provide a designated location for roof access. This can help to prevent unwanted climbers and reduce the risk of damage to the roof.
If you are interested in learning more about our permanently mounted extension ladder brackets, please contact us at A-Mezz Industrial.

Inspection Platform With Custom Support Columns

Recently, a customer contacted us with a problem. They needed a safe way to inspect and clear their conveyor chute. The plan was to fabricate an inspection platform, enclosed with railing, with a caged ladder for access. The top of the ladder would require a self-closing gate in order to meet OSHA requirements for guarding at ladder way openings, as the ladder was not offset from the platform. 

Designing the Inspection Platform

As we started with concept drawings, we realized that the traditional fabrication of a post in each corner would not work with their application. The leading edge of the inspection platform extended into the aisle-way and a post in that corner would encroach on forklift traffic. 

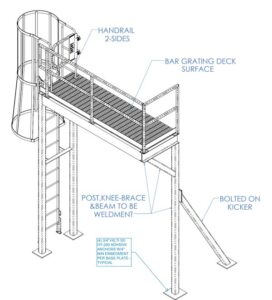
Inspection Platform ISO Drawing

Drawing of inspection platform, ladder and MLG ladder safety gate

Upon consulting our PE, it was decided that we could use a short knee brace at the corner in question, and utilize a bolt-on kicker off the rear post for reinforcement. The kicker was designed to nest underneath their existing equipment. 

As the installation location is open to the elements, and there is a high likelihood of debris, the inspection platform utilizes an open bar grating deck. This allows dirt and water to fall through the treads instead of collecting on top of a solid surface deck. 

Platform Shipping and Installation

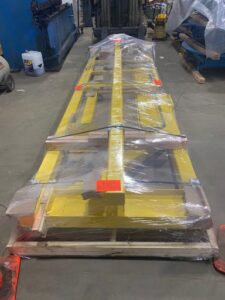
Photo of flat packed inspection platform

Inspection platform packed knocked down for shipping cost savings

The inspection platform shipped knocked down for freight savings. A smaller load takes up less space on a truck and costs less to ship. It also allows for smaller, lighter pieces that are more easily maneuvered at tough to access locations. Installation required basic tools and no hot permit was required.

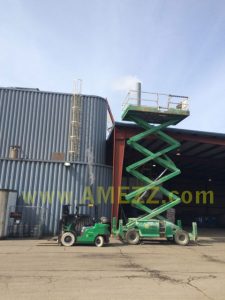
All components are designed for bolt together installation with basic hand tools. This eliminates the need for field welding, hot permits, and additional finish touchup around weld areas. Installation for the platform and ladder requires two men and one day. As the height is under 12 ft high, a forklift and A frame ladders or a scissor lift are all that are required for install. 

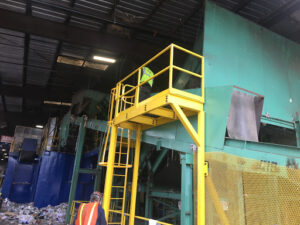
Photo of inspection platform installed with ladder

Inspection platform installed with ladder and MLG ladder safety gate

With the new platform in place, this customer can now safely inspect and perform maintenance on their chute at any time without impeding regular business activity in the area. Fabrication lead time for the platform, ladder, and gate was quoted at 5-7 weeks after approved drawings were returned.  The material was shipped at right on time at 5 weeks. Pricing was also what the original estimate was. On time. On budget. Contact A-Mezz for help with your next project. 

Roof Stack Access with A-Mezz Catwalks and Ladders

A company contacted us because they needed safe roof stack access. The EPA required them  to do regular tests on their stacks to comply with the Clean Air Act, but they had no permanent, safe means of access.


When we went out to the site for a preliminary review, accessing their stack was no easy feat. We needed to use a lower extension ladder to reach the lowest roof and bring up another extension ladder to use on the lower roof to access the middle roof.

"<yoastmark

To make matters worse, once we were on the middle roof, it wasn’t made with regular foot traffic in mind. We had to constantly be mindful of our step. Each metal roof panel groaned and flexed with each precarious step we took. Our goal was to keep the solution simple. It gets really easy to over-engineer a solution, but all that does is increase costs while not always providing a better product for the conditions.

What Were Our Options?

Our first thought was to have a fixed ladder extend from the lower roof to the middle roof, similar to their existing lower to upper caged ladder. We decided against that for a couple of reasons.  The first was that there was no back wall to mount a walk-thru ladder. This would make us need to increase materials and engineering time, creating a custom solution which would just add costs to the project. Another option was for mounting a ladder on the same wall as their existing ladder and having it exit onto the side. We chose against this because the exit location was far from the stack needing access and that would have greatly increased the size of the catwalk needed, thus increasing costs.

Fixed ladder from upper roof to middle roof for roof stack access

Fixed ladder from upper roof to middle roof for roof stack access

An Economical Solution

We decided that the best solution was to utilize their existing ladder from the lower to upper roof. We then would fabricate a ladder to access the mid roof from the upper roof, as they would already have a need to be on the upper roof to inspect stacks there. The upper roof had a low parapet that the client didn’t want people stepping on. Our fixed ladder had a step-across platform incorporated into it so their workers could step onto that instead of the parapet, allowing for safer access to the ladder while protecting the parapet flashing.

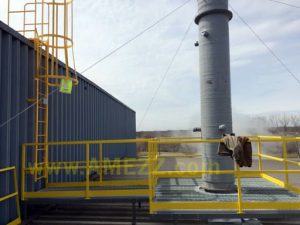
Our installed roof stack ladder and catwalk provides safe access under customer's budget

Our installed roof stack ladder and catwalk provides safe access under customer’s budget

We also fabricated a short catwalk and platform surrounding their stack. We designed the framing for the platform to mount onto their existing purlins with elongated supports as the platform extended to compensate for the roof slope. This allowed for a level, safe platform for their testing team to work from, eliminating the fear of slips in inclimate weather that can come from an iced up, sloped catwalk system. 

A Quick, Permanent Roof Stack Access Solution – Under Budget

Ultimately, we relocated the access ladder from original plans which allowed us to utilize our mostly standard ladder design. The location change also allowed for a smaller platform which allowed us to complete the project under the customer’s budget. This project took 9 weeks from the date we got approval drawings in the customer’s hands to the completion of installation.

OSHA 1910.28 Ladder Change is Live

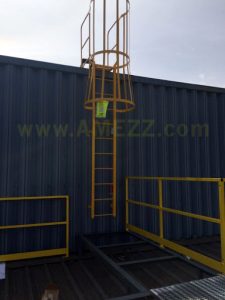
OSHA’s November 19, 2018 fixed ladder changeover has officially come on their standard 1910.28. What do you need to know to ensure you are meeting OSHA fall protection standards for your fixed laddersOSHA 1910.28 Ladder ChangeIf you have an existing fixed ladder more that 24’h that was installed before November 19, 2018, it should already have a cage on it.  The previous OSHA standard 1910.27 required cages on all ladders over 20’h. You have until November 18th, 2036 to retrofit the caged ladder with a personal fall arrest system. Until then, you are grandfathered in under the OSHA standard that was in place at the time of install. If your climb is 24’ or less, you do not need to retrofit the ladder at any time with a personal fall arrest system.

A-Mezz Personal Fall Arrest System Meets OSHA 1910.28

A-Mezz Personal Fall Arrest System Meets OSHA 1910.28

Note that if you modify or replace an existing ladder (over 24 feet high) that was installed before November 18, 2018, you will need to retrofit the ladder with the personal fall arrest system at that time. Replaced ladder sections are not grandfathered in under the prior OSHA standards – 1910.27.

Any new ladders over 24’h will need to be installed with a personal fall arrest system. You can still have a cage installed on the ladder “provided it does not interfere with the operation of the system” (1910.28(b)(9)(iv)).

These changes pertain to “fixed ladders that extend more than 24 feet (7.3 m) above a lower level.” The big change for lower ladders is that a fall arrest system is now not required until you are over 24 feet, whereas the code used to require cages or personal fall arrest systems for climbs over 20’ (1910.27(d)(1)(ii)).

You can also now run your ladders a maximum 150’ in a single climb if using a personal fall arrest system or ladder safety system (1910.28(b)(9)(ii)(B)).

The previous OSHA fixed ladder standard had stipulated a 30’ maximum climb before landing platforms were used to break your climb up into shorter climbs. I.e. before November 18th, 2018, a 150 foot climb would require five separate caged ladders and four separate landing platforms. OSHA 1910.28 will let you now have just one ladder with a personal fall arrest system, cutting fabrication costs, delivery costs, and installation costs.

Please contact us at A-Mezz Industrial Structures to get more information on our fixed ladders, our ladder cages, and our ladder personal fall arrest systems.


A-Mezz Rigid Track Personal Fall Arrest System

Personal fall arrest systems are causing cages to go out of vogue with OSHA. As of November 2018 they will not count as fall protection on new fixed ladders and they will only count as fall protection on existing ladders until November of 2036. Note that if an existing ladder is modified at anytime, that modified section of ladder must be retrofitted with a personal fall arrest system at that time. 

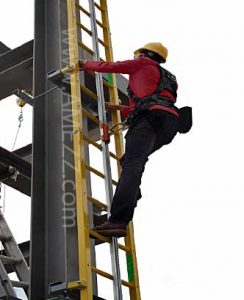
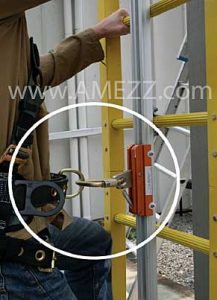
Personal fall arrest system with body harness and trolley

Personal fall arrest system in use with body harness and trolley

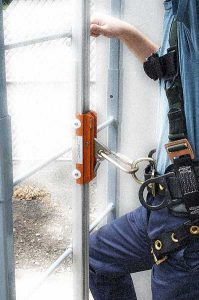
We now carry a rigid fall arrest track that, when used in conjunction with a trolley and body harness, will meet OSHA’s new requirements for fall protection. The rigid track and trolley allow the climber to move freely up and down the track without needing to push, pull, or even touch any part of the fall arrest system.

Should an accident happen, your foot slips or you fall, the trolley on the fall arrest system will automatically lock onto the rigid rail, stopping your fall.

Tracks are available in 316 Stainless Steel or Aluminum with an anodized finish. The trolleys are designed for a single user and have a capacity of 310 lbs. Note: Two users are permitted to use a single track when used for rescue purposes, but never the same trolley. With that in mind, we suggest the single track and two harnesses and trolleys.

One track/trolley may get you by for most things, but if you ever need to have more than one person on the roof at the same time you will need to have a harness and trolley for each climber. If you do not, the first climber has to get to the roof, remove the trolley and harness, lower it by rope to the lower person who then has to put on the harness and climb up. Likewise, when work is done, one person has to climb down with the harness and trolley and then remove it, tie it to a rope for the upper climber to pull up, put on the harness and climb down… It doesn’t make much sense to us either.

Close up view of A-Mezz personal fall arrest systems utilizing rigid track.

Close up view of A-Mezz personal fall arrest systems utilizing rigid track.

The rigid tracks are installed in the middle of the climbing side of the ladder rungs. The fall arrest system clamps around the ladder rung every 4’ to 6’ to secure and can have multiple pieces of rigid track spliced together to accommodate long climbs without requiring a single long rail to be shipped, which saves on shipping costs. Often the increased cost of the system is offset almost entirely by the fact that the ladder does not need to have a cage anymore. Cages are costly to manufacture and especially to ship. Taking up 4’x4’x34’ of space on a truck isn’t cheap. We have seen some freight costs come back almost 1/7th what they were compared to caged ladders.


A-Mezz Ladder Install in Muddy Conditions

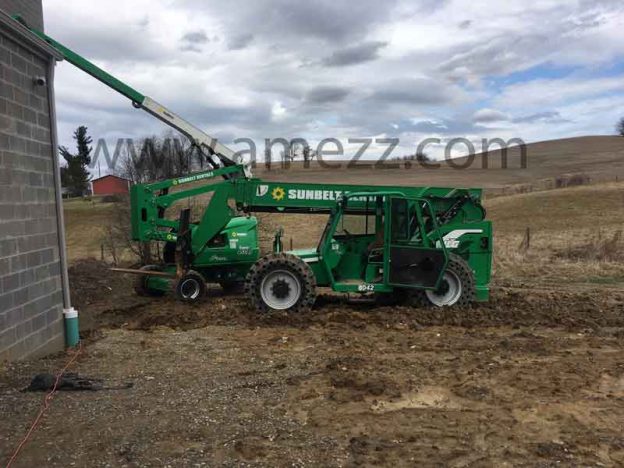
Springtime Muddy Ladder Installation

Ahh… Spring time in Ohio. The flowers, birds, oh and MUD.

A-Mezz Ladder Install in Muddy Conditions

A-Mezz Ladder Install in Muddy Conditions

We got a call from a builder with with a newly constructed structure – so new that there was no paved access yet – and they needed a ladder to gain access to their HVAC rooftop units. The building height was over 30’ and we had some options on how to access the roof based on OSHA’s new regulations.

The first option was a straight, uncaged ladder 35’ high with a personal fall protection cable. That is the new OSHA requirement on all climbs over 24’. The pros of the cable/track systems are that the climber wears a harness and clips onto the fall arrest system so that if he falls, the system stops his fall. The downside is those systems require the climber to have a harness and proper equipment to utilize the cable/track.

For this site the customer chose to go with the second option. We used a lower, uncaged ladder to get them up to a mid landing under 20’h. Then we used a second ladder with cage to climb from the intermediate landing to the upper roof. This setup was slightly more expensive up front but did not require the purchase of additional harnesses, trolleys and maintenance that the personal fall arrest systems required. Additionally, the cage is always there. This provides a safety benefit always, whereas the personal fall arrest systems only provide a safety benefit if the climber is wearing a harness and has the proper equipment. By utilizing the intermediate platform, no climb between platforms is over 24’ so the customer will not have to retrofit their ladders with personal fall arrest systems in 18 years when OSHA’s grandfather rules expire for existing ladder systems.

We had to hold off on install for a couple weeks as the ground thawed early in Ohio and there was way too much mud for our equipment to get to the install location. Luckily we caught a break and a few dry sunny days slightly helped dry out the site – being Ohio, if we didn’t get out to the site when we did, the spring rains could have pushed things off for months until things dried up.

Trying not to bury our axels in the mud, we got the upper ladder into place and worked down from there.

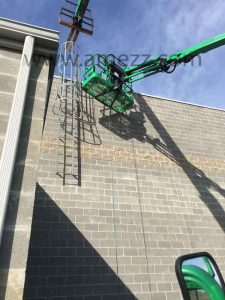
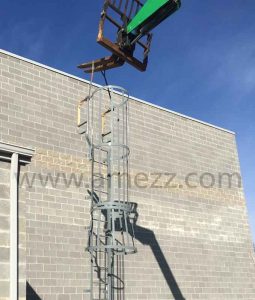
Upper Caged Ladder Being Lifted into Position

Upper Caged Ladder Being Lifted into Position

We fabricated the upper ladder with our self support walk-through handrail because the wall included a short parapet and we didn’t want to have the ladder setting on the metal capping.

Self supported walk-through handrail detail

Self supported walk-through handrail detail

On the lower ladder we included our lockable rung door so that unauthorized people could not climb the ladder.

Completed Installation of Ladder System

Completed Installation of Ladder System

With a crew of two men and one morning, the ladder system was installed (despite the mud) and the customer has safe, OSHA and ANSI compliant access to their roof. A-Mezz took care of everything from design, detail, fabrication and installation and we were able to educate the customer on all of their options and costs. The project was done on time for the amount budgeted.

Catwalk Bridges Can Save Space and Improve Efficiency

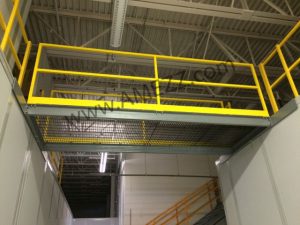
Recently we’ve been out to a local shop for a lot of projects. This time we were called to supply some catwalk bridges. This helps them better utilize their existing space by gaining extra storage and workstation space from the areas they already had. They have several buildings in their facility that were capable of housing light storage on top of them. Ordinarily, the easiest way to access these spaces is through a pre-engineered steel staircase. The problem you run into when you have many buildings in relatively close vicinity to each other is that floor space is a premium; you can’t afford to block off aisle ways with stairs, and even if you have the space to accommodate multiple stairs to access multiple buildings, it is not very efficient having to run up and down stairs from one structure to go to another.

One stair was put in place to access a central building and then a couple of catwalk bridges were fabricated and installed to access the ancillary modular buildings. The catwalk bridges were fabricated so they could be lifted into place with a forklift truck. This allowed for quick, easy installation. This also allowed the customer to remove them relatively quickly should they need the additional vertical clearance to bring larger machinery through their aisles.

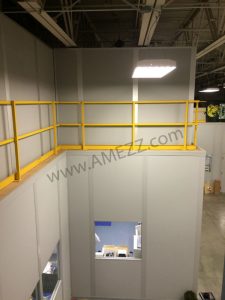
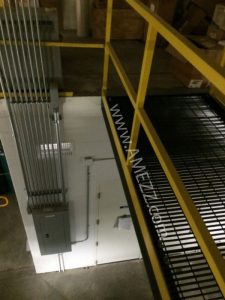
Catwalk bridges between block wall and modular building

Catwalk bridges between block wall and modular building

Attachment to their existing cinder block structure was easy, but mounting to their modular buildings required some extra consideration. Modular buildings are weakest at the panel locations. We supplied angle so the customer could span the angle from multiple posts on the building and then fasten the bridge to the angle. This distributed the load of the bridges across two sturdy posts per side instead of hitting a potentially crushable panel.  The catwalk bridges were not going to be centered directly over their panels so the angle was sent extra-long to allow flexibility in their bridge locations.

The customer now has access to multiple interior building tops for additional workspace and storage, and hasn’t sacrificed much room on their floor now that they utilized crossover bridges to open up their previously unusable  spaces.

OSHA Changes Ladder Fall Protection Requirements (OSHA 1910.28)

OSHA is on fire! Breaking news! WOW!

Ok now that we’ve got that out of our system… We don’t usually have many changes out there when it comes to OSHA standards but there are some industry changing updates coming that will change a lot of things.

Cages will not be required on fixed ladders after mid November of 2018.

Caged ladders to be phased out for other fall protection options

Caged ladders to be phased out for other fall protection options in 2018

Currently, under OSHA standard 1910.27 cages are required on ladders where the climbs are over 20’h. In OSHA’s new standard (OSHA standard 1910.28) taking effect 11/19/2018, ladders will not be required to have fall protection until their height is over 24’ (24’-0-1/4” requires fall protection). OSHA will also be requiring ladders installed after 11/18/2018 to have fall protection in the form of a personal fall arrest system or ladder safety system (not a cage). If you have cages now, don’t worry, you will be grandfathered in for twenty years.

So, why the change? OSHA is aligning the fixed ladder standard to be more in line with the ANSI standard A14.3, which in 1979 changed its fall protection height requirement from 20’ to 24’.

Why are they telling us now when the rule won’t go into effect until 11/19/2018? OSHA wants to give the industry time to update products and procedures before they go fine crazy. You CAN now follow the new OSHA rule 1910.28 even though it is not in effect yet. You would not be meeting the current OSHA standard, but you would be in compliance with the future OSHA standard. OSHA would consider this a “de minimis violation”. De minimis violations are violations of standards which have no direct or immediate relationship to safety or health, and do not result in a citation, or penalty and need not be abated. 

How does this help you? Well, if your floor to floor height is between 20’ and 24’, you will no longer need to have a cage on your ladder. First off, this can save you LOTS of money. Why?  Not only is it easier to fabricate an uncaged ladder, but there is less steel involved in making the ladder, and also, due to the size a caged ladder takes up on a truck compared to an uncaged ladder, caged ladders can cost 2-4 times as much to ship than their uncaged counterparts.  Another advantage of losing the cage is that you decrease its visibility from the roadside. Without the large cage the ladder is tougher to see from a distance, increasing your buildings visual appeal as well as decreasing the chance that kids looking for a cool place to skateboard, copper thieves, and other people you don’t want on your roof will see the ladder as they pass.

All this being said, when OSHA’s standard mandated cages on climbs over 20’, A-Mezz still offered cages on ladders that only had a climb of 10’ or so and we will continue to offer cages for customers who prefer the added safety of a cage for those shorter climbs. We have gotten feedback from many customers who prefer having a ladder cage because that safety barrier is always in place. You can’t forget to bring a harness with a cage so safety is increased. It is the same argument that makes ladder safety gates so popular and efficient as opposed to ladder chains. Chains only work if the person before you closed them. Ladder safety gates are always in place, always swing closed and always protect you. The same goes for a fixed ladder cage which adds some protection for climbers regardless of whether they have a ladder harness or not.

Fixed Ladder Installation – the process from start to finish

A customer called asking for a safe and secure means of accessing their roof and us to do a fixed ladder installation. They have a building that has multiple tenants and didn’t want to have to go through the tenants’ space every time roof access was needed, so an interior ladder and roof hatch combination was off the table. This happens more often than not either because they don’t have a good location inside to mount the ladder or they don’t want to make a hole in their roof.

We went out for a preliminary site visit to verify what the job would entail. The location that was chosen to mount that ladder at was flat from floor to roof. There were no gutters so we would not have to worry about having to either start and stop the gutter and add another down spout, or add a step across platform at the top of the ladder to keep within OSHA’s requirement of a maximum step across a distance of 12”.

Installation site for caged ladder

Installation site for caged ladder

There was a slight parapet at the top of the wall so we set up the extension ladders to verify that the parapet was under 14”high so we would not need to have a crossover ladder with return on the back. We did elect to modify the walk through handrail to remove the return down to the roof to allow more flexibility with installation. Using the self supported walk through handrail allowed a proper fit regardless of the parapet thickness.

Materials were fabricated and shipped to the jobsite where the installation crew attached the lower and upper ladder sections together with the supplied brackets. Next, the ladder was hooked up and elevated into place by a forklift boom. By securing the ladder a little lower than the top, but well past the weight ½ way point, we were able to safely use a shorter, readily available lift and avoid the added cost of additional machine rental.

Lifting the fixed ladder into position

Lifting the fixed ladder into position

The ladder was also outfitted with the LG6 6’ security ladder rung guard to prevent unauthorized access to the ladder. Once hoisted into place, ½” sleeve anchors were inserted into holes drilled into the block and turned until expanded properly, securing the ladder to the wall. For this ladder 18 anchors were used, distributing the 650# ladder and 300# capacity load to well below the tension and shear values for sleeve anchors with the recommended 1-7/8” minimum embedment and a 4:1 (25%) safety factor. Installation was completed in just one morning by a crew of two.

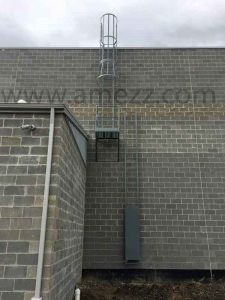
Completed installation of fixed ladder

Completed fixed ladder installation

Steel Fixed Ladder Handrail Options

Does my ladder need a handrail?

Almost all ladders will have an extension at the top, with the only exceptions being ladders accessing roof hatches, manholes, floor doors, or anything else that closes over the top of the ladder. If you are exiting the ladder to the side or going to an offset platform due to the 30’ maximum climbing distance between ladders, you will need to add four more rungs above the platform. Those rungs are only to be used for hand-hold only, to give you something to grab onto to safely exit the ladder.


Side step ladder platform for climbs over 30' in length

Side step ladder platform for climbs over 30′ in length

If the ladder is going up to a wall, to a roof, or to a mezzanine, then you will need extensions on the ladder for the “walk-through” exit of the ladder.

We have three different designs of walk-through handrails and I’ll go into the details on each of them below.

Steel ladder handrail options

Steel ladder handrail options

The first design, the “8” shape, is our standard ladder design. This is the most commonly used handrail setup as it allows for the top of the walk-through to mount to the landing surface, providing the greatest rigidity at the handrail. It also makes installation easy, as there are no questions where the top rung mounts; it is always installed properly meeting the top of the landing surface as required by code.

In cases of short parapets or locations where you cannot have the walk-through handrail anchor to or even set upon the roof you would use the second “P” profile, our “self supported walk-through handrail”. This handrail design works well when there is a parapet under 14” high that the handrail mounting pads would not line up with. It is not a necessity to use the “P” shaped handrail in those instances. Many installers still prefer the “8” layout for the added cross brace back to the ladder. When installing a ladder with our self-supported walk-through handrail, be sure to install properly, with the top rung level with the top of your roof. There is no foot pad at the top to ensure this is done, so installation just requires a check to be sure of compliance.

The last ladder handrail design is our “customer supplied walk-through handrail”. This is used in instances where the installation location has existing railing and handrails that they want to weld the walk-through handrail to. This is useful in locations where space is minimal and existing site conditions allow for field welding to existing rails.

Not shown is our step across platform, which is essentially a crossover used when site conditions require the ladder rung to be more than 12” away from the landing surface as required by OSHA standards. Most commonly, this is used on locations with gutters that are more than 5” off the face of the climbing side of the wall.

OSHA 1910.27(d)(3)

“Ladder extensions.” The side rails of through or side-step ladder extensions shall extend 3 1/2 feet above parapets and landings. For through ladder extensions, the rungs shall be omitted from the extension and shall have not less than 18 nor more than 24 inches clearance between rails. For side-step or offset fixed ladder sections, at landings, the side rails and rungs shall be carried to the next regular rung beyond or above the 3 1/2 feet minimum (fig. D-10).