OSHA’s November 19, 2018 fixed ladder changeover has officially come on their standard 1910.28. What do you need to know to ensure you are meeting OSHA fall protection standards for your fixed ladders? ![]() If you have an existing fixed ladder more that 24’h that was installed before November 19, 2018, it should already have a cage on it. The previous OSHA standard 1910.27 required cages on all ladders over 20’h. You have until November 18th, 2036 to retrofit the caged ladder with a personal fall arrest system. Until then, you are grandfathered in under the OSHA standard that was in place at the time of install. If your climb is 24’ or less, you do not need to retrofit the ladder at any time with a personal fall arrest system.
If you have an existing fixed ladder more that 24’h that was installed before November 19, 2018, it should already have a cage on it. The previous OSHA standard 1910.27 required cages on all ladders over 20’h. You have until November 18th, 2036 to retrofit the caged ladder with a personal fall arrest system. Until then, you are grandfathered in under the OSHA standard that was in place at the time of install. If your climb is 24’ or less, you do not need to retrofit the ladder at any time with a personal fall arrest system.
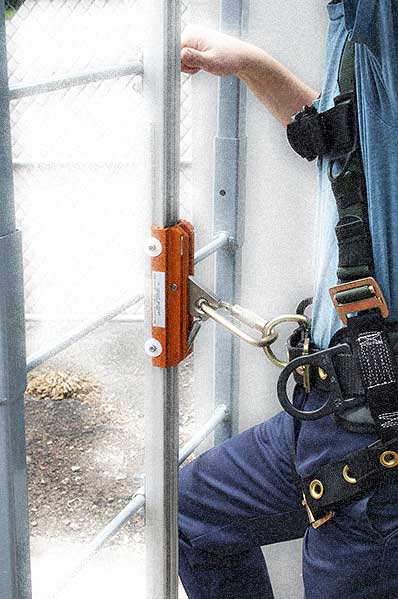
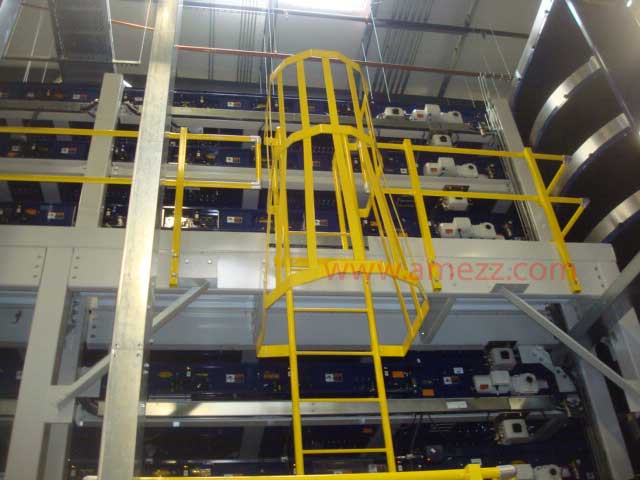
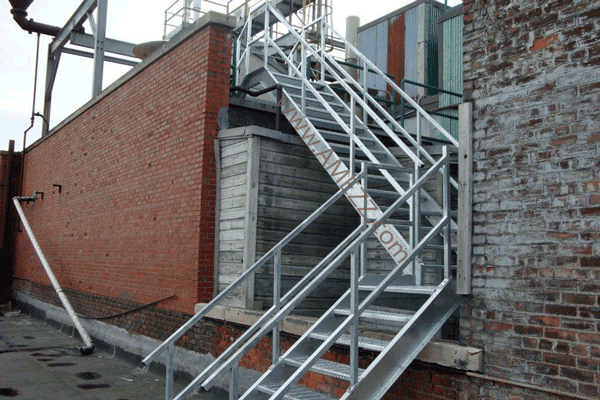
A-Mezz Personal Fall Arrest System Meets OSHA 1910.28
Note that if you modify or replace an existing ladder (over 24 feet high) that was installed before November 18, 2018, you will need to retrofit the ladder with the personal fall arrest system at that time. Replaced ladder sections are not grandfathered in under the prior OSHA standards – 1910.27.
Any new ladders over 24’h will need to be installed with a personal fall arrest system. You can still have a cage installed on the ladder “provided it does not interfere with the operation of the system” (1910.28(b)(9)(iv)).
These changes pertain to “fixed ladders that extend more than 24 feet (7.3 m) above a lower level.” The big change for lower ladders is that a fall arrest system is now not required until you are over 24 feet, whereas the code used to require cages or personal fall arrest systems for climbs over 20’ (1910.27(d)(1)(ii)).
You can also now run your ladders a maximum 150’ in a single climb if using a personal fall arrest system or ladder safety system (1910.28(b)(9)(ii)(B)).
The previous OSHA fixed ladder standard had stipulated a 30’ maximum climb before landing platforms were used to break your climb up into shorter climbs. I.e. before November 18th, 2018, a 150 foot climb would require five separate caged ladders and four separate landing platforms. OSHA 1910.28 will let you now have just one ladder with a personal fall arrest system, cutting fabrication costs, delivery costs, and installation costs.
Please contact us at A-Mezz Industrial Structures to get more information on our fixed ladders, our ladder cages, and our ladder personal fall arrest systems.

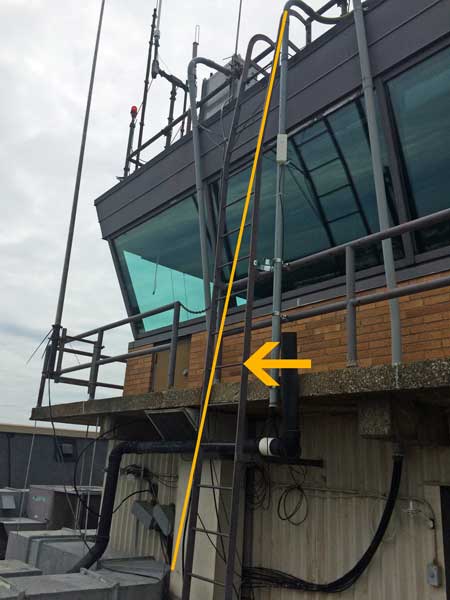
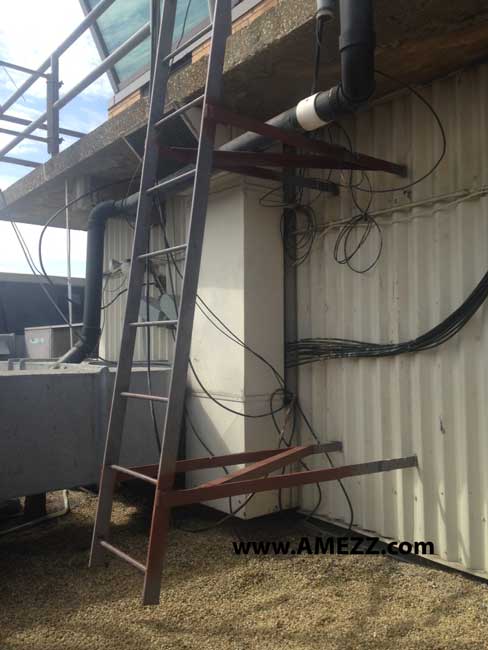
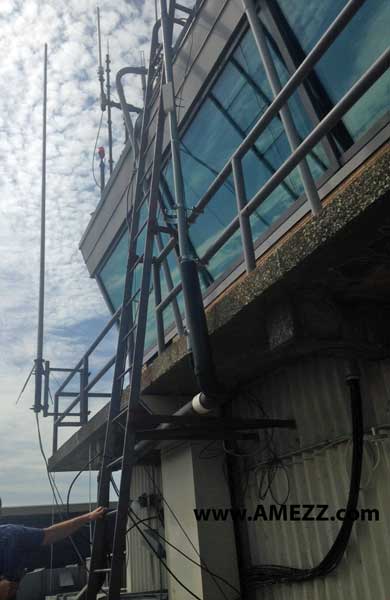
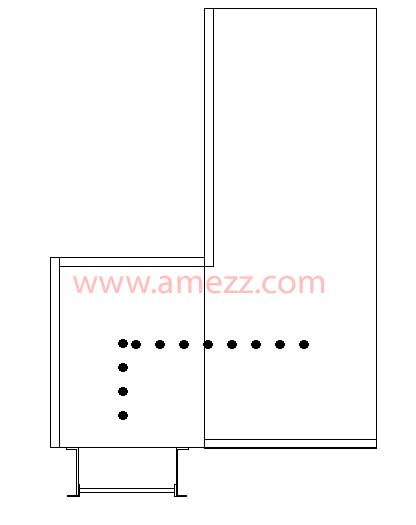
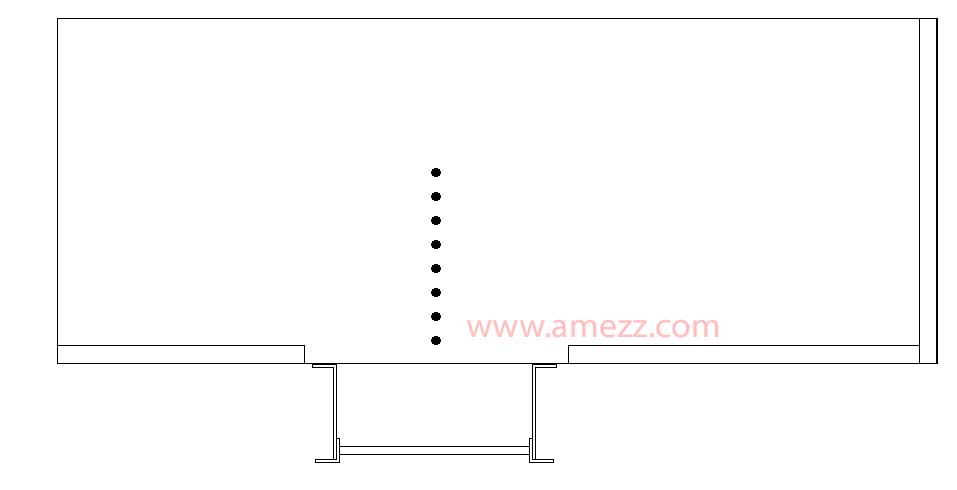
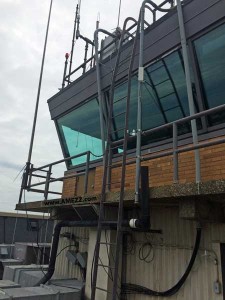 We recently were called out to look at a ladder that did not meet OSHA standards (1910.27) for clearance on the back side of the ladder. The ladder also had two angles of climb as shown in the above photo. When climbing up the ladder, the concrete walk was too close to the ladder for you to safely grasp the rung and also to put your foot on the rung while climbing. The ladder was accessing the top of the traffic control tower at an airport, and as such, we had to work around a variety of factors to ensure a proper replacement or modification of the ladder could take place without interrupting operations. As the install location was at an airport, the use of a crane to bring a replacement ladder to location would have been a logistical nightmare. We decided that whatever the solution was, it was to be brought up from the inside of the tower.