Mezzanine Deck Types: Corrugated Roof Deck with Resindek

I thought it might be a good idea to begin a little series in which we discuss some of the different mezzanine deck types available.  To start things off, let’s talk about our most commonly used mezzanine deck type:  the corrugated roof deck topped with resindek.

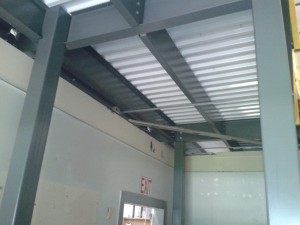
Underside of corrugated roof deck

Corrugated roof deck, painted reflective white, as viewed from below.

As the name implies, roof decks with resindek is a two-layered mezzanine deck surface.  The structural component of the mezzanine deck is provided by a 1-1/2” corrugated steel roof deck.  The gauge of the roof deck used varies depending on the loads the mezzanine deck is designed to support.  The underside of the roof deck is painted white to help reflect light under the mezzanine deck.  The corrugation of the roof deck doesn’t offer a very useable deck surface, so it needs to be skinned with a second material — in this case, resindek.

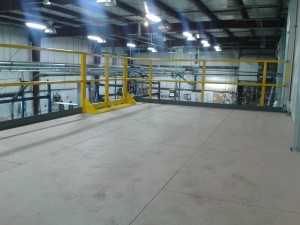
Unfinished Resindeck mezzanine deck

Unfinished Resindek mezzanine deck surface

Resindek is a wood composite material specifically designed to provide a durable and affordable mezzanine deck surface.  There are different grades of resindek depending on the loads the mezzanine deck is designed to support.  Most commonly we will use an unfinished ¾” Resindek LD material which is designed to accommodate a combined pallet and pallet jack load of up to 2000 lbs.  If we’re designing the mezzanine to support heavier loads, varieties are available for all the way up to an 8000 lb max load.   It provides a smooth surface to roll your pallets across, both on and between panels, and doesn’t peel layers like plywood can.

Corrugated roof deck with resindek is easily our most popular mezzanine deck surface, largely due to its significant price advantage over other deck types.  There are, however, some situations where it would not be the best option.  As a wood based material, resindek can swell when it gets wet.  During installation you leave a gap between panels about the width of a nickel to accommodate some swelling, but if the deck will be in a wet environment it is not the recommended tool for the job.  In our next segment, we’ll talk about another deck type that would work better for wet environments.

Winter Weather Tips

It’s getting colder now and it’s time for some winter weather tips to keep things running smoothly whether you’re at the shop or out on the road.Snow storm traffic jam

  1. Keep a 5 gallon bucket with salt by each of your entrances along with a shovel. Snow and ice buildup can not only make it tough for people to get into your shop, it can also hinder egress in case of an emergency. Be sure to open the emergency doors and shovel/salt around them. Drifts of snow and ice can build up on the outside wall even if there is only a little snow on the ground.
  2. Have entry mats and/or a dry mop by the entrances to your shop. Wet boots trekking in snow can be a dangerous slip hazard.
  3. If you have exterior silcocks (spigots) be sure to remove hoses from them. Even if you have a frost free silcock, it will freeze with the hose attached.
  4. If there is ice on your windshield there is ice on the road. It doesn’t have to be packed up deep to be a problem. Often a thin sheet of ice can cause a big problem, especially when people aren’t expecting it.
  5. Watch the spray from tires – if spray is coming off other vehicles’ tires it’s likely the roads are wet as opposed to being ice covered.
  6. Pack extra supplies. Be sure to bring extra supplies in your truck in case you end up sitting in a back-up, stuck in the snow, wrecked or spun out. Blankets, hats, gloves, wool socks, hand warmers, energy bars, bottled water, a bag of road salt or sand, a small shovel, tow rope, booster cables and emergency flares are a good place to start.
  7. Make an electronics bag for your car. If your job requires using cameras, two way radios, cell phones, laptops or another portable electronic device like a laser level or laser measurer, pack those items all in one bag that you can take to and from your car, along with some extra batteries. Remember, in cold weather batteries are not as productive and electronics can stop working, so it is best to take them indoors with you instead of letting them chill for a prolonged time in an unheated trunk. Packing these items in one bag makes it quick and painless to take them with you.
  8. Stay dry. Whether you are directing traffic, offloading a truck, or maintaining or installing equipment, keeping dry is the first step to preventing frostbite and hypothermia.
  9. Layer properly. Cotton tee shirts offer no insulating value to you when you get it wet, yet many people still wear them as they go off to work outdoors. Natural fibers, wool or silk are amongst the best insulators when damp. There are also many good synthetic materials out that do just as well.  Remember, even if you start off warm and dry, when you work, you sweat, and when you sweat, you get damp, and when you get damp in cotton, you get cold.
  10. When working outdoors, take regular breaks from the cold. Hop in your truck for a warm beverage that you keep in a thermos. This will warm you from the inside out. Same thing goes for eating. Hot soup will warm you up quicker than a brown bagged sandwich.
  11. To help prevent your fuel lines from freezing up, keep your tank at least half full. If the vehicle is going to park for lengthy periods, fill the gas tank beforehand.

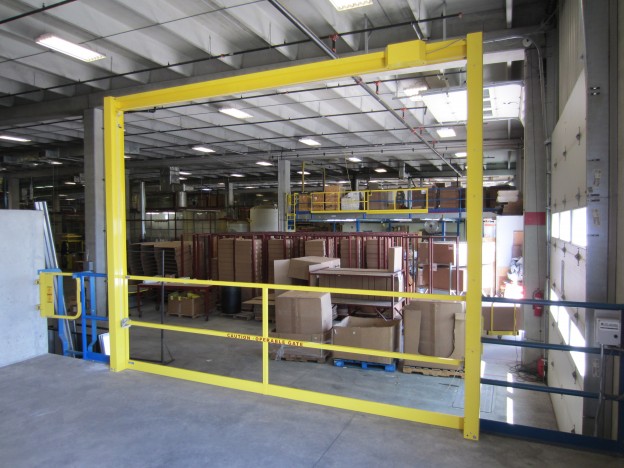
What makes a mezzanine gate a mezzanine safety gate?

We offer a number of different varieties of gates to provide fall protection on your mezzanines at your pallet access locations, but only some of them are labeled as safety gates.  Aren’t they all safety gates? While all our mezzanine pallet gates are designed to protect your personal safety while working on elevated platforms, the gates are designed to meet different standards.

Self Closing Pallet Gate

Having only a single layer of gates, the self closing pallet gate is not considered a true mezzanine safety gate.

Gates, such as our self closing pallet gate, horizontal sliding mezzanine gate, or vertical sliding mezzanine gate, help keep your employees safe while working on elevated platforms, but are not considered true safety gates.  They are all single gate systems designed to meet the federal OSHA safety railing requirements for dimensions and loading.  This means that they have a 42” hand rail, a 21” mid-rail, a 4” high toe board, and can hold back 200 lbs. of pressure.  Because they are single gated systems, when the gate is open, you have a potential exposed opening on your mezzanine.  When using a single gate system, we recommend that you mark out a 6’ bubble around the opening, train your employees to remain behind that line when the gate is open, and post signage reminding them of this at the location.

Many of these single gate systems have some additional safety features built into their design. The self closing pallet gate was designed so that instead of needing to open the gate to lift a pallet to the deck, you can lift the pallet up and push it against the bumpers of the closed gate.  As you load the pallet the spring loaded doors will open up just enough to fit the pallet, keeping the sides closed off.  When you then pull the pallet all the way through from the top, the gate closes itself.  The controls for a manual horizontal mezzanine gate are all located behind your existing handrail so your personnel will always be behind OSHA hand rail while opening and closing the gate.  Even better, the horizontal mezzanine gate and vertical mezzanine gates are both available in electric operated versions.  This allows us to add additional safety features such as strobe warning lights and adjustable timers so the gates will close after a predetermined period of time if your employees forget to shut them.  With both control boxes being field wired, you can place them in a location within view of, but away from, the opening.

Dual Interlocked Vertical Mezzanine Safety Gate

Having both a front and back gate, the dual interlocked vertical mezzanine safety gate is an example of a true safety gate

True mezzanine safety gates have both a front and back gate, and are designed to meet the voluntary ANSI MH28.3-2009 standard (Section 6.4.3) in addition to the OSHA safety railing requirements for dimensions and loading.  Operating like an airlock, the double gated system allows access to the pallet for the fork truck down below or your personnel above, while keeping a line of guard rail between your employees and the edge of the mezzanine.  The pivoting mezzanine safety gatedouble drop horizontal mezzanine safety gate and the dual interlocked vertical mezzanine safety gate are all examples of true safety gates.  If your facility is following the ANSI standards and wants to put a mezzanine safety gate in a pallet opening, make sure it is a double gated system.

Help protect your property from ‘Attractive Nuisance’ instances

By Brett @ A-Mezz

Oftentimes, people are looking for an easier way to access their roof. They may have been using an extension ladder before, renting a bucket lift, or even pulling a truck up to the wall and climbing on the vehicle.  Adding a permanently fixed roof access ladder is a great way to mitigate the cost of renting lift equipment, or increase the safety of the climber compared to using an extension ladder.

Once you’ve installed the permanent access ladder, you need to ensure that you protect yourself from having an “attractive nuisance”, or in other words, an item on your property that can be a magnet to curious kids, while at the same time providing an opportunity to cause them harm.

Generally, attractive nuisance laws start with the understanding that kids are not expected to foresee the danger all situations present. As the property owner, if there is reason to believe kids can access your property, you have a responsibility to prevent causes of potential harm. If the owner does not, the property owner could very well be held responsible for the injury to a child. Keep in mind that in many courts, kids are not just young children, but can very well be teenagers also.

What are ways to mitigate your liability? The easiest way is to be a responsible property owner. Make sure that you are following the local, state and federal laws and safety standards.  Simply do what you can to prevent access to the hazard. Just as you would lock up tanks of propane so they can’t be stolen or so that kids can’t access them, you should do the same with your ladder if it is in an area accessible to kids. A simple lockable door over the rungs of your ladder can help accomplish this. Though it will not stop someone who is determined to gain access to the roof and is willing to ‘spiderman’ up the side, or pull their car up and climb up, it will help lessen your exposure to inquisitive kids, as well as add a deterrent to opportunistic thieves and vandals. Another option, if you have the room, is to fence in the area surrounding the ladder (this also works well at the bottom of stairs accessing roofs). Again, if someone is determined to partake in criminal activities they will find a way to do circumvent whatever you do, but with regards to having an “attractive nuisance” you will have helped alleviate the opportunity for accidents.

OSHA penalties for violations could be increasing

By Brett @ A-Mezz

Let’s dive into a little workplace safety tangent. Earlier this month an article came out of Wyoming pointing that their state legislators may hike the workplace safety penalties for companies found to be in violation of the state’s Occupational Health and Safety Act.

Currently, according to an OSHA.gov publication, OSHA can assess a penalty of $1,500 to $7,000 for a ‘serious violation’. The OSHA definition of a serious violation is one where there is substantial probability that death or serious physical harm could result. This could be a situation that the employer was not even aware failed to meet federal safety standards. We come across this all the time when it comes to fall protection and machine guarding. If your roof hatch is open and employees are doing work in the vicinity, there is an opportunity for serious injury unless you use a roof hatch safety rail. Likewise, fixed ladders that do not have automatically closing ladder gates or offset orientations could also cause serious injury should a fall occur. Shop machines without proper guarding, and in some cases, without electrical interlocks, can also cause serious violations if your employees can gain access to movable parts without the machine shutting down.

OSHA also has a penalty for a “Willful Violation”. This they define as a violation that the employer intentionally and knowingly commits. The employer is aware that a hazardous condition exists, knows that the condition violates a standard or other obligation of the act, and makes no reasonable effort to eliminate it. OSHA can access penalties up to $70,000 for each violation. Knowing that areas lack proper fall protection but choosing not to address the hazard could easily put an employer into this category of violation. Should that violation result in the death of an employee the penalty can be increased up to $250,000 (or $500,000 if the employer is a corporation). Those fines are in addition to any legal amounts the injured or killed party may be awarded.

As Benjamin Franklin once put it, “An ounce of prevention is worth a pound of cure”. Proper safety equipment is MUCH less expensive than ignoring a safety issue and having a costly accident.

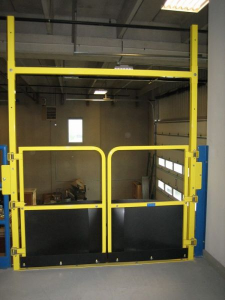
Vertical mezzanine gate in the down position

The Newly Redesigned Vertical Lifting Mezzanine Gate

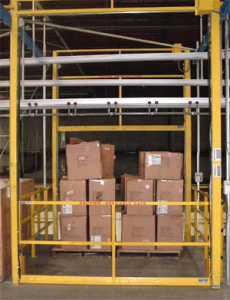
Vertical mezzanine gate in raised position

Electric vertical lifting mezzanine gate in action

By Derick @ A-Mezz

Recently, the vertical lifting mezzanine gate received a redesign.  I’d like to take a moment to go over some of the modifications made to better assist our customers.

The most noticable change in the design was to how the gate moves along the columns.  In the old design the gate traveled to approximately 6” from the top of the column.  This would vary a bit depending on the size of the counterweight required.  We most commonly used a 12’ tall column which would allow for approximately an 8’ clearance height under the raised gate.   The gates operation has changed slightly.  We now typically use a 10’ tall column and the gate now travels beyond the columns by 6” allowing for a 7’ clear height under the raised gate.  As before, custom heights are still available, but by more efficiently utilizing our customers’ vertical space, the new vertical mezzanine gate is a great option in more locations.

Vertical mezzanine gate in the down position

Closed electric vertical lifting mezzanine gate

One of primary goals for the redesign was to improve the lead time.  In the old design, every mezzanine gate was a custom unit.  Each mezzanine gate would require its own set of drawings to be drafted, and would need to be made from scratch as the orders where approved.  In the redesigned gate, many of the components where standardized.  We are now able to provide our vertical mezzanine gate customers with their approval drawings typically in a day or two, and improved the overall production cycle as well to about 6 weeks on average.  To further improve our lead times, we took two of our most requested sizes and began stocking many of the components.  We can now typically ship out standard 6’ or 8’ clear width vertical mezzanine gates in powder coated mild steel in about 3 weeks on average.

Our vertical mezzanine gates have always been available in manual, electric, pneumatic with electric controls, or fully pneumatic for explosive environments.  From time to time we receive calls from customers who previously purchased a manual mezzanine gate and wanting to upgrade it to an automated unit.  Unfortunately with the old design there was no easy way to convert it, and the customers would need to replace the gate.  With the redesigned vertical mezzanine gate, a customer can purchase a manual gate, and in the future if they are looking to upgrade it purchase a kit to easily convert their existing gate in the field.  When the factory built their prototype, it only took them 15 minutes to convert a manual vertical mezzanine gate into an electric gate.

We’re really pleased with how the redesigned vertical mezzanine gate turned out.  The changes in the design have made a marked improvement in the lead times while not just maintaining its adaptability, but improving it.


Catwalk Access Ladder

fixed access ladder for catwalk use

Uncaged Ladder for Catwalk Access

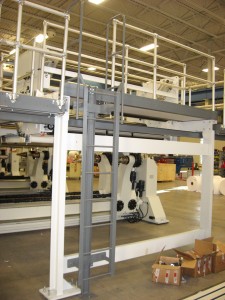
We supplied the above permanent ladder to a customer who was accessing elevated sections of their presses with catwalk platforms. As the top landings for the presses were infrequently accessed, and floor space was minimal, using a fixed ladder with a walk through handrail was the best solution due to its small footprint, safe access and low cost.

Our standard fixed 8 rung ladders have two pairs of standoff brackets to mount to the wall, but because there was no wall to mount the ladder to in this instance, the installer fabricated custom plates for the wall mount brackets to bolt to. Those custom brackets then mounted to the single C-channel running behind the access ladder.

The ladder was supplied with a walk through handrail that they bolted to the top of their landing. Even though they have OSHA handrail on the catwalk the ladder needed its own walk through rails per OSHA 1910.27(d)(3) which states:

 “The side rails of through or side-step ladder extensions shall extend 3 1/2 feet above parapets and landings. For through ladder extensions, the rungs shall be omitted from the extension and shall have not less than 18 nor more than 24 inches clearance between rails.”

There are two main instances that you would find a ladder without the walk through handrails. The first is when you are stepping off to the side of the access ladder to exit (right or left hand exit). Keep in mind that when doing a side exit off your permanently fixed ladder you will still need to have four additional ladder rungs above the landing surface to meet the 42” extension, you wouldn’t just omit the rungs from the extension. Those additional ladder rungs would be for hand hold only.

The second instance that you would not need a walk through handrail is when the fixed ladder is accessing a manhole or any climbs that terminate with hatches. There is no walk through handrail requirement in OSHA 1910.27 for manholes or hatches, and as such, grab bar devices would be voluntary.  For information on OSHA’s thoughts regarding telescoping ladder posts see the following letter: http://www.ladderhatch.com/osha-roof-hatch-interpretation.htm


Relocating a Modular Office

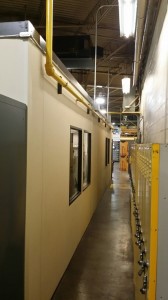
A-Wall 200 modular in-plant office.  Still in great shape after one reconfiguration and 6+ years of use.

A-Wall 200 modular in-plant office. Still in great shape after one reconfiguration and 6+ years of use.

One of the major advantages of modular building systems over traditional construction is their ability to adapt to your changing needs.  Let’s take this project for example.

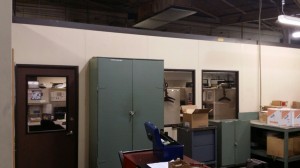
6+ year old A-Wall 200 modular office.  Here, the first reconfiguration moved the door from the other side of the building.

6+ year old modular office after the first reconfiguration moving the door from the other side of the building.

Back in early 2008, we provided the customer with a 24’ wide x 42’ long x 9’ high modular in-plant office.  The original layout had three doors. There were two on one 24’ end, and one on the other.  A few years later as their layout around the building was changing, the 24’ long wall with two doors was going to get blocked off.   By disassembling a portion of the building and swapping 4’ panels with one another, the customer was able to relocate the doors to the 42’ long walls.

Over the years the customer’s needs continued to change.   They recently decided to remove the in-plant office.   If this was built out of traditional construction, the office space would be torn down and that would be the

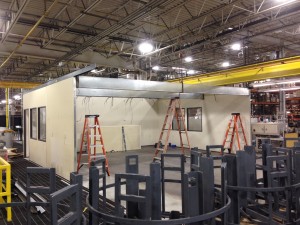
Installing the reconfigured in-plant office in its new location. Recessed beams used to support the roof deck due to the long spans.

Installing the reconfigured in-plant office in its new location. Recessed beams used to support the roof deck due to the long spans.

end of it.  However, as this was modular construction, the customer found another spot in their plant where the building could be relocated in a slightly smaller (24’ wide x 34’ long) form.

We were able to reuse almost all of the materials when we relocated it.  We replaced the base track, as well as the ceiling grid and tiles.  The base track is very difficult to remove without creating kinks in the channel.   As the panels fit very snuggly into new base track, any kink in the track can make it almost impossible to fit.  Likewise, the material cost to replace the ceiling grid and tiles is usually significantly less than the additional labor to carefully disassemble the ceiling for reuse.

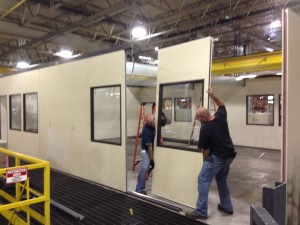
Relocating the modular office panels

Relocating the modular office panels

There were some additional considerations that went into the reconfiguration to maximize the materials we could reuse.  On the A-Wall building systems with a non-load bearing roof, we can span the roof deck a maximum 20’.  In the original 24’x42’ layout, we used a couple of 24’ long recessed beams to break the spans approximately into thirds.  By maintaining the 24’ width and by making sure that none of the spans between beams grew, we were able to reuse the beams and roof deck without needing to order any additional material.

The modular wall system’s ability to be rearranged and reconfigured for a new application, or disassembled and re-installed in a new location, is one of this customer’s favorite features.  They’ve purchased a number of modular buildings from us over the years and most of them have been rearranged or relocated at least once.

Installation of a Parapet Crossover Fixed Ladder

By Brett

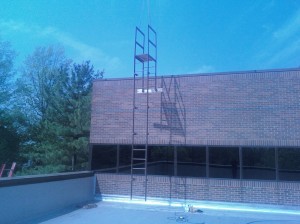
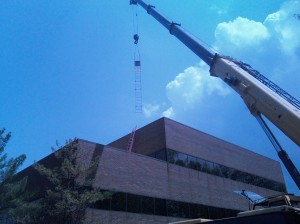
parapet crossover ladder suspended by crane

Installation of parapet crossover fixed ladder by crane

We recently completed fabrication and installation of some hard to reach roof ladders for a customer in northeast Ohio. They were looking to access their upper roof level from their lower roof. Before contacting A-Mezz, if they were on the lower roof and wanted to access the upper roof, they needed to climb back down the roof hatch ladder, walk over to the taller building section and take an elevator to the top floor of that building. They then had to climb back up another ladder through a roof hatch. This was entirely too time consuming and a big efficiency drain.

We arrived on site and after reviewing the site conditions it was decided that an uncaged ladder was the best solution to their roof access problems.

There were a couple of things that we had to work around at the site. The first item we had to work around was that the upper most roof had a parapet wall on top.

According to the ANSI Standard A14.3-2002, the first rung of a climb has to be 14” or less from ground level (floor or roof). As the parapet was over 14” high, a crossover platform was required to allow for rungs on the rear of the parapet.

The second item we had to work around was the row of windows that went around the building. We needed to make sure that the ladder brackets cleared the window span for installation so we made sure to attach directly above and below the windows. The ladder was also painted a brown color to help it blend in with the building, making it less noticeable from the parking lot and street.

Crane lifting fixed ladder for installation

Lifting the fixed ladder into place

The last item we had to work around was the install location. As we were going from one roof to another roof, it was impossible to use lift equipment like scissor lifts and fork lifts to safely get the parapet ladder into place for installation. As the overhead was clear and there was a concrete pad nearby, we brought in a crane for the heavy lifting.

Actual installation time for the parapet crossover ladder was just a couple of hours, but the planning and attention to all the little details on site are what made the process go so smoothly.

Overview of the prefabricated mezzanine installation

By Derick

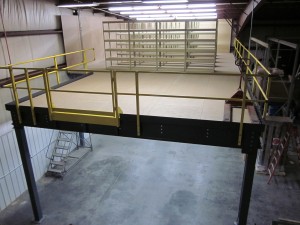
Front topside view of the completed parts storage mezzanine

Front topside view of the completed parts storage mezzanine

We’re often asked by customers if they’re able to install their mezzanine order on their own. The following series of pictures were sent to us from a customer who did just that, and should provide you with a general idea of what a mezzanine installation entails.

First, a little bit about the mezzanine. The customer was a metal welding and fabrication shop in Iowa and they were looking to move their parts storage up above the production floor. They wanted to provide their own staircase, but contacted us to design and provide them with a 46’ x 24’ mezzanine. Because this was going above their production area, they wanted to maintain at least a 10’ clearance height and to minimize the number of columns below the mezzanine deck. The mezzanine clear spanned the 24’ and broke the 46’ span into two 23’ nominal bays using a beam and c-section framing system. This left the customer plenty of space to maneuver around and work below. The deck was designed to accommodate both the point loads from their single rows of shelving as well as 125 psf distributed live load to accommodate 4’x4’ pallets up to 2000 pounds each.   With the mezzanine situated in the corner of their building, we provided industrial use two rail handrail with a 4” kick plate on the two exposed sides, as well as along the opening for the customer’s staircase per IBC code. The decking on the other two sides was extended beyond the framing to the existing walls in order to utilize deck space and eliminate the need for additional handrails. The customer added additional resindek to their girders in order to further close off the walls and protect their insulation.
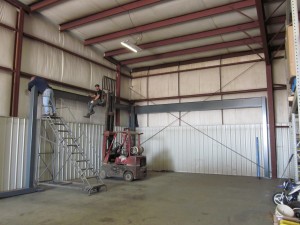
Attaching the primary framing members to the columns

Attaching the primary framing members to the columns

Now for the installation of a prefabricated mezzanine, we would recommend a three man crew. You will want a fork lift on hand, and a scissor lift if possible. As everything is typically bolted together or fastened with a self-tapping screw, there is very little in the way of specialized equipment required.

Starting in the back corner and working forward, you’ll begin by positioning your columns and bolting in the primary framing members. Use the forklift to position the beams and hold them in place while you connect them as the beams can be quite heavy. A spud bar will come in handy to align your bolt holes. You will need to reach inside the square tube columns to tighten the bolts.
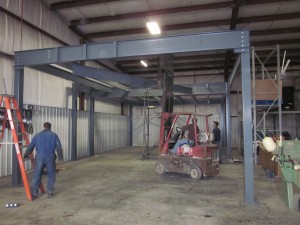
Connecting the secondary framing members

Connecting the secondary framing members

After the primary framing members have all been attached, your next task is to bolt the secondary framing members to the primary framing members. After all the framing is connected and tightened down, it’s time to anchor the columns to your floor with the provided concrete wedge anchors.
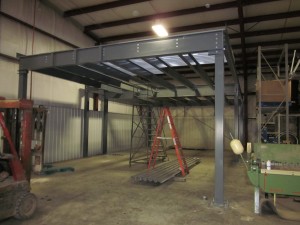
 

Installing the corrugated roof deck on the mezzanine

Installing the corrugated roof deck on the mezzanine

Next you will install the kick plate and decking to your platform. In this example we used a corrugated roof deck for the structural component and covered it with resindek. This was done to provide the customer with a cost effective and smooth surface to work on. The kick plate is an angle that goes between the roof deck and your primary framing members. This closes off the platform so you cannot see down the corrugation of the roof deck from the sides. It also protects workers below the structure from material/tools, etc. that could roll or be kicked off the top level. The roof deck sub floor is fastened down to the framing members below using the provided self-tapping screws at every valley. You’ll then need to install the deck surface and secure it to the sub floor. The tek screws for the resindek are provided in a ribbon for use with a stand-up screw gun in order to speed up the installation process, as each 4’x8’ sheet of resindek takes 20 screws to properly fasten.
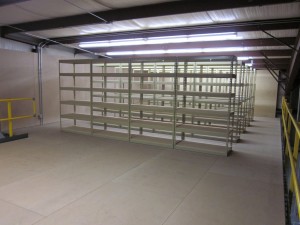
Installed unfinished resindek on the completed parts storage mezzanine

Installed unfinished resindek on the completed parts storage mezzanine

We’re almost finished now. Our railing is typically mounted on the face of the mezzanine with a post that will need to be bolted on every eight feet at maximum. The railing typically ships in 21’ long pipes that are cut in the field to the appropriate lengths. The cut handrails are then connected together with the provided splices and pipe elbows, and are fastened to the saddle brackets of the posts. You will need to install the splice clips for the kick plate at every seam to establish a continuous appearance.
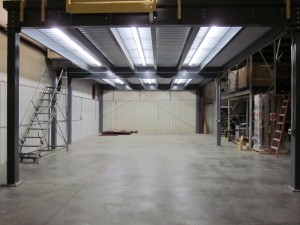
Underside of beam and c-section mezzanine with surface mounted lighting attached to the roof deck

Underside of beam and c-section mezzanine with surface mounted lighting attached to the roof deck

Generally you would still need to bolt the treads to the stringers and finish off the handrail for the staircase, but in this case the customer was going to fabricate their own stair.

While this has been just a general overview, your mezzanine would ship with a very detailed set of assembly drawings and instructions that would go into much greater detail on the installation. This customer was pleased with the ease everything went together and the quality of the platform.